XWiki (Enterprise add-on) integration setup

| Topic | Description |
|---|---|
| Wikis | Section about configuration of Wiki providers in OpenProject |
| XWiki: Set up | How to set up an XWiki provider |
| XWiki: Replacing authentication | Replacing authentication details and its effects |
Set up the XWiki provider
Wichtig
You need to have administrator privileges both in your XWiki and OpenProject instances to set this integration up.
1. Install the OpenProject plugin in XWiki
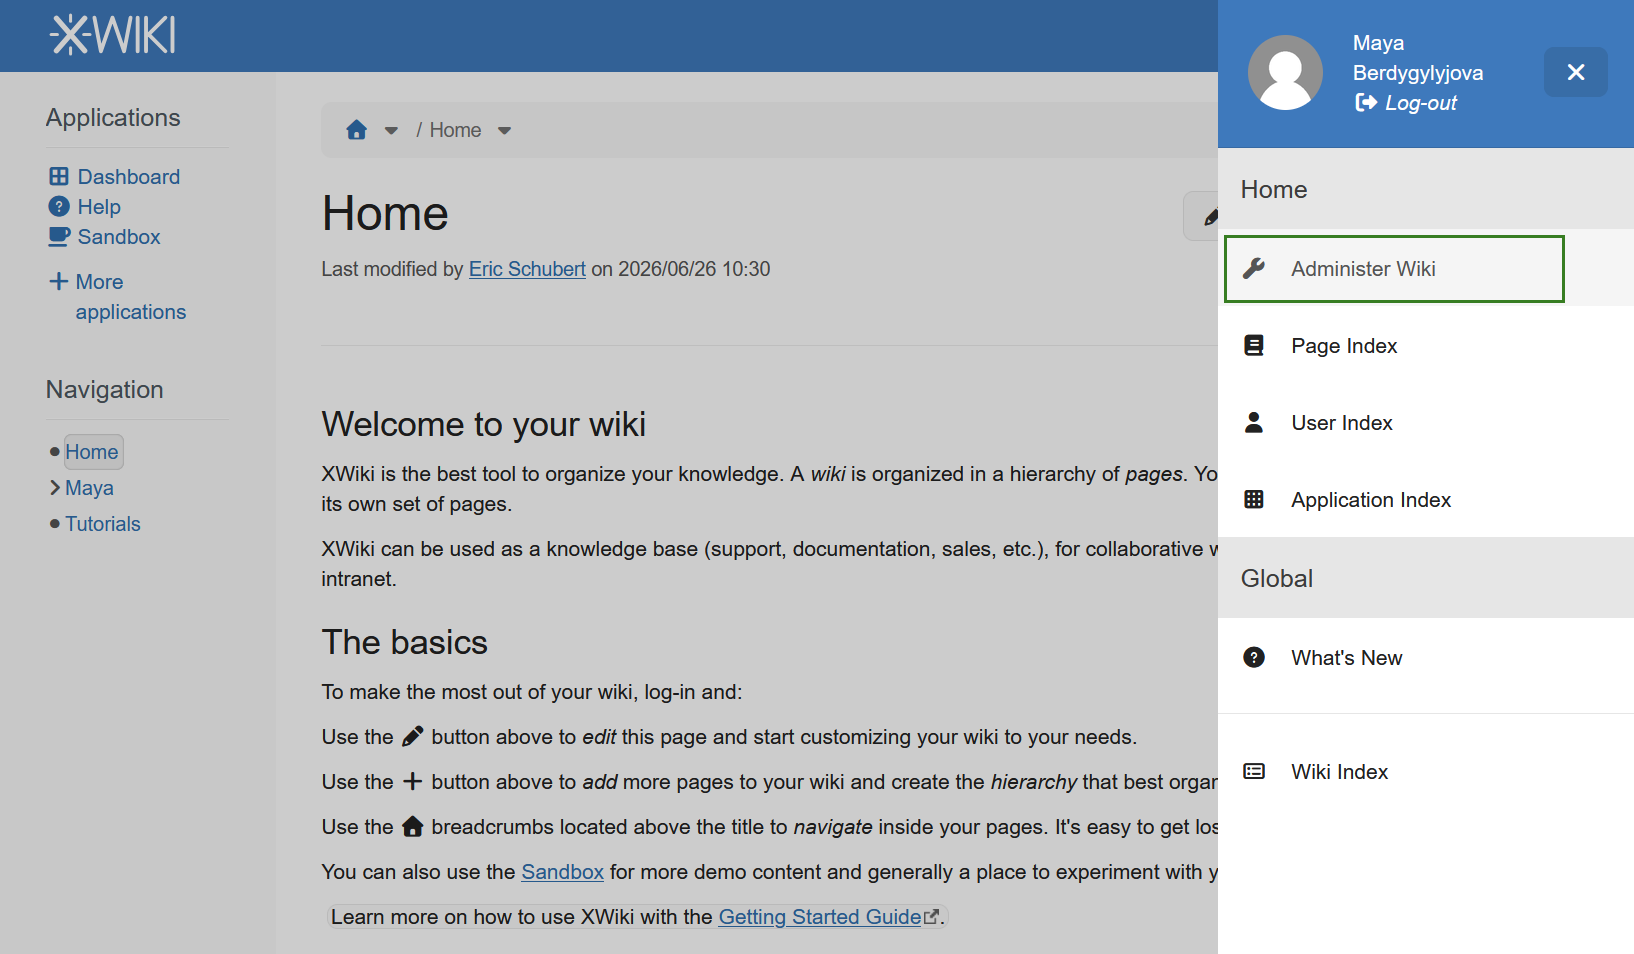
Start by opening the XWiki instance as an administrator. Click on the Drawer icon in the top right corner and select Administer Wiki.
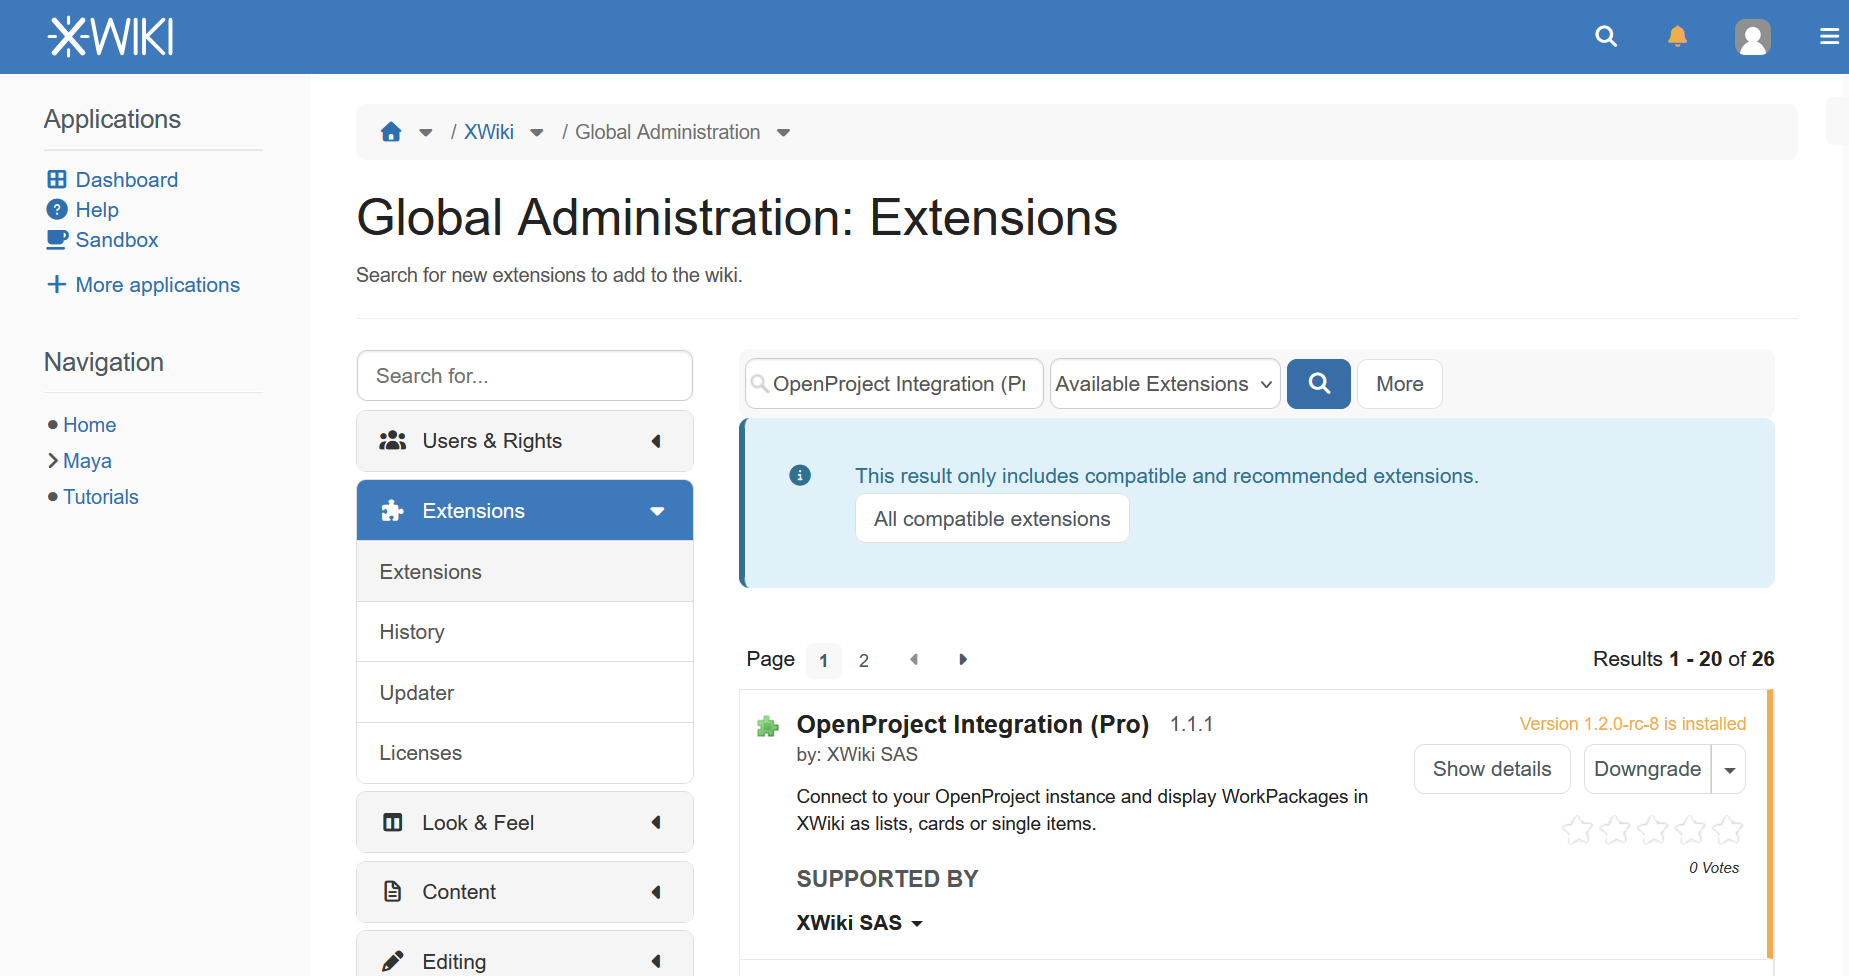
Click on Extensions, search for OpenProject Integration (Pro), and install the plugin.
2. Create the XWiki provider in OpenProject
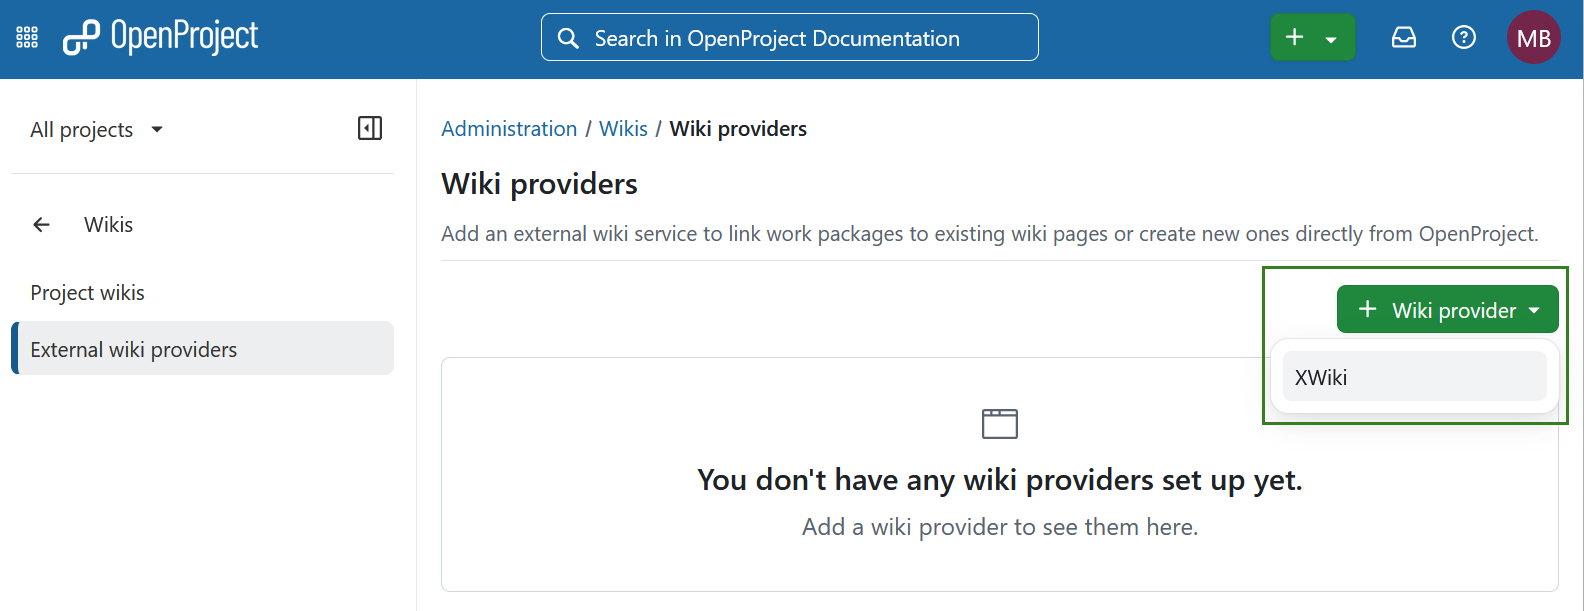
Navigate to the OpenProject administration settings page. In the left hand menu select Wikis → Wiki providers. Click the + Wiki provider button and select XWiki.
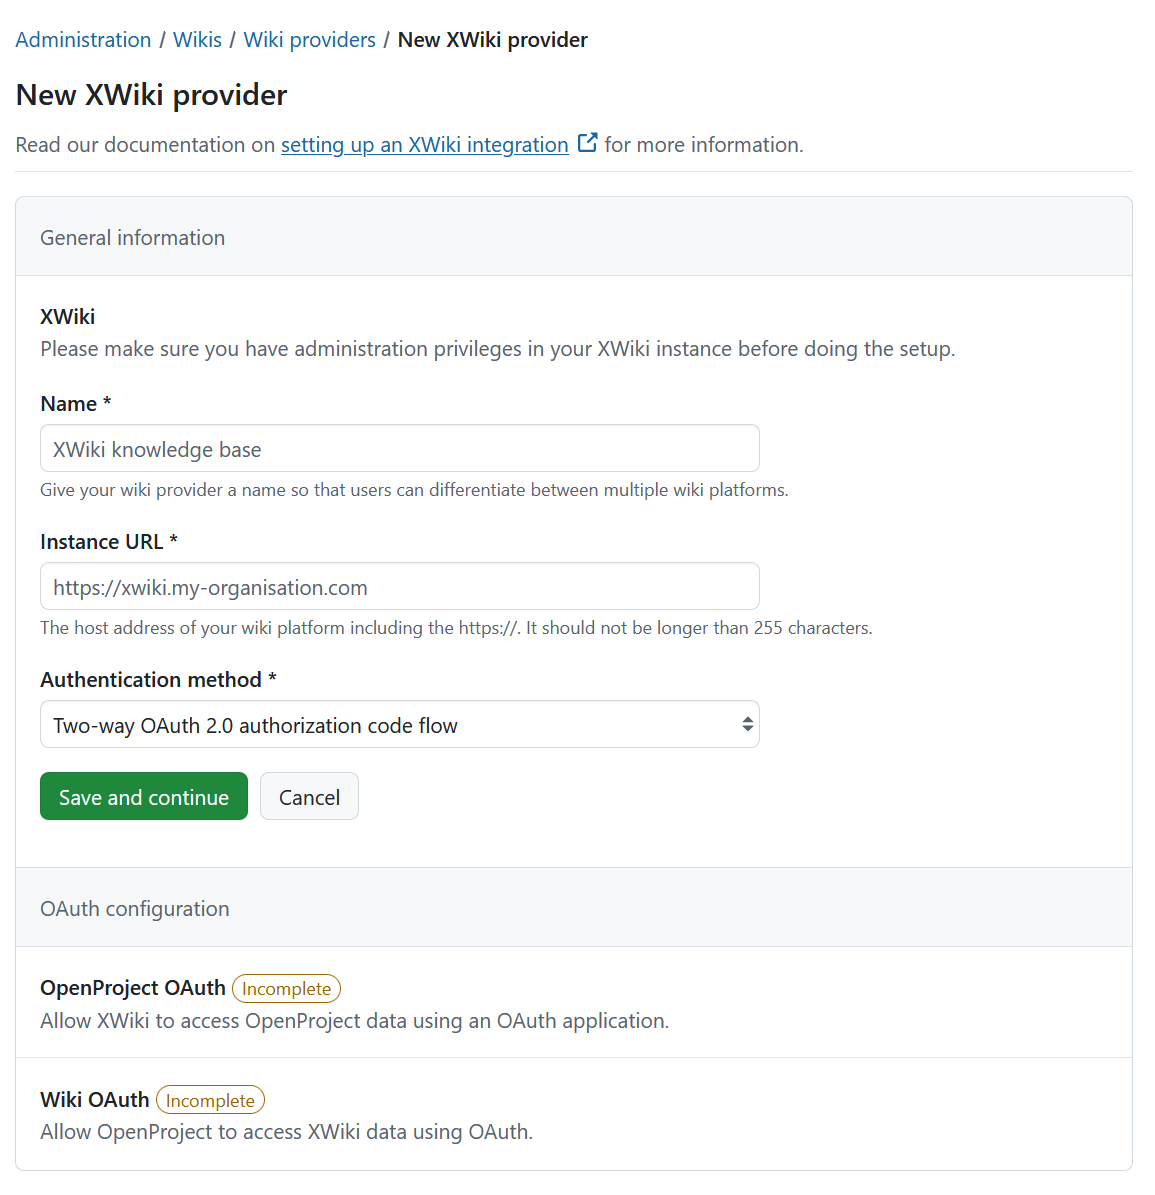
A new page titled New XWiki provider will appear, where you will be able to configure your XWiki instance.
First, choose a Name for the XWiki provider. This name will be shown when linking pages from this XWiki instance in OpenProject.
Then, enter the Instance URL of your XWiki instance. This URL will be checked on submitting this form.
Lastly, choose the Authentication method. This determines how OpenProject users will connect their user accounts to their XWiki accounts. Additional information is provided in the next step.
3. Configure authentication credentials in OpenProject
Depending on which authentication method you chose in the previous step, this configuration step differs. Currently, OpenProject supports only a single authentication method:
- Two-way OAuth 2.0 authorization code flow
Two-way OAuth 2.0 authorization code flow
This method requires the user to go through an OAuth 2.0 authorization code flow to connect their OpenProject user account to their XWiki account, and vice versa.
First, you will see the client credentials generated by OpenProject. Copy the Application ID and Application secret to your clipboard and insert them in the corresponding form at the XWiki instance. A link to the correct configuration page (leads to XWIKI side) is displayed in a banner above.
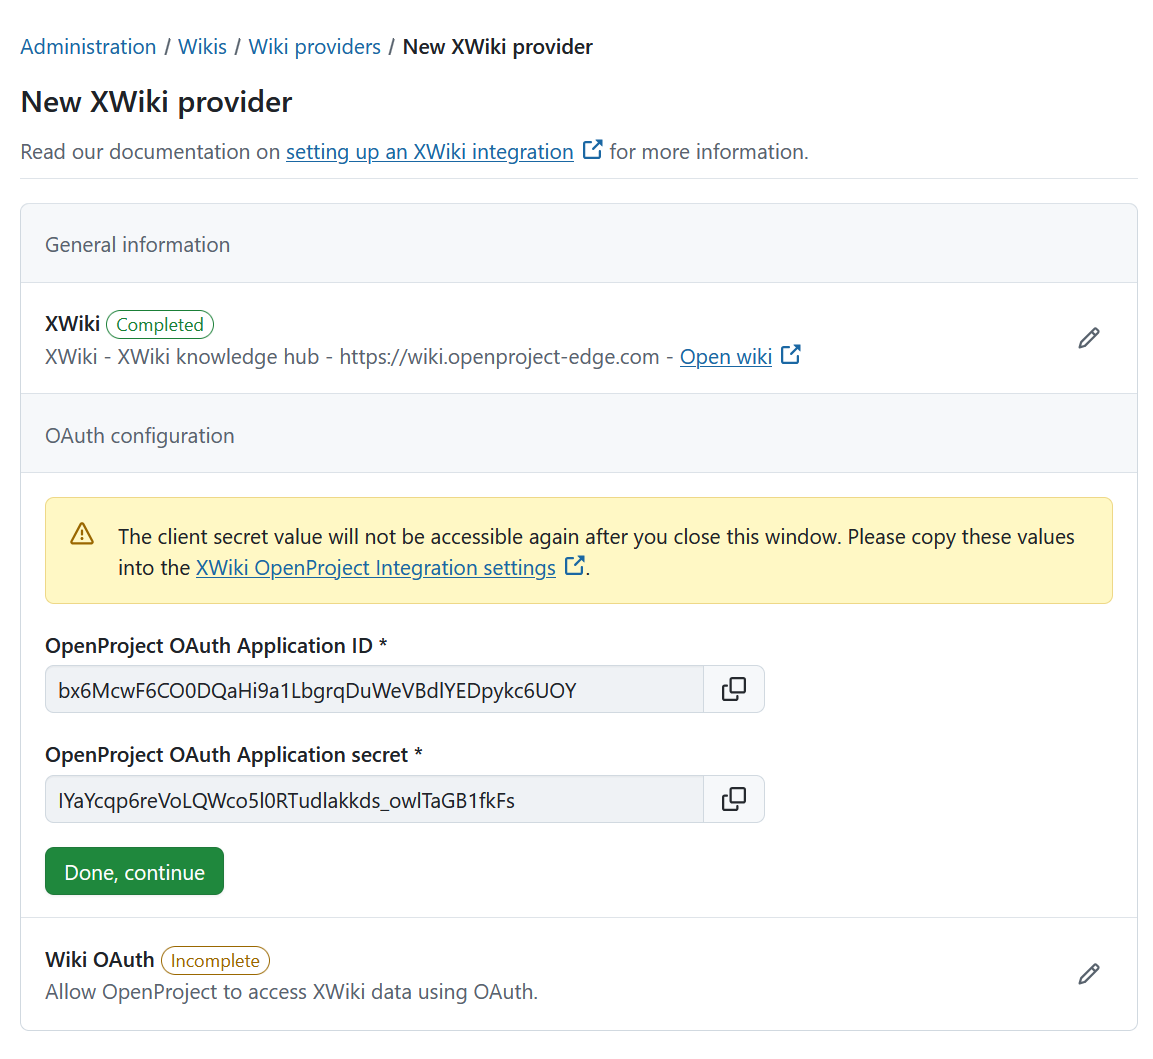
Click on Done, continue. This will show the next step, where a Client ID and Client secret are generated on the OpenProject side to be used for the XWiki OAuth client configuration. These values are just examples – if needed, you can change them. The generated secret fulfills all requirements to be considered secure. Copy all the values, including the Redirect URI, to your clipboard and insert them in the corresponding form at the XWiki instance. A link to the correct XWiki form will be displayed again above the form.
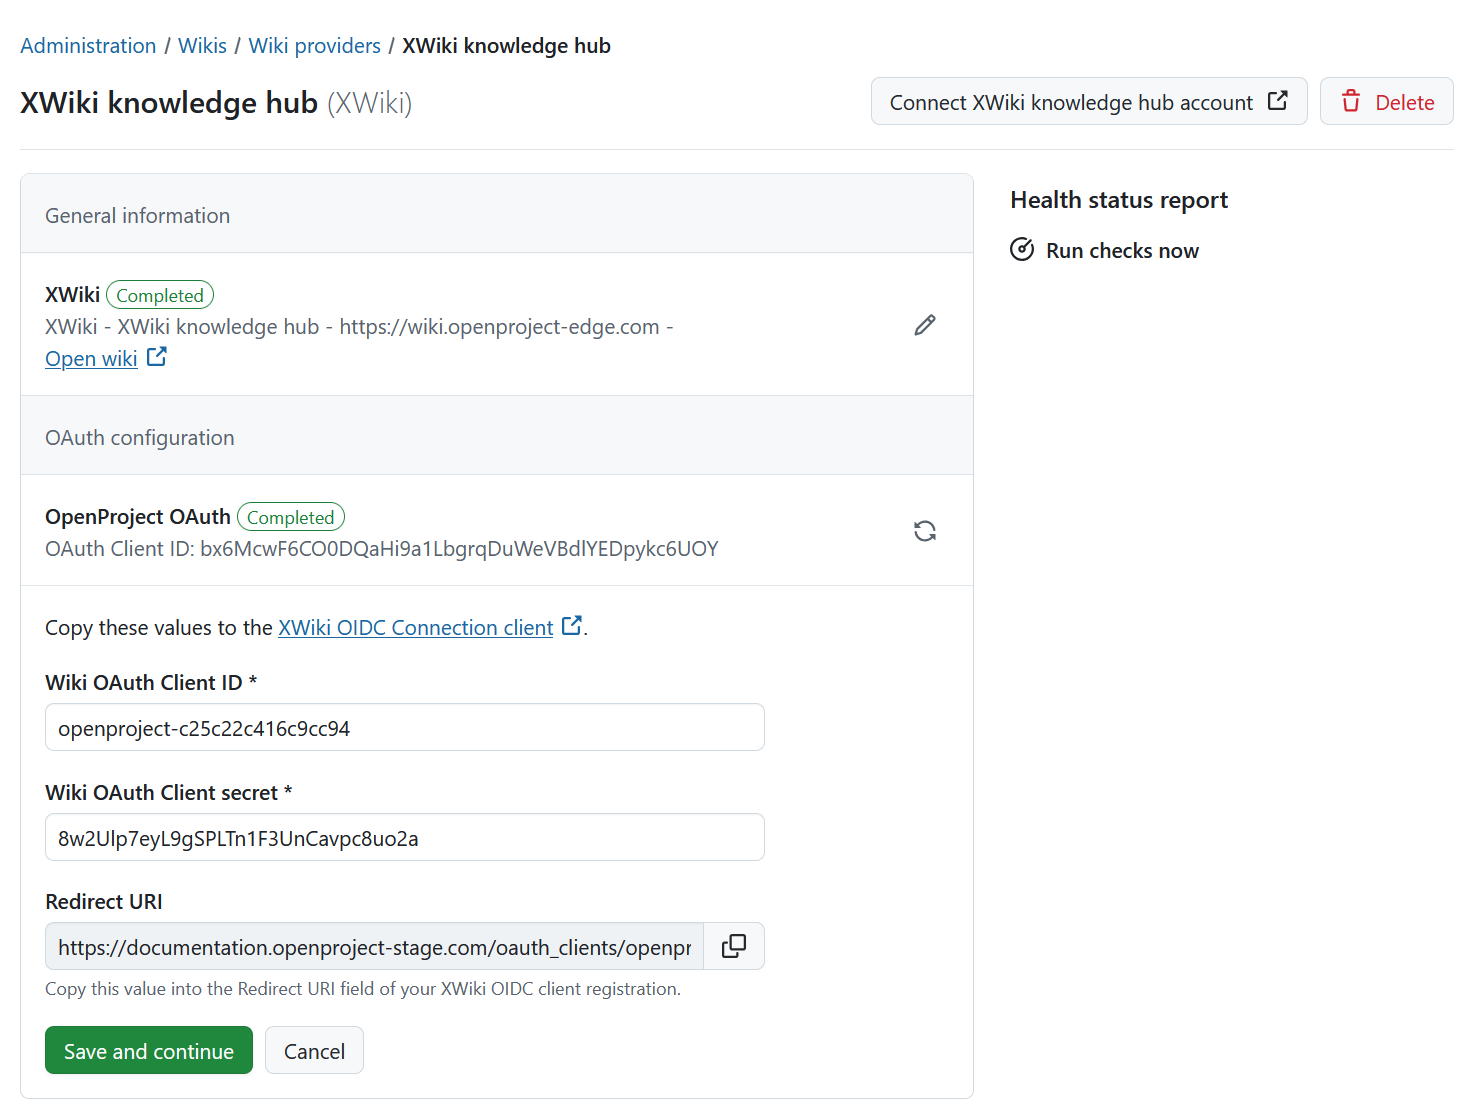
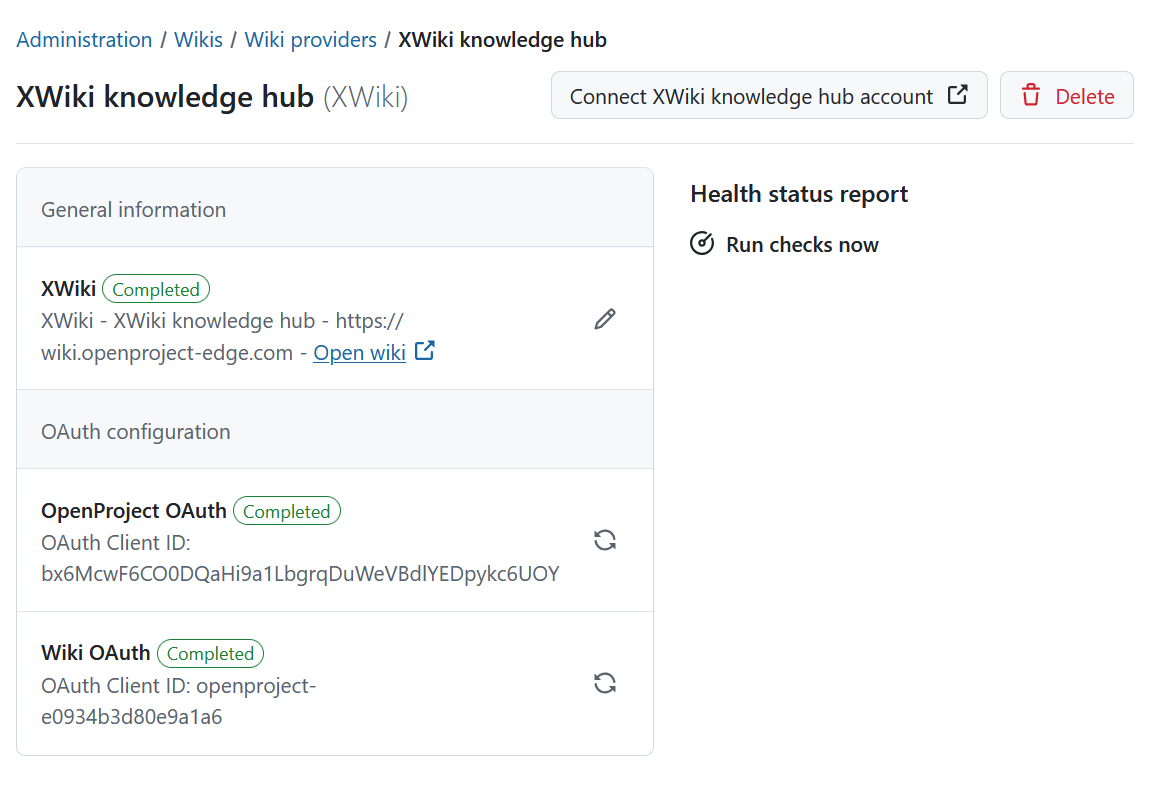
Once this is done, click on Save and continue. This will conclude the configuration of the XWiki provider and the details page will be shown.
Replace authentication details
If authentication credentials are lost, leaked, or need to be rerolled, you can replace them by clicking on the name of an XWiki provider. This will open the details page of the provider. Click Replace next to the configuration entry.
The replacement action is available separately for each pair of credentials and will generate new credentials after confirming the destructive action. As described in the section Two-way OAuth 2.0 authorization code flow you will have to copy the new values over to the corresponding XWiki forms.
Wichtig
Every user will have to reconnect from the affected side after resetting the credentials. For example, if replacing the Wiki OAuth credentials, the connection from the OpenProject account to the XWiki account is lost and has to be reconnected.
To learn how to link a wiki to a work package or create a new one, refer to this user guide.
Configuration using environment variables
For some deployment scenarios, it might be desirable to configure a provider through environment variables. These variables follow the rules defined in the documentation about using environment variables.
The configuration OPENPROJECT_WIKI__PROVIDERS accepts an array of JSON objects to configure external wiki providers, such as XWiki. For each XWiki provider you can define the following attributes:
type: Must be set toxwikiname: Defines the user-visible name of the wiki provider.url: The wiki provider’s base URL.uid(optional): The XWiki installation id of the related XWiki instance. If not provided, this will be asynchronously fetched later.openproject_oauthclient_id: The client ID that XWiki will be able to use to authenticate towards OpenProject via OAuth.client_secret: The client secret that XWiki will be able to use to authenticate towards OpenProject via OAuth. Make sure to pick a strong password.
xwiki_oauthclient_id: The client ID that OpenProject shall use to authenticate towards XWiki via OAuth.client_secret: The client secret that OpenProject shall use to authenticate towards XWiki via OAuth.
The following is a configuration example for a single XWiki provider:
[{ "type": "xwiki", "name": "XWiki knowledge base", "url": "https://xwiki.example.com", "openproject_oauth": { "client_id": "xwiki", "client_secret": "secret" }, "xwiki_oauth": { "client_id": "openproject", "client_secret": "secret" } }]
Applying the configuration
To apply the configuration after changes, you need to run the db:seed rake task. In all installations, this command is run automatically when you upgrade or install your application. Use the following commands based on your installation method:
- Packaged installation:
sudo openproject run bundle exec rake db:seed - Docker:
docker exec -it <container of all-in-one or web> bundle exec rake db:seed.
Changes will also be applied to existing wiki providers this way. Existing wiki providers will be matched to the ones defined in environment variables preferably by their uid (if one was defined) and otherwise by their human-readable name.