Manage users
The user list provides an overview of all users in OpenProject. You can create new users, make changes to existing user accounts and block or delete users from the system.
User is defined as a person (described by an identifier) who uses OpenProject. Users can become project members by assigning them a role and adding them via the project settings.
To manage users click on your avatar (top right corner) and select Administration. Select Users and permissions -> Users. The list of current users is shown.
In the Community edition there is no limit to the number of users. In Enterprise editions (cloud and on-premises) the user limit is based on your subscription. The number of users for your subscription is thus not bound to names. For example, if you block a user you can add a new one without upgrading.
| Topic | Content |
|---|---|
| User list | Manage all users in OpenProject. |
| Filter users | Filter users in the list. |
| Configure view | Configure how user information is displayed. |
| Lock and unlock users | Block a user permanently in the system or unlock a user. |
| Create users | Invite or create new users. Resend or delete user invitations |
| Manage user settings | Manage user details. |
| Authentication | Set and use authentication methods. |
| Delete users | Delete a user from the system. |
User list
The user list is where users are managed. Users can be added, edited, or deleted from this list. You can search, sort, and filter the list to quickly find specific users.
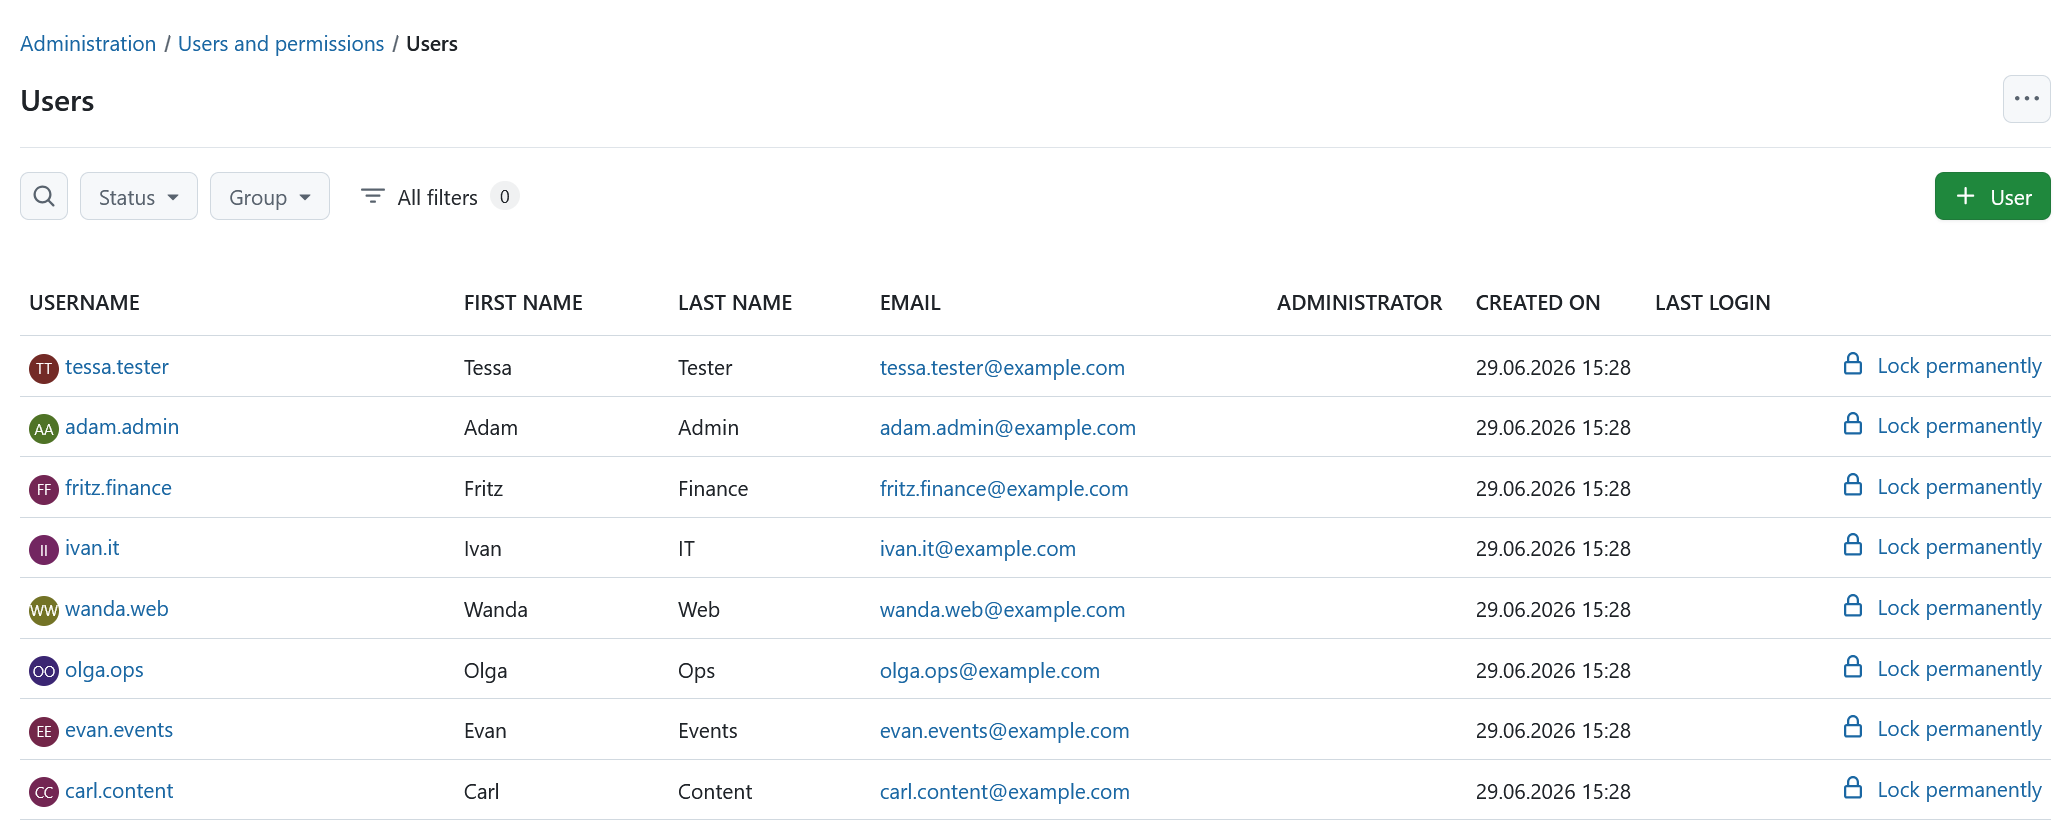
Column headers can be clicked to toggle the sort direction. An upward arrow indicates ascending order (A–Z/0–9), and a downward arrow indicates descending order (Z–A/9–0). Paging controls are shown at the bottom of the list. The list also indicates whether a user is a system administrator.
Filter users
Above the user list, you can:
-
Use the Search field to search users by free text.
-
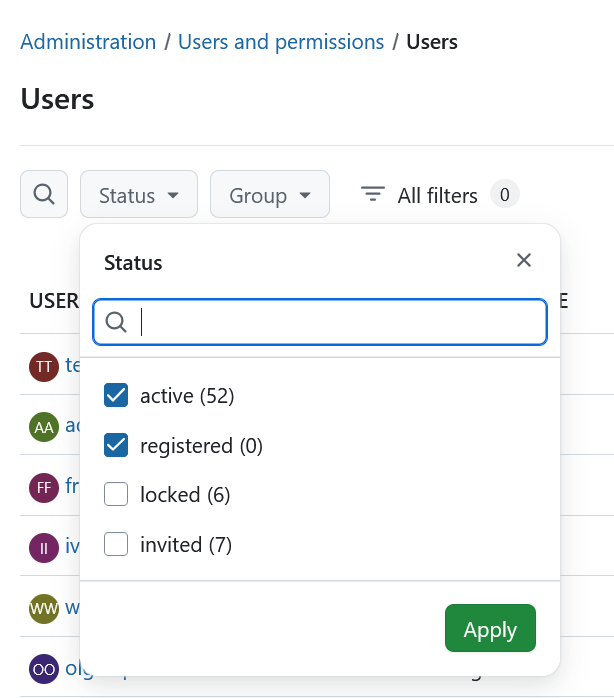
Use the Status filter to filter by user status (Active, Registered, Locked, or Invited). Select one or more statuses using the checkboxes and click Apply.
-
Use the Group filter to filter by existing groups or departments. Select one or more entries using the checkboxes and click Apply.
-
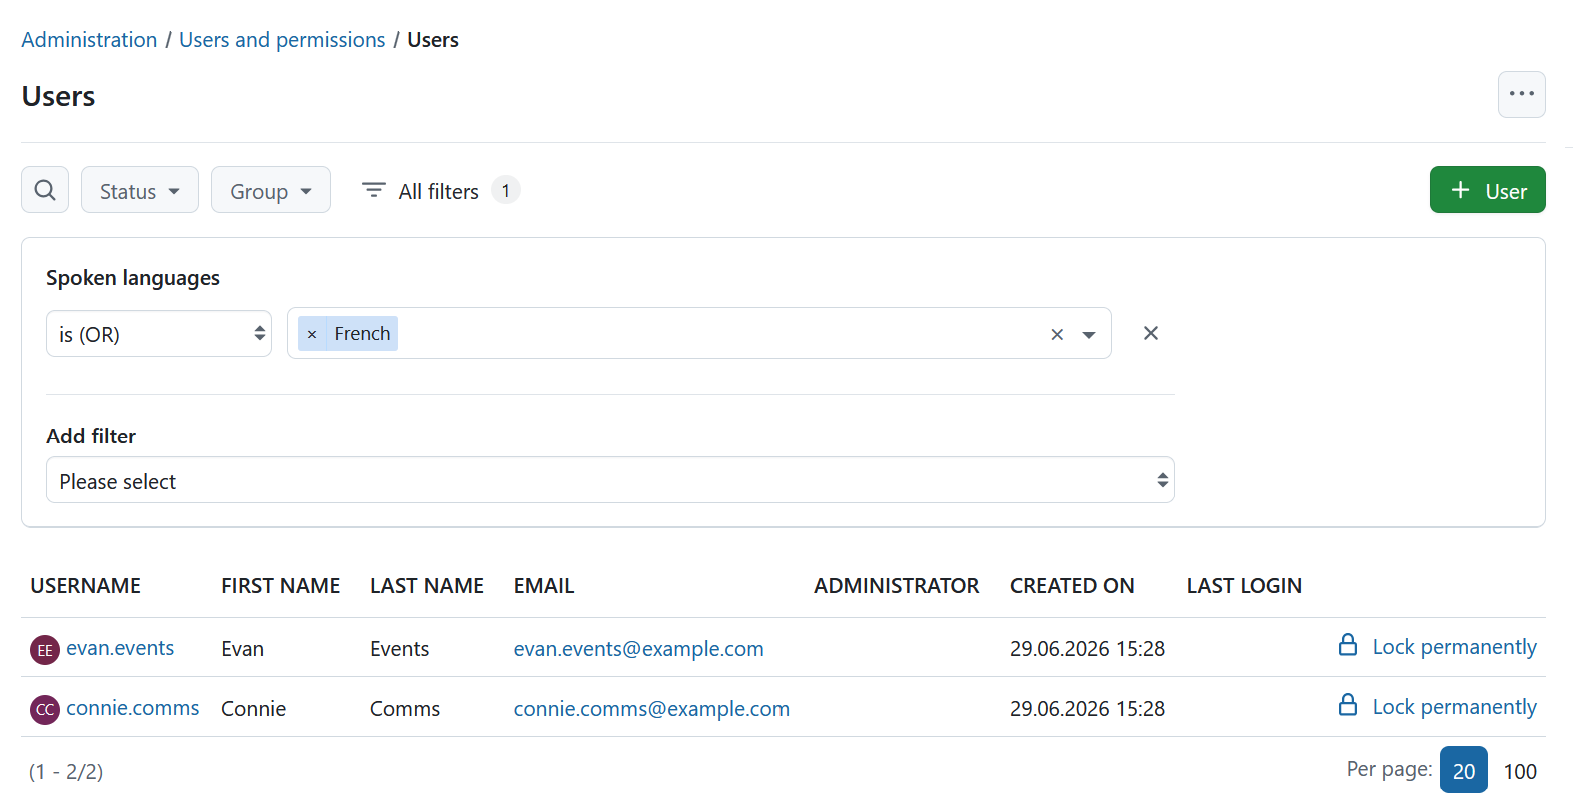
Click All filters to access additional filtering options.

Clicking All filters opens the + Add filter form. Here, you can filter by group, status, name, username, and all configured user attributes. Each filter provides additional options to help you narrow down the results. The user list is updated automatically based on the selected criteria.
Click the × icon next to a filter to remove it, or click the × in the top-right corner to close the filter panel.
Available filters include:
- Username – Enter any text or character sequence (such as
@or.com) that is unique to the username or email address. - Name – Enter any text. You can use the
%wildcard to match zero or more characters. For example, searching forNi%lasmatches names such as Niklas, Niclas, Nikolas, or Nicholas. The filter searches first name, last name, and email address. - Group – Select one or more existing groups or departments.
- Status – Select one or more statuses: Active, Registered, Locked, Invited, or Deleted. Each status displays the number of matching users.
- User attributes – Filter by any configured user attribute, such as Job start date, Job title, Key skills, or Spoken languages.
Configure view
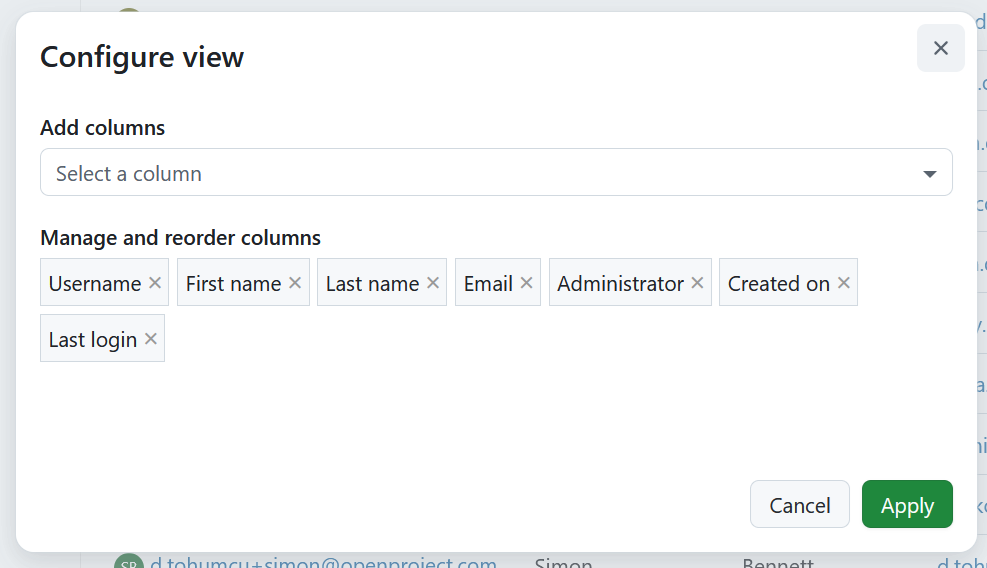
To configure how the table of users is displayed, click on the More menu (…).
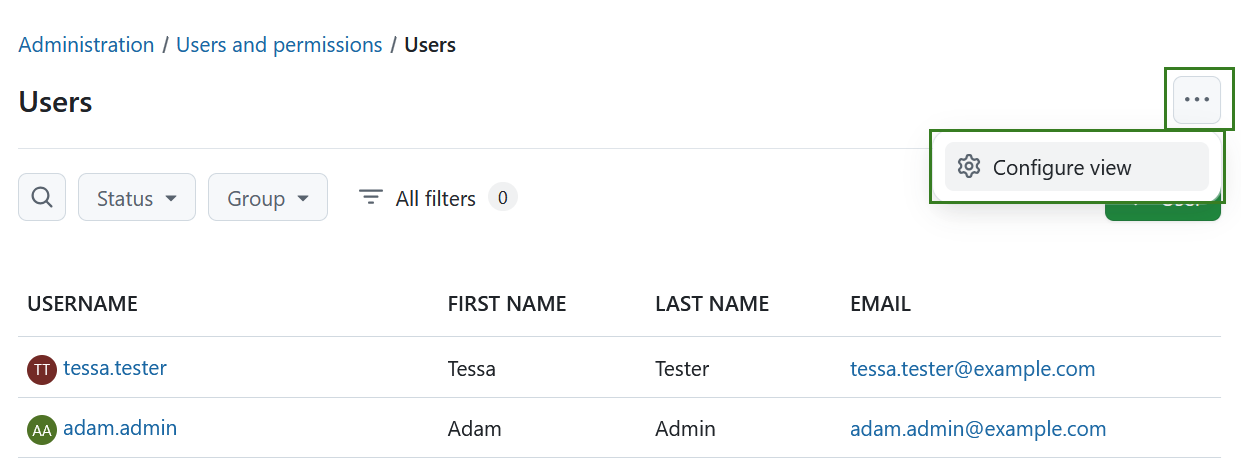
This opens up a form where you can add columns, or manage and reorder columns via drag and drop. Click Apply to save your changes.
Lock and unlock users
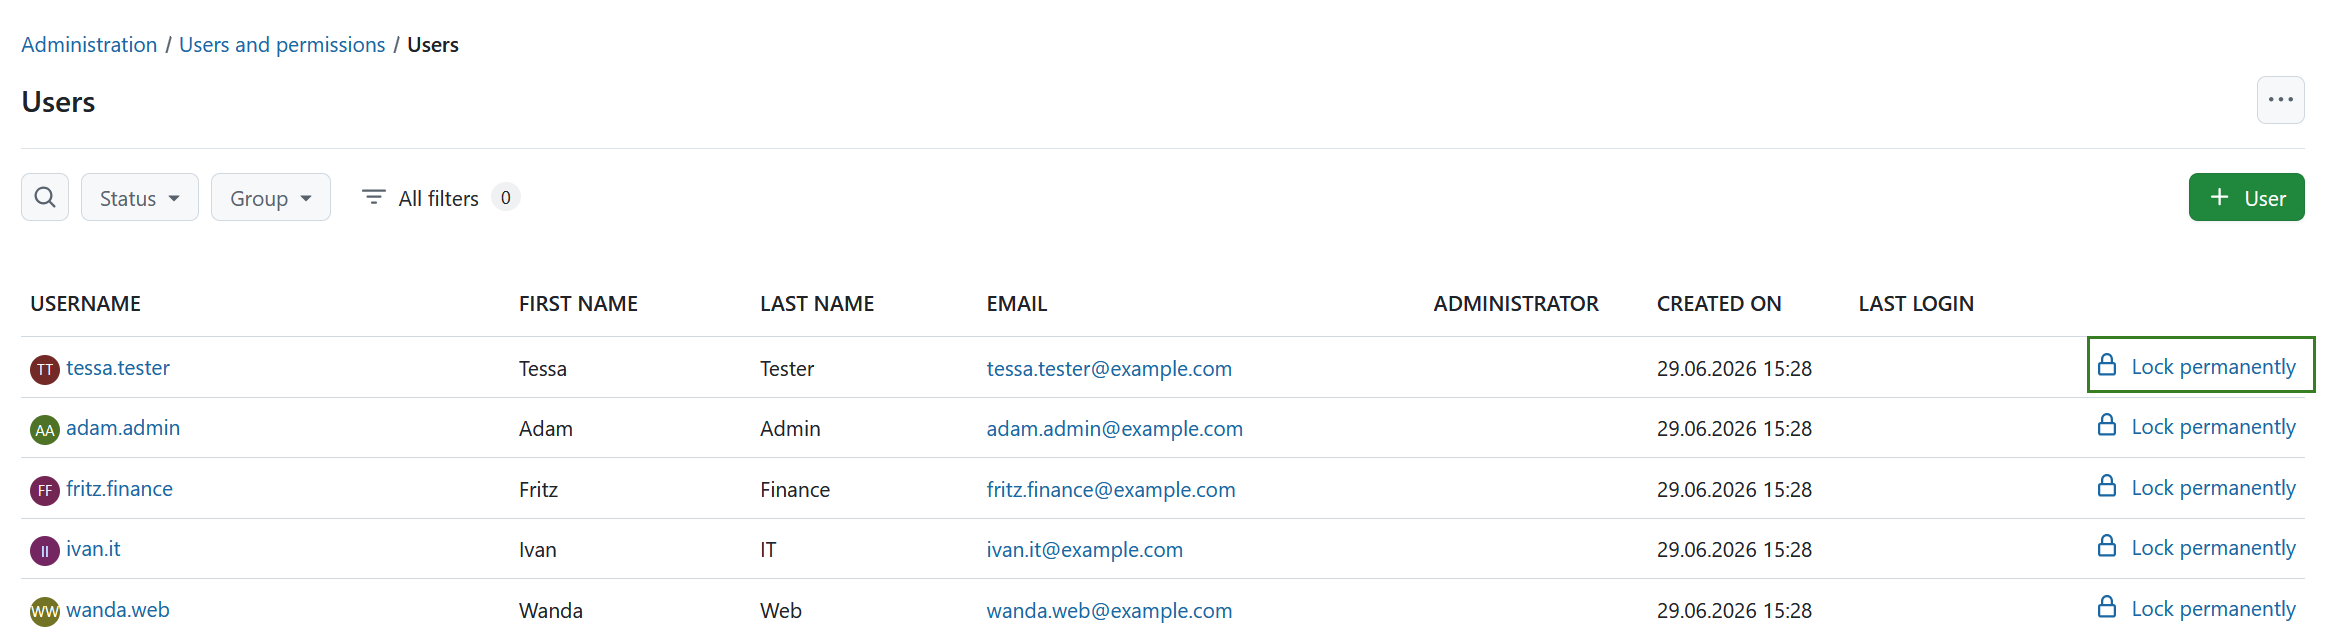
Handling locking and unlocking of users is also done from the user list. To disable a user’s access click, the Lock permanently link next to a user. Use the Unlock link to restore the user’s access.
If you are using Enterprise cloud or Enterprise on-premises locking a user will free up a user license and so you could add another user to the system within your booked plan.
Hinweis
The previous activities of a locked user will still be displayed in the system.
If a user has repeated failed logins, the user will be locked temporarily and a Reset failed logins link will be shown in the user list. Click the link to unlock it right away, or wait and it will be unlocked automatically. Have a look at the section Other authentication settings for failed attempts and time blocked.
Create users
New users can be created and configured by an administrator or by the users themselves (if this option is activated).
Invite a user
In the user list, click the + User button to open the New user form.
The form consists of the following sections:
- Account
- Select the Administrator checkbox to grant the user administrator privileges.
- User attributes
- This section contains both built-in and custom user attributes.
- Fill in the required attributes: First name, Last name, and Email.
Hinweis
The email address must be in a valid format and be unique. Otherwise, the user cannot be created.
- Optionally, fill in any additional user attributes, such as Language (English is the default), Department, Job title, Key skills, or Job start date.
- Authentication
- Select an Authentication source. Choose Internal or an LDAP source (if configured). If you select an LDAP source, enter the user’s Username.
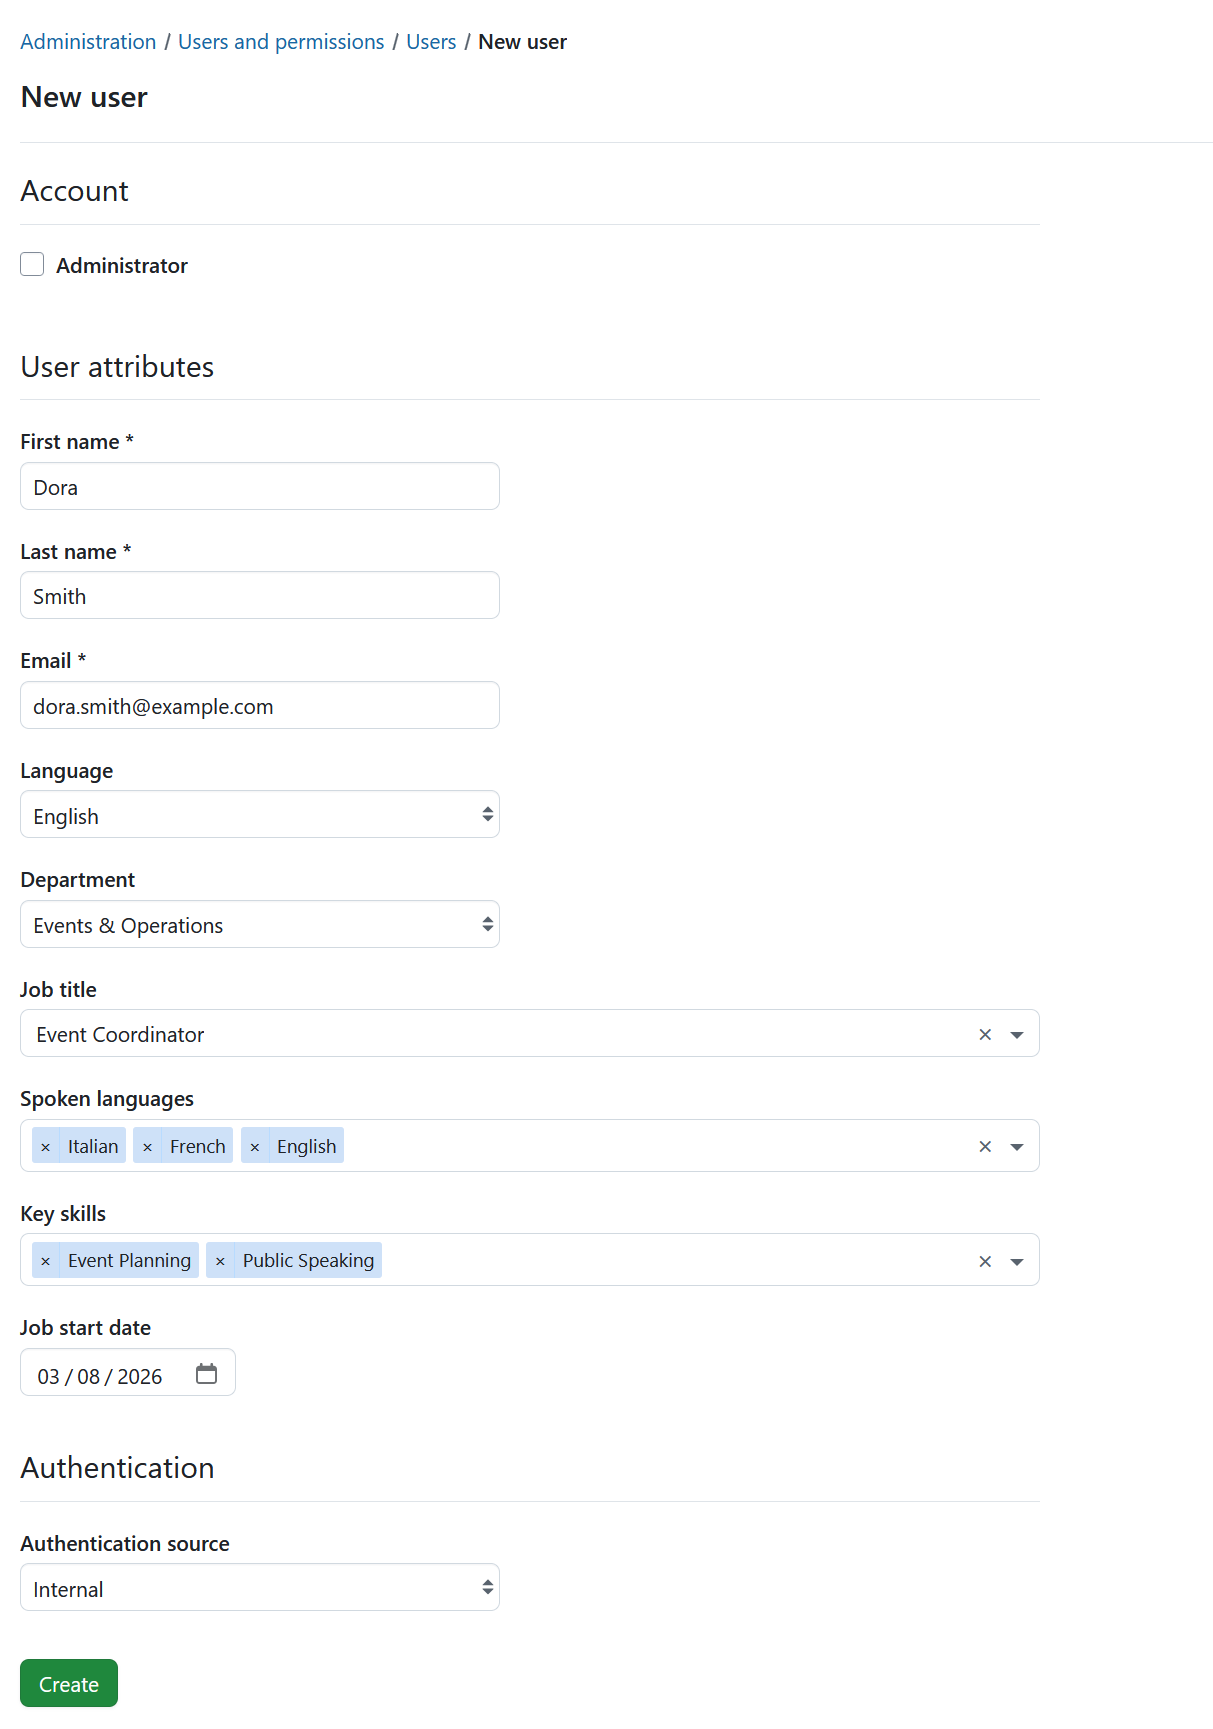
Click Create to add the user. After the user has been created, their user details page opens automatically.
Create user (via self-registration)
To allow users to create their own user accounts enable self-registration in the authentication settings. A person can then create their own user from the home page by clicking on the Sign in button (top right), then on the Create a new account link in the sign in box.
Enter values in all fields (they cannot be left blank). The email field must be a valid email address that is not used in this system. Click the Create button. Depending on the settings the account is created but it could be that it still needs to be activated by an administrator.
Activate users
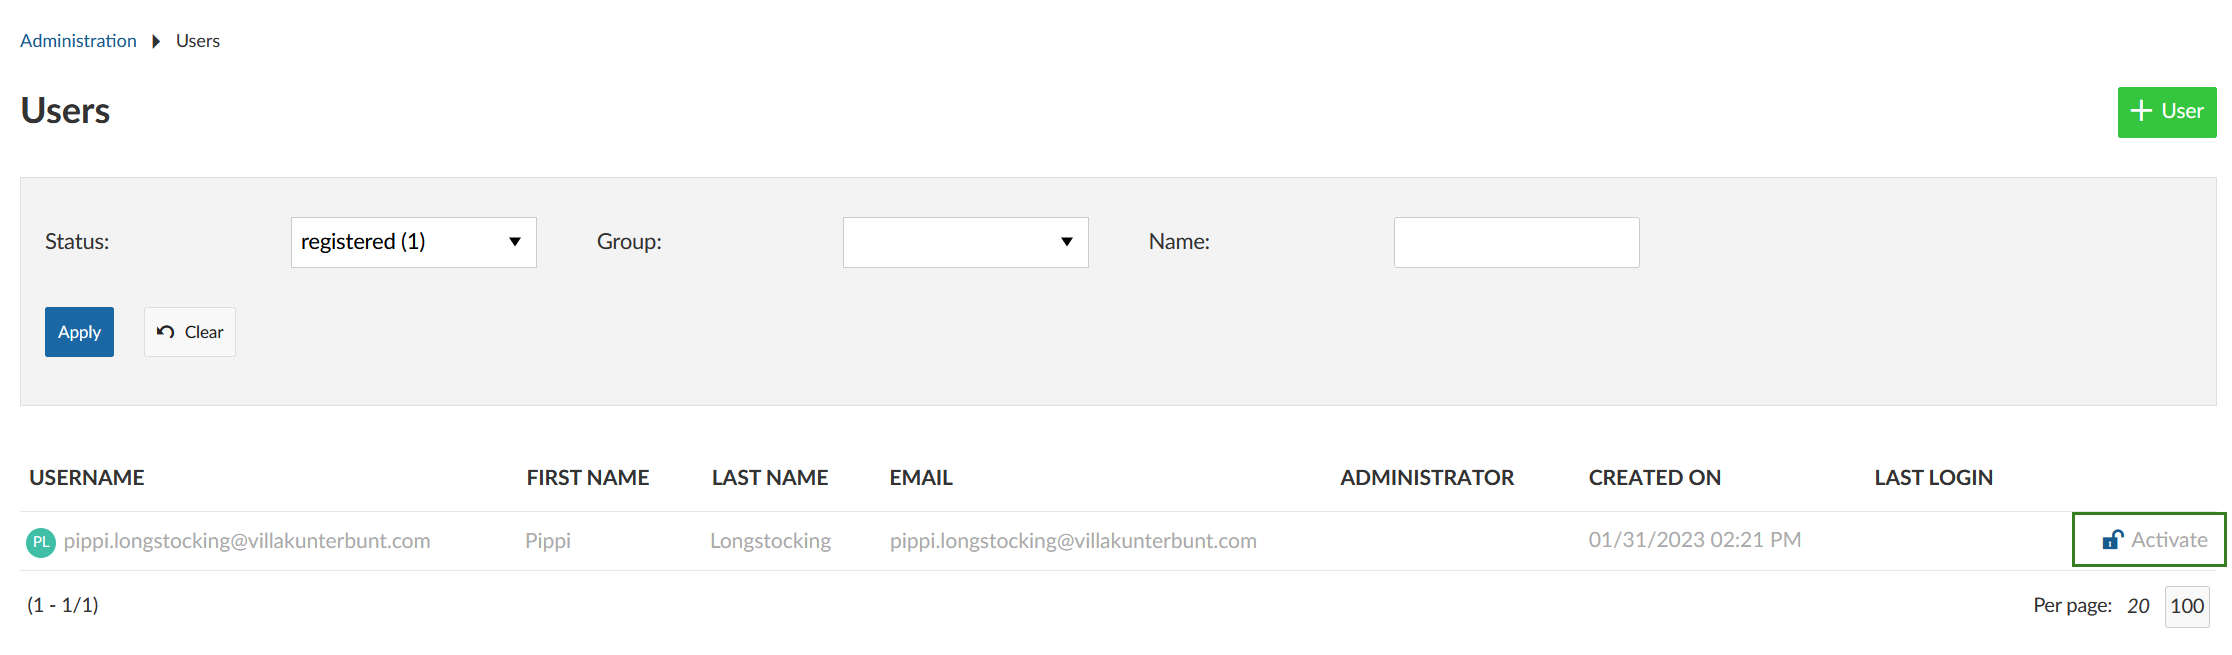
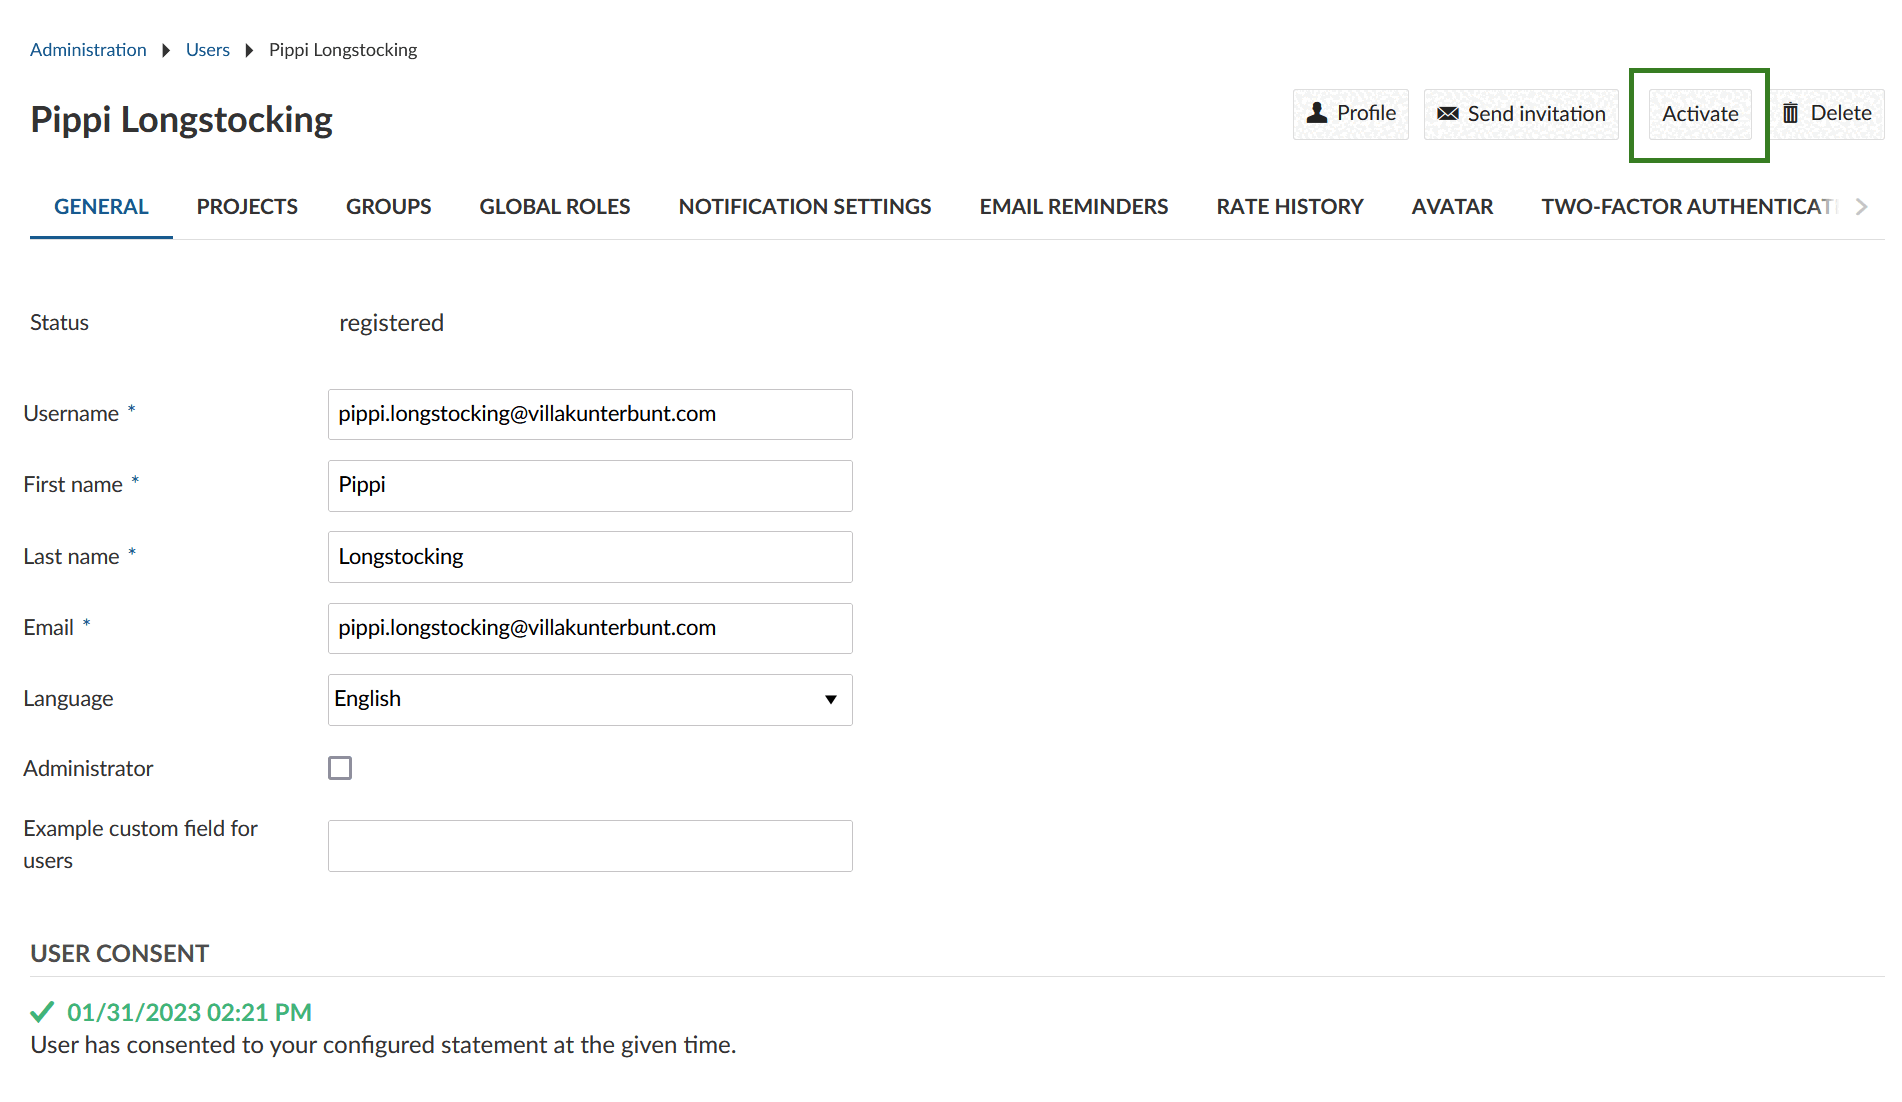
Open the user list. If a user has created their own account (and it has not been activated automatically) it is shown in the user list with an Activate link on the right. Click this link and continue to add details to this user as below.
There is also an Activate button at the top of the user’s details page.
Set initial details
You can edit the details of a newly created user. Useful fields might be Username, Language and Time zone. You might also fill Projects, Groups and Rates, or leave these to the Project creator. Also consider the authentication settings.
See Manage user settings for full details.
Resend user invitation via email
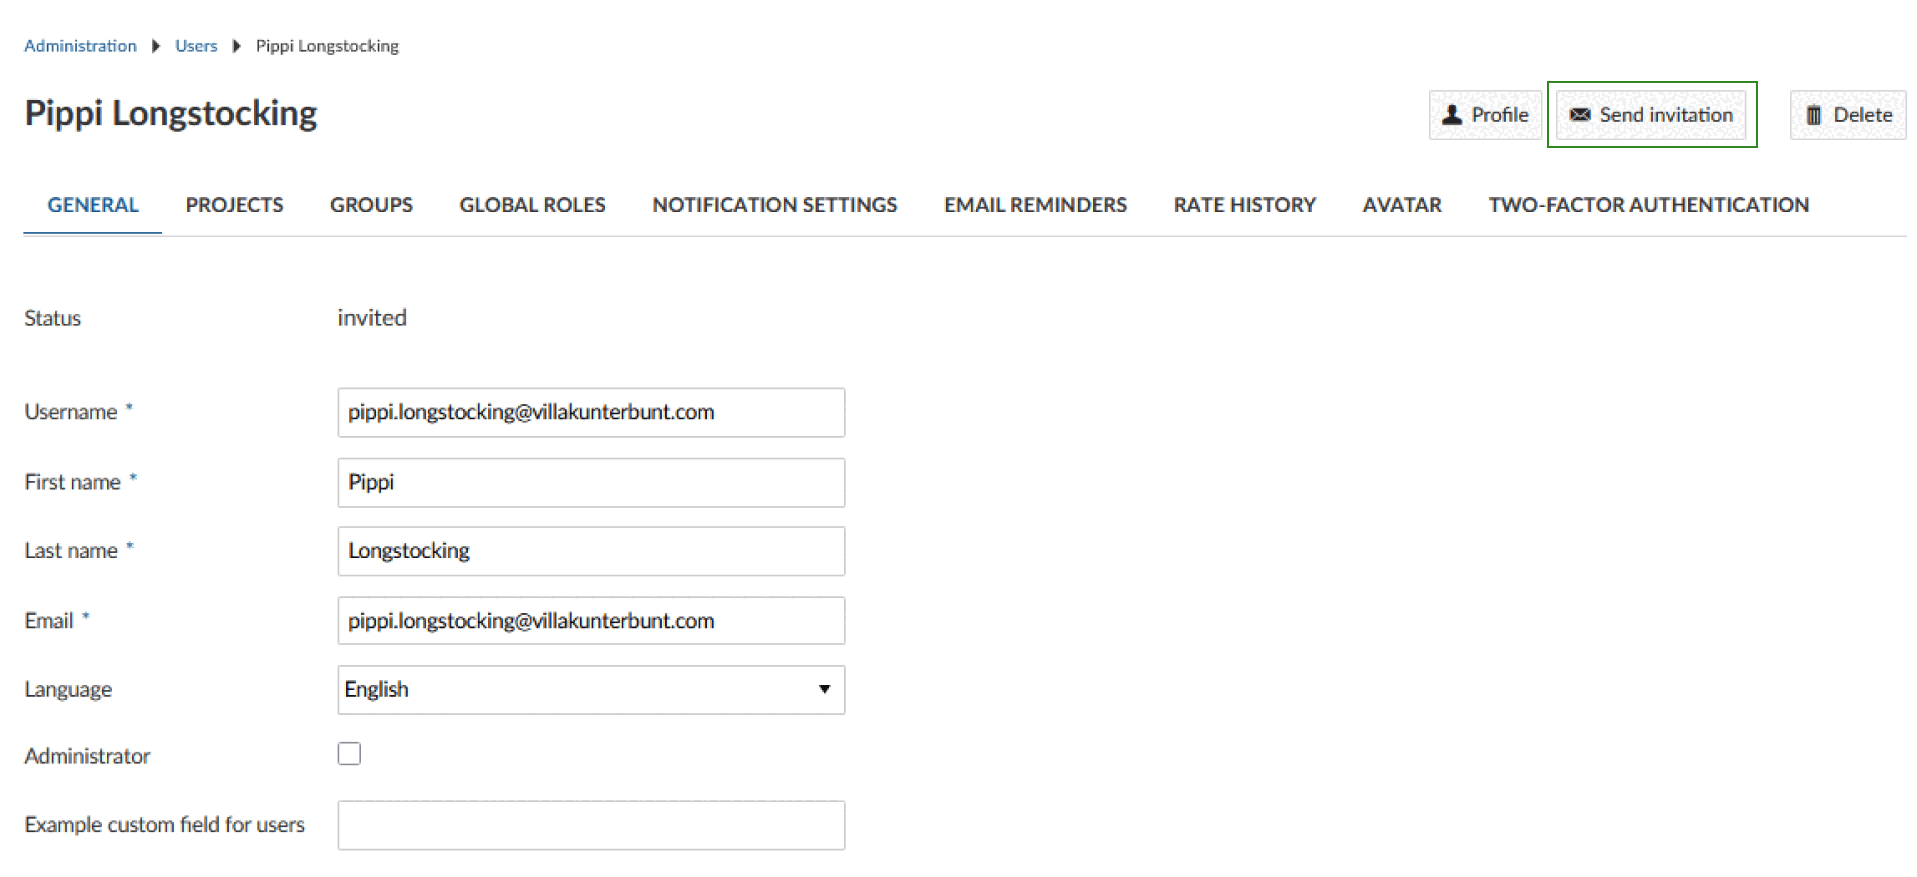
If a user did not receive the email invitation or shall change their authentication method to email, you can send the invitation to the user again if needed. In the user list, click on the name of the user to whom you want to resend the email with the invitation link to the system.
In the top right, click the Send invitation button in order to send the email once again.
Delete user invitations
To invalidate or revoke a user’s invitation, click on the user name and then on Delete in the upper right corner. This will prevent the invited user from logging in.
Hinweis
This only works for users who haven’t logged in yet. If the user is already active, this will delete his/her whole profile and account. Deleting users can’t be revoked.
Manage user settings
To manage an individual user’s settings, select the user from the Users list. The settings configured here override the user’s own settings from their Account settings, where applicable.
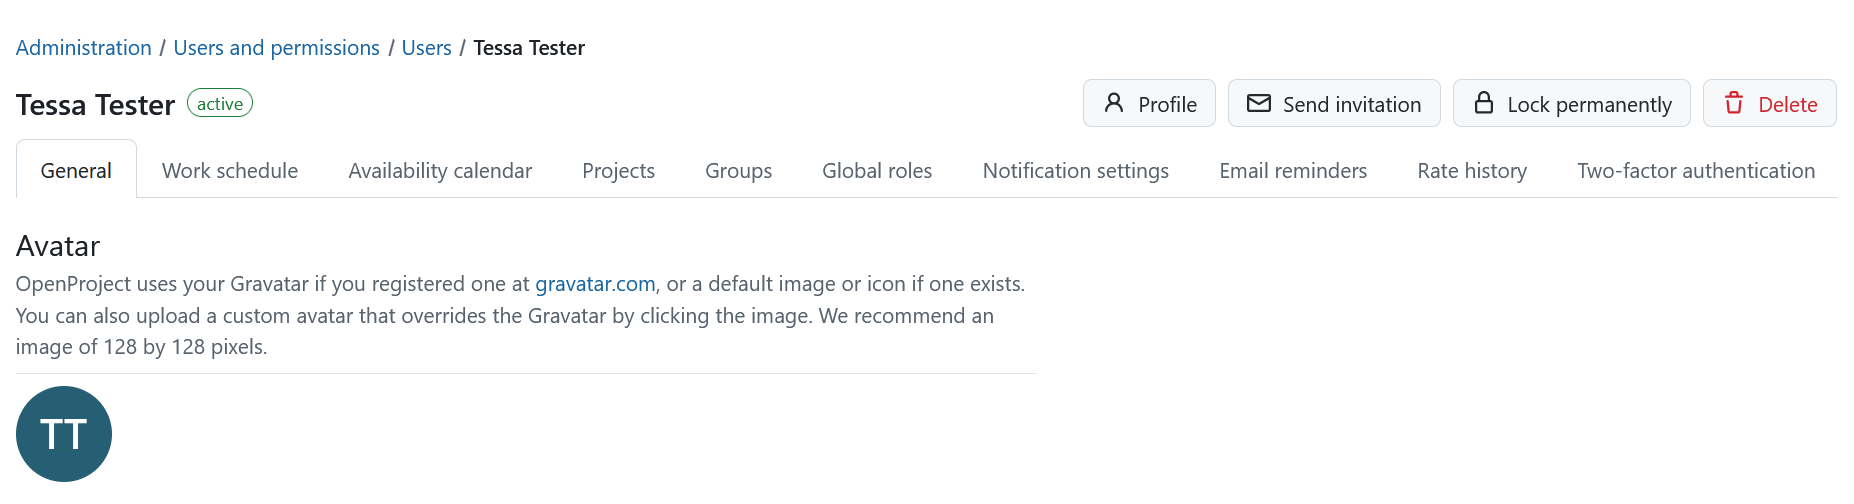
User settings are organized into the following tabs:
- General
- Work schedule
- Availability calendar
- Projects
- Groups
- Global roles
- Notification settings
- Email reminders
- Rate history
- Two-factor authentication
General settings
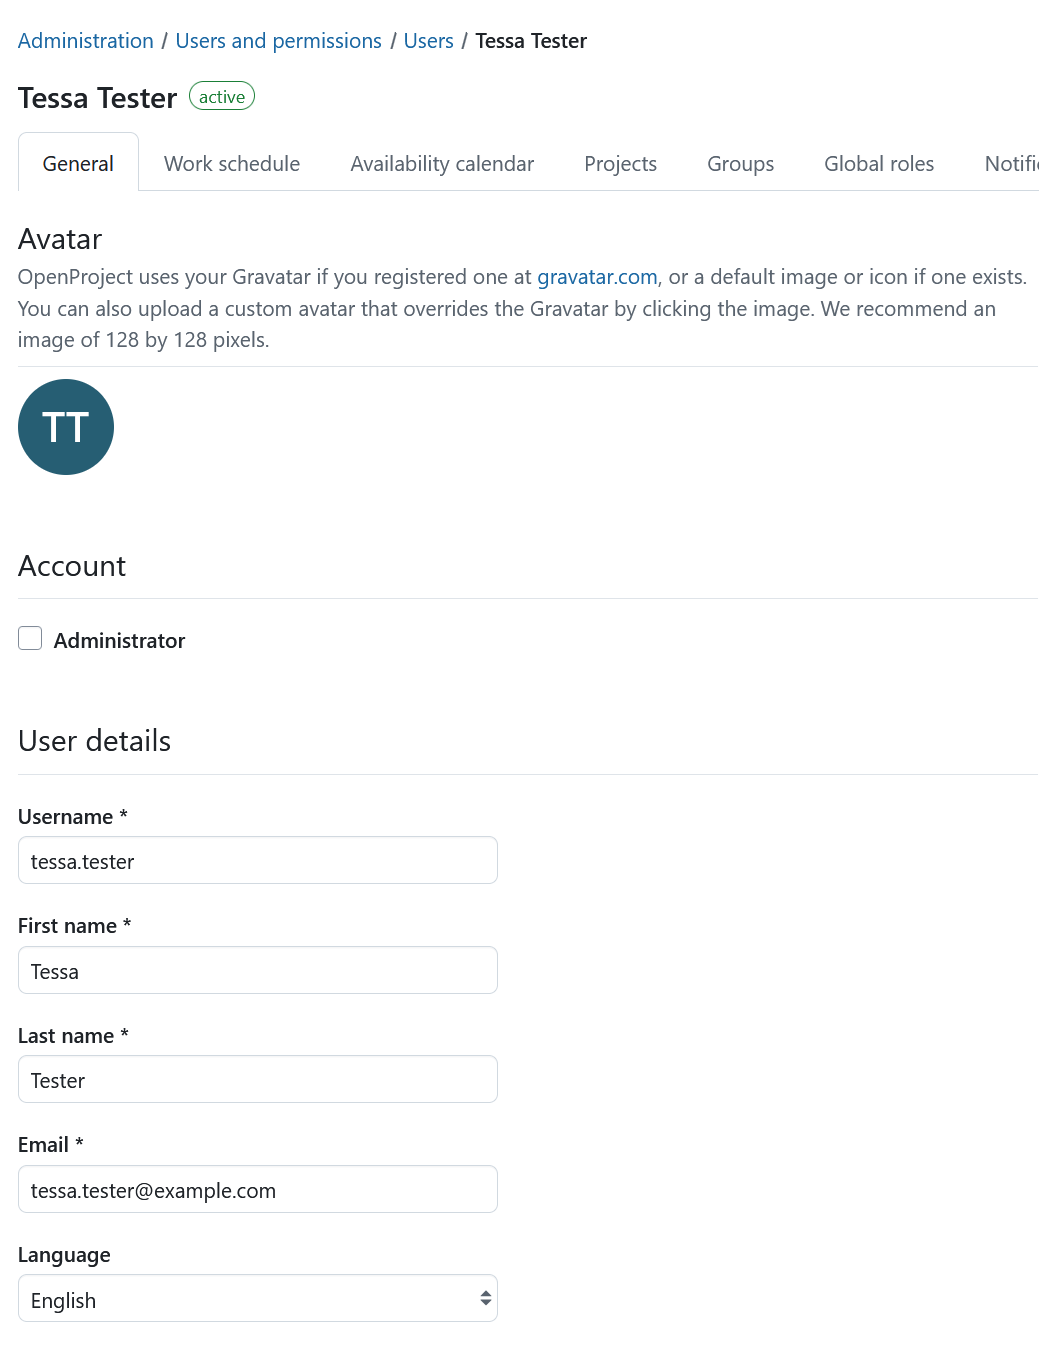
The General tab is divided into several sections.
Avatar
The Avatar section displays the user’s current avatar. By default, a generic icon is shown. You can upload a custom avatar image for the user.
If enabled, users can also use a Gravatar, which they can manage in their Account settings. Both custom avatars and Gravatar support can be disabled in the Avatar settings.
Tipp
Hover over a user’s avatar or name (for example, on the Members or Activity page) to view additional user information.
Account
- Administrator – Grants or revokes the global administrator role. This setting can only be changed by an administrator.
User details
- Username – For newly created users, the username defaults to the email address unless the account was created through self-registration. Administrators can change the username; users cannot.
- First name, Last name, Email – These fields are initially set when the user account is created. Users can update them in their Account settings. All three fields are required.
- Language – Defaults to the value configured in the default user settings. Users can change their preferred language in their Account settings.
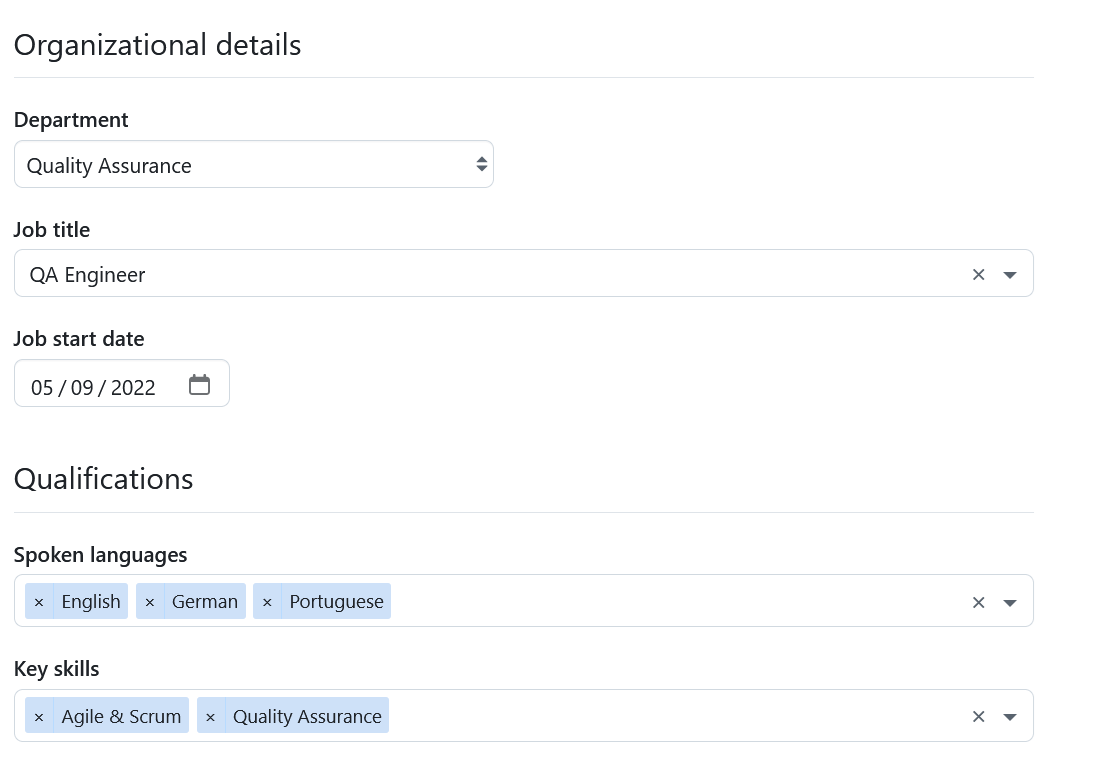
User attributes
Any configured user attributes are displayed in this section. User attributes can be used to store additional information, such as a department, phone number, or qualifications. If no user attributes have been configured yet, see User attributes to learn how to create them. In this example, user attributes are grouped into two sections: Organizational details and Qualifications.
Authentication
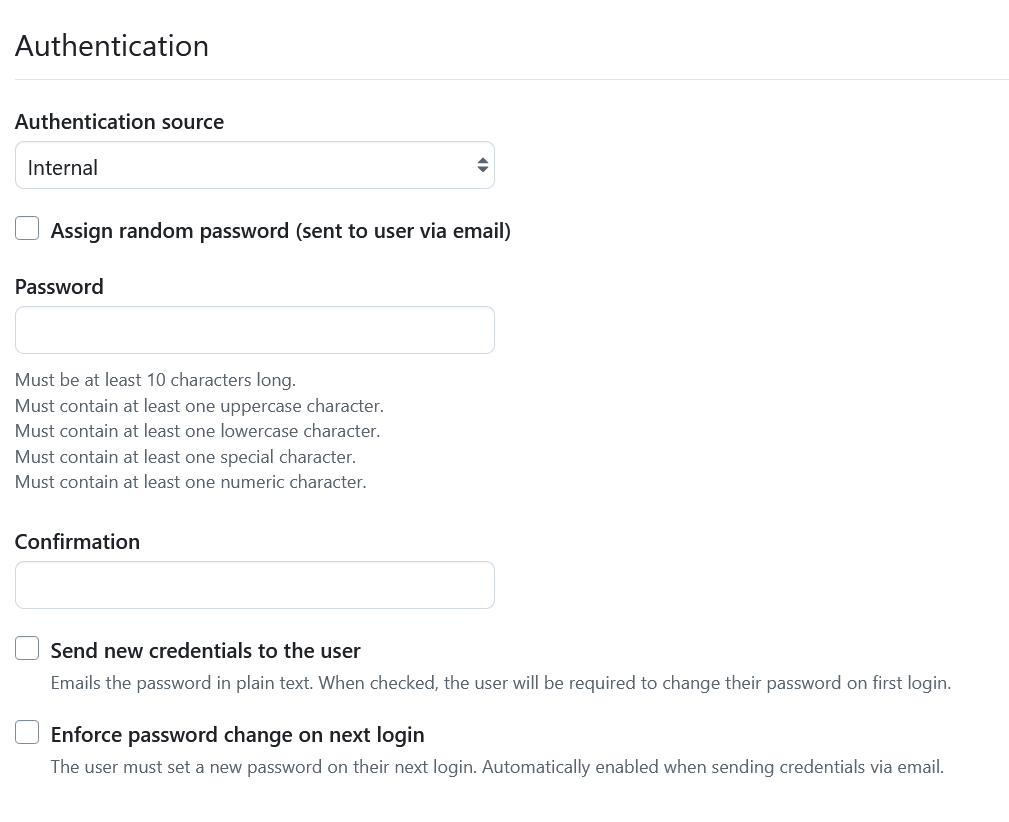
The Authentication section varies depending on the authentication method configured for your OpenProject instance (for example, password authentication, OpenID Connect, LDAP, Kerberos, or SAML).
Available fields depend on the configured authentication provider and may include:
- Authentication source – Select the authentication source for the user from the drop-down list.
Reset a user’s password
To reset a user’s password, navigate to the Authentication section on the General tab.
You can either:
- Select Assign a random password to generate a secure password automatically, or
- Enter a new password manually.
If you set a password manually, share it with the user using a secure communication channel. You can also enable Enforce password change on next login to require the user to create a new password when they next sign in.
Preferences
The Preferences section lets administrators configure user preferences. Users can also manage these settings in their Account settings, unless they are overridden here.
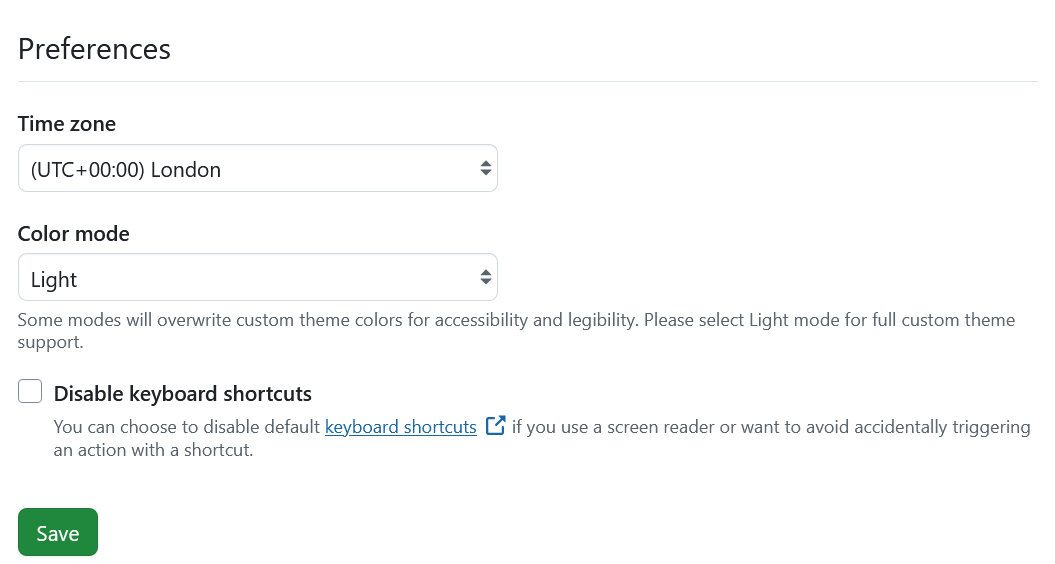
Available settings include:
- Time zone – By default, the time zone is determined from the selected language but can be changed.
- Color mode – Choose the preferred appearance. Some color modes override custom theme colors to improve accessibility and readability. Select Light mode for full compatibility with custom themes.
- Disable keyboard shortcuts – Disable the default keyboard shortcuts. This can be helpful when using a screen reader or to avoid triggering actions accidentally.
Remember to Save your changes before leaving the page.
Work schedule
The Work schedule tab allows administrators to view and manage a user’s working schedule. You can edit the user’s current schedule, plan future schedule changes, and review their schedule history.
The functionality is the same as described in the user documentation for Schedule and availability, except that administrators manage these settings on behalf of the selected user.
Availability calendar
The Availability calendar tab provides a yearly overview of the selected user’s availability, including personal time off and company-wide non-working days such as public holidays.
Administrators can view and manage the user’s time off directly from this page. The functionality is the same as described in the user documentation for Schedule and availability.
Add users to a project
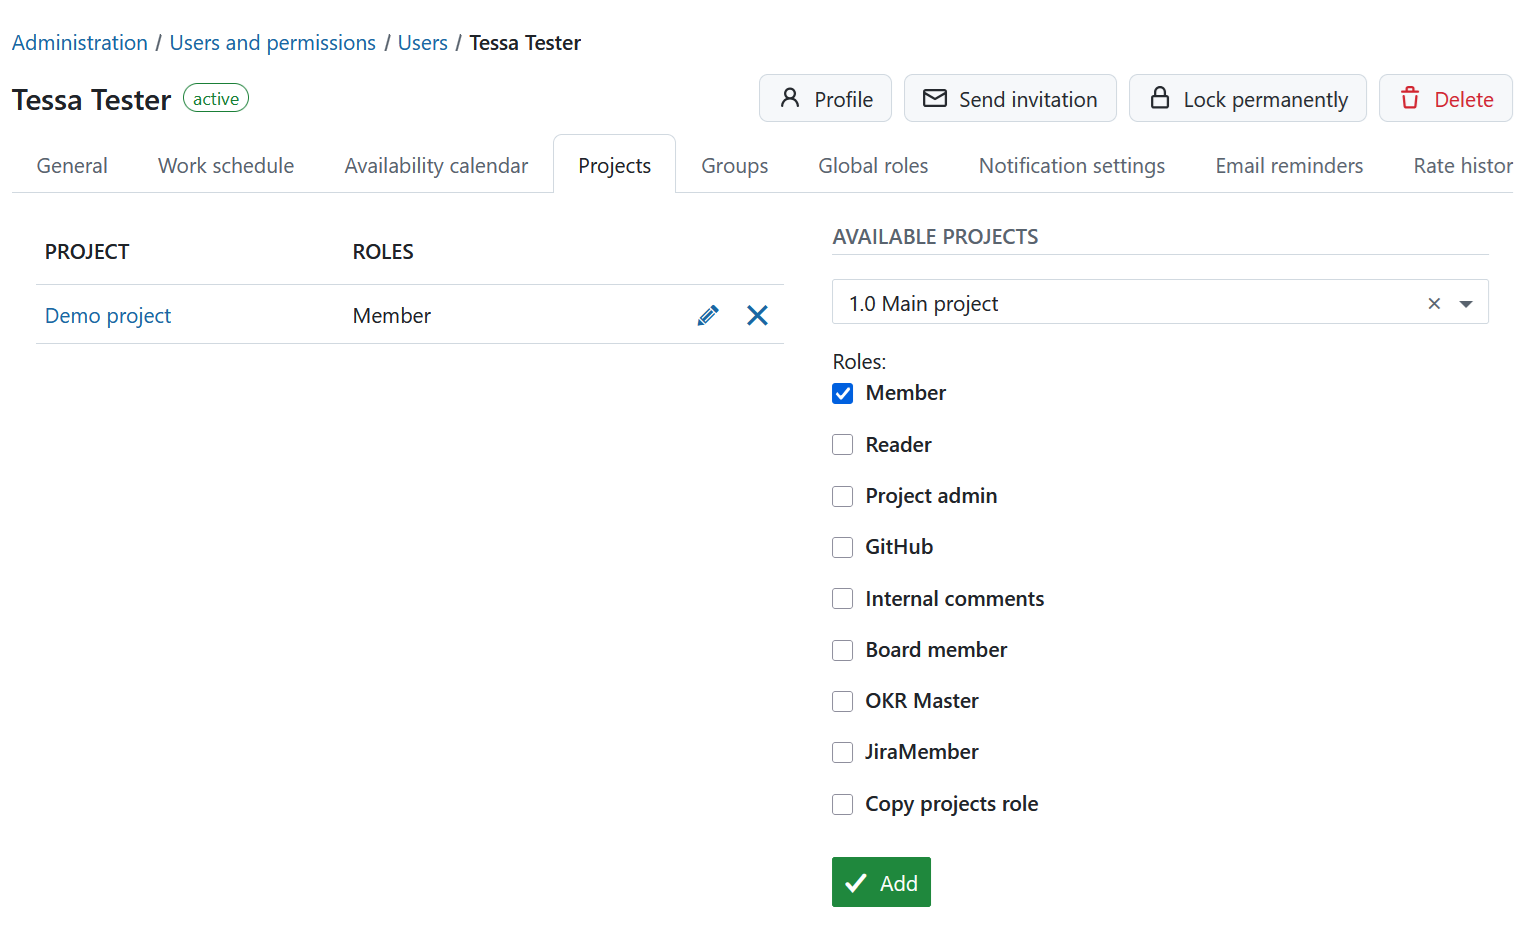
In order to see and work in a project, a user has to be a member of a project and needs to be added with a certain role to this project.
On the Projects tab, select the new project from the drop-down list, choose the roles for this project and click the green Add button.
Add users to groups
On the Groups tab you can see the groups the user belongs to. If a group is shown, click the group name link.

If no groups are shown (i.e. the user does not belong to any group, yet), click the Manage groups link to edit groups.

Hinweis
The Groups tab is only shown if at least one user group exists in OpenProject.
Global roles
In order to add a global role to a user, at least one global role needs to be created in the system (a role with the Global role field ticked).
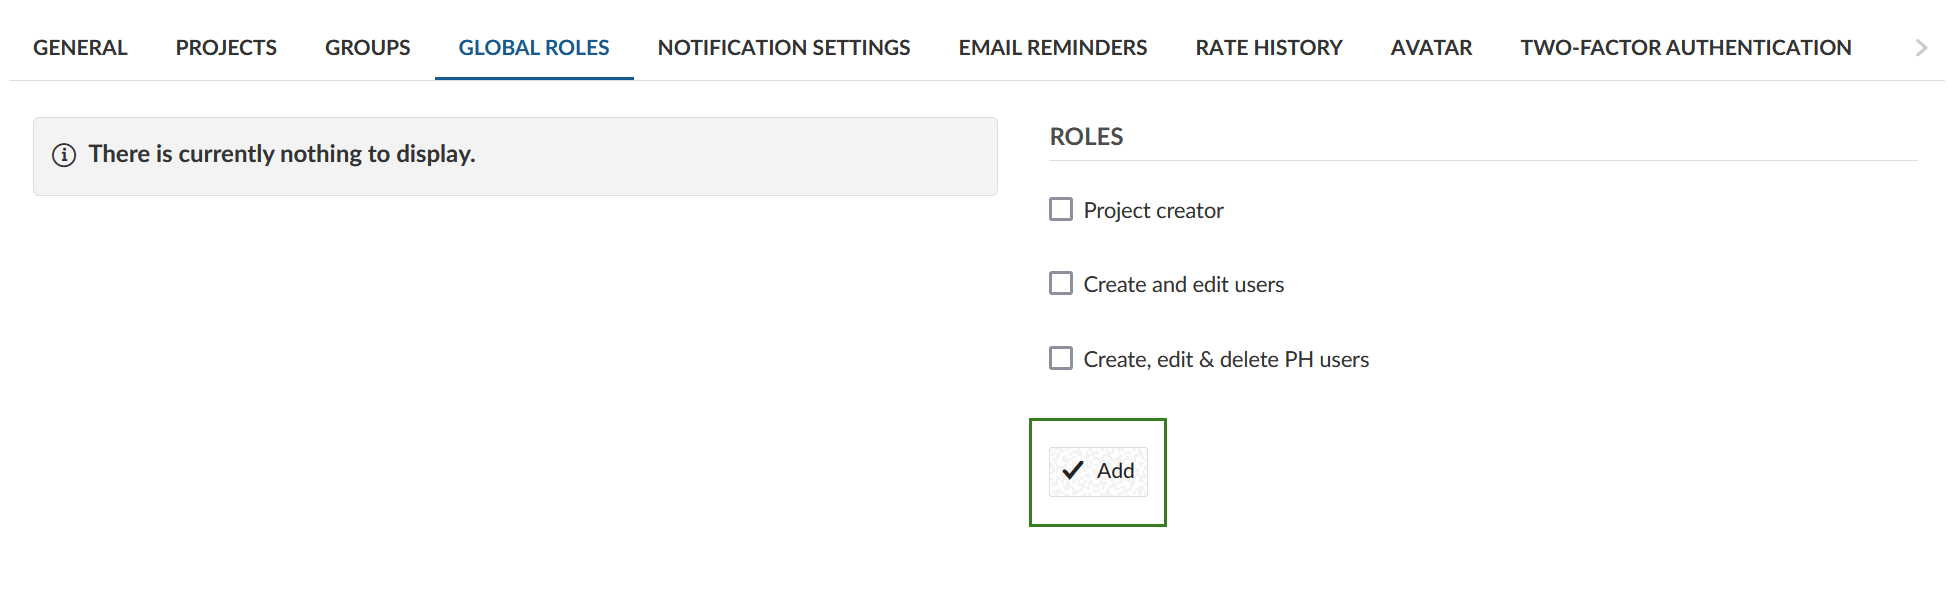
On the Global roles tab, select or de-select the global role(s) for this user. Click the Add button.
Notification settings
Under Notification settings tab you can edit the notification settings for the user. Each user can adjust these settings under Account settings on their own.
Email reminders
Under Email reminders tab you can edit the email reminders settings. Each user can adjust these settings under Account settings on their own.
Rate history
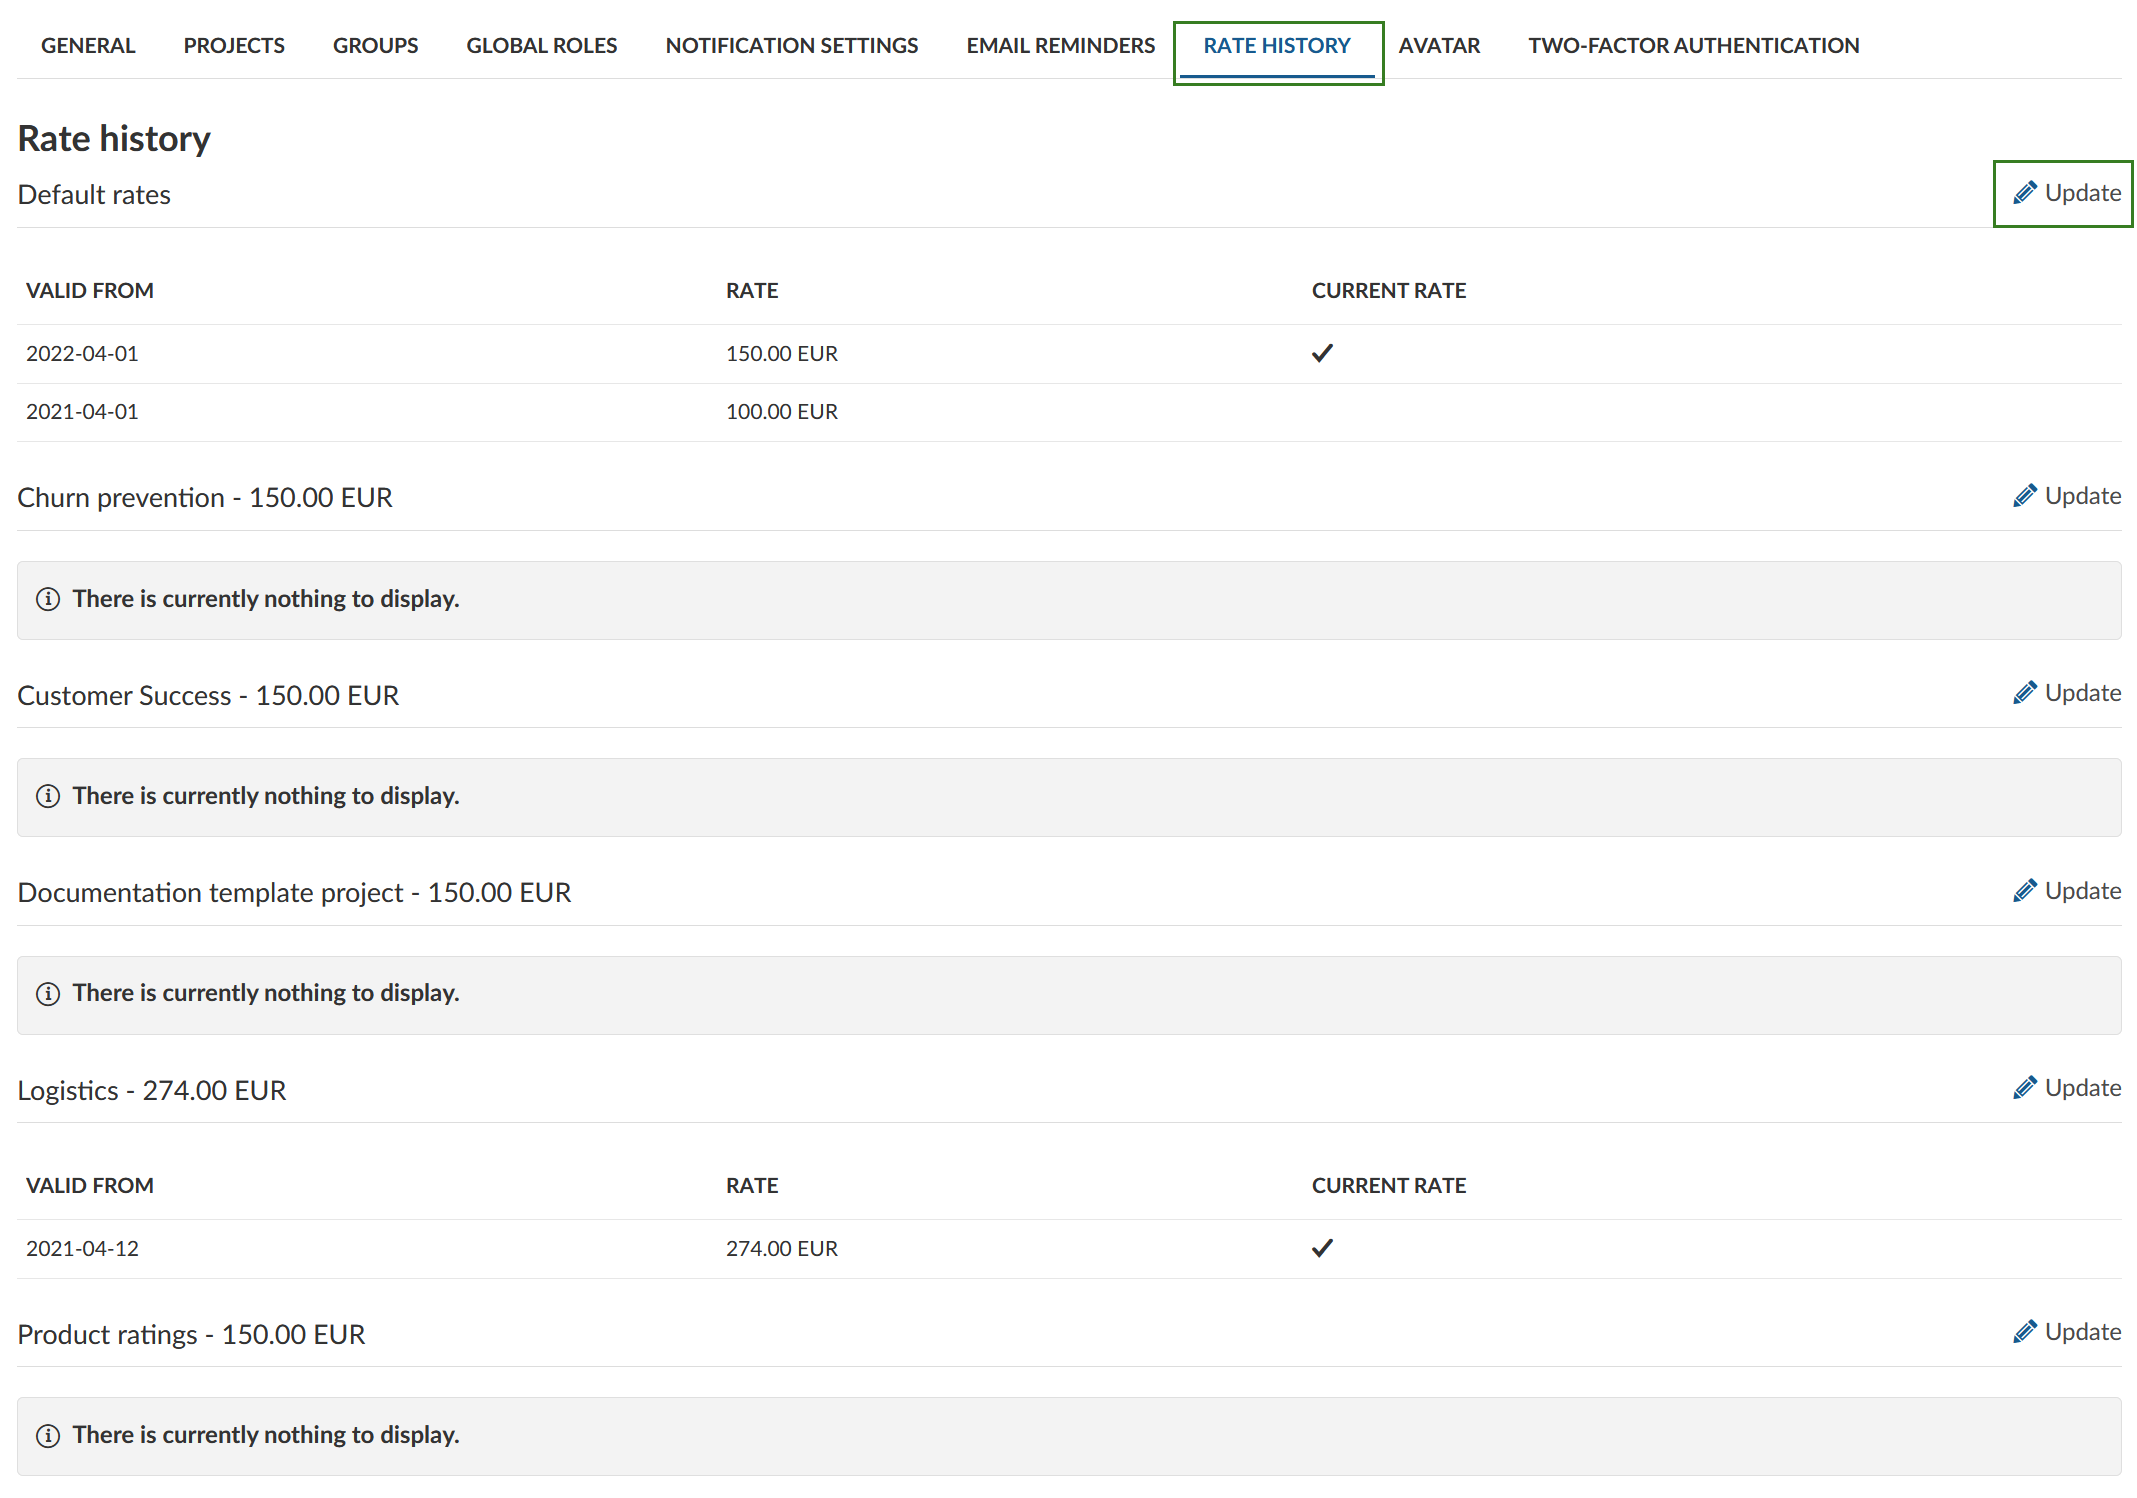
The rate history tab shows the hourly rates that have been defined for the user. The Default rate is applied to projects with no rate defined. All projects that the user is a member of are listed with the user’s rates.
The Valid from date will affect the rate used when creating a budget and when logging time.
If you want to set a different hourly rate for the user on different projects, you can overwrite the default rate with a different rate below in the respective projects.
To enter a new hourly rate, click on the Update icon next to the rate history. You can either set a default hourly rate or define a rate for a certain project.
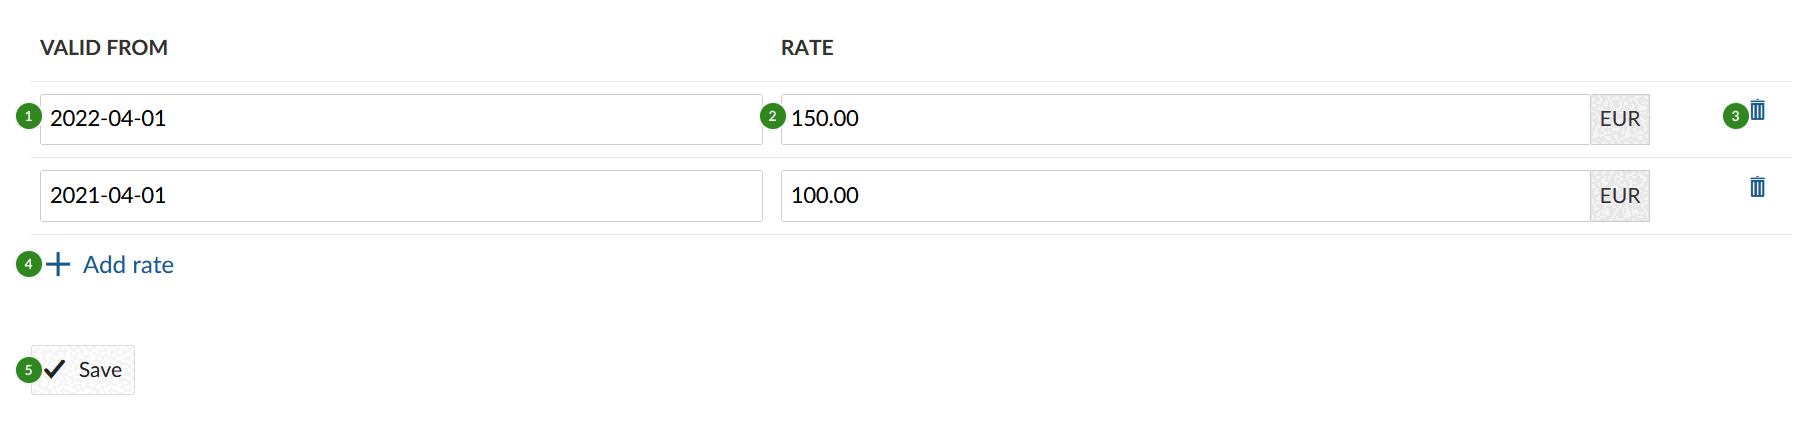
- Enter a date from which the rate is Valid from.
- Enter the (hourly) Rate. The currency can only be changed in the respective settings.
- You can delete an hourly rate.
- You can add a rate for a different time period.
- Save your changes.
Two-factor authentication (2FA)
This tab shows whether a user has activated a device for two-factor authentication in their account. You can see the devices and delete them if necessary.
Delete users
Two settings allow users to be deleted from the system:
- User accounts deletable by admins - if ticked, a Delete button is shown on the user details page.
- Users allowed to delete their accounts - if ticked, a Delete account menu entry is shown in the Account settings page.
To delete another user’s account open the user list. Click on the user name of the user which you want to delete. Click the Delete button at the top right.
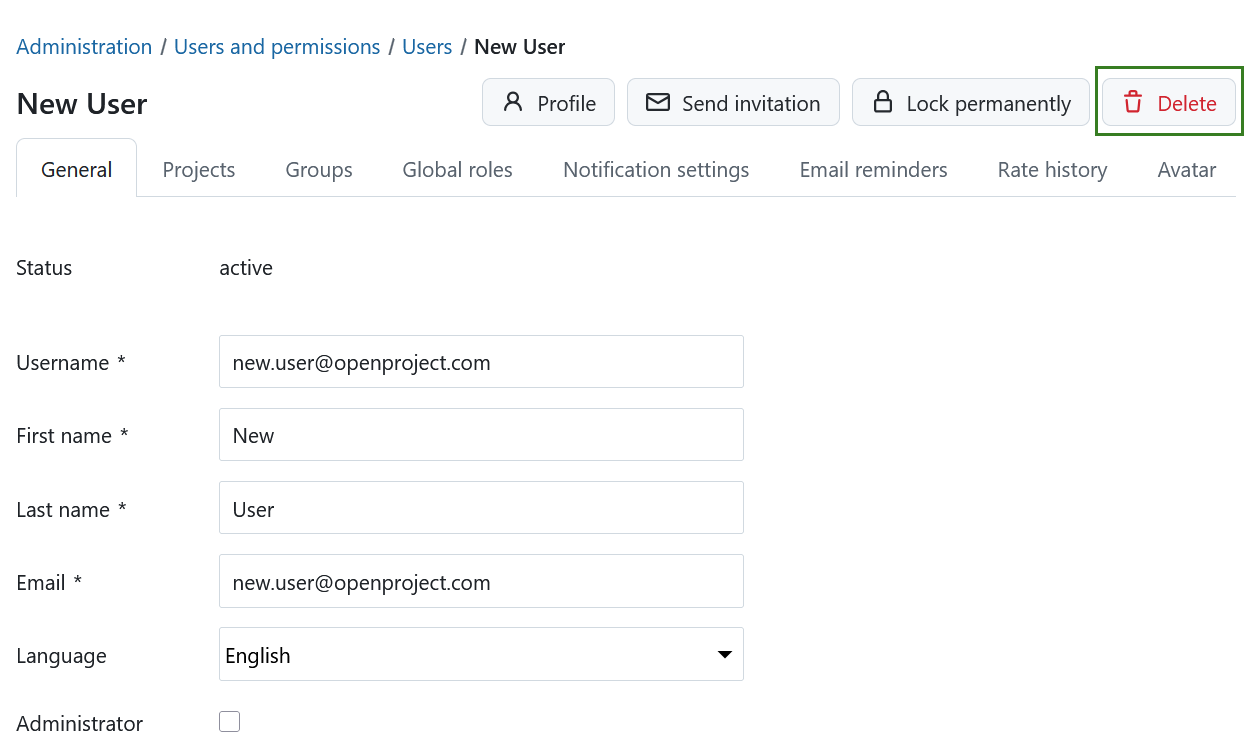
You will then be asked to confirm the deletion of the user permanently from the system. Checking the consent box will activate the Delete permanently button.
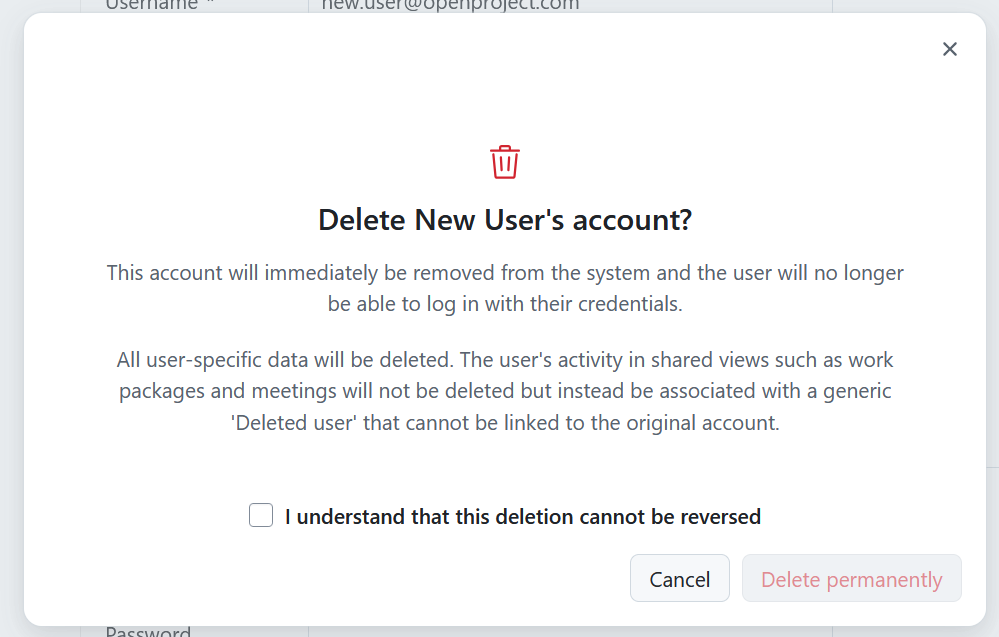
Achtung
Deleting a user account is a permanent action and cannot be reversed. The previous activities from this user will still be displayed in the system but reassigned to Deleted user. This is also true for the Time and cost and the Budget modules. Spent time will be still be visible for Deleted user inside a Work package. Time and cost reports will contain the entries with reference to Deleted user. Labor budgets that have been setup for the user are displayed under Deleted user, too. If you would like to keep track of the user’s name in connection with the mentioned activities, the spent time and the budget, you are able to keep the user’s name in the historical data by simply locking the user.