Gestionar la información del proyecto
Editar la información del proyecto
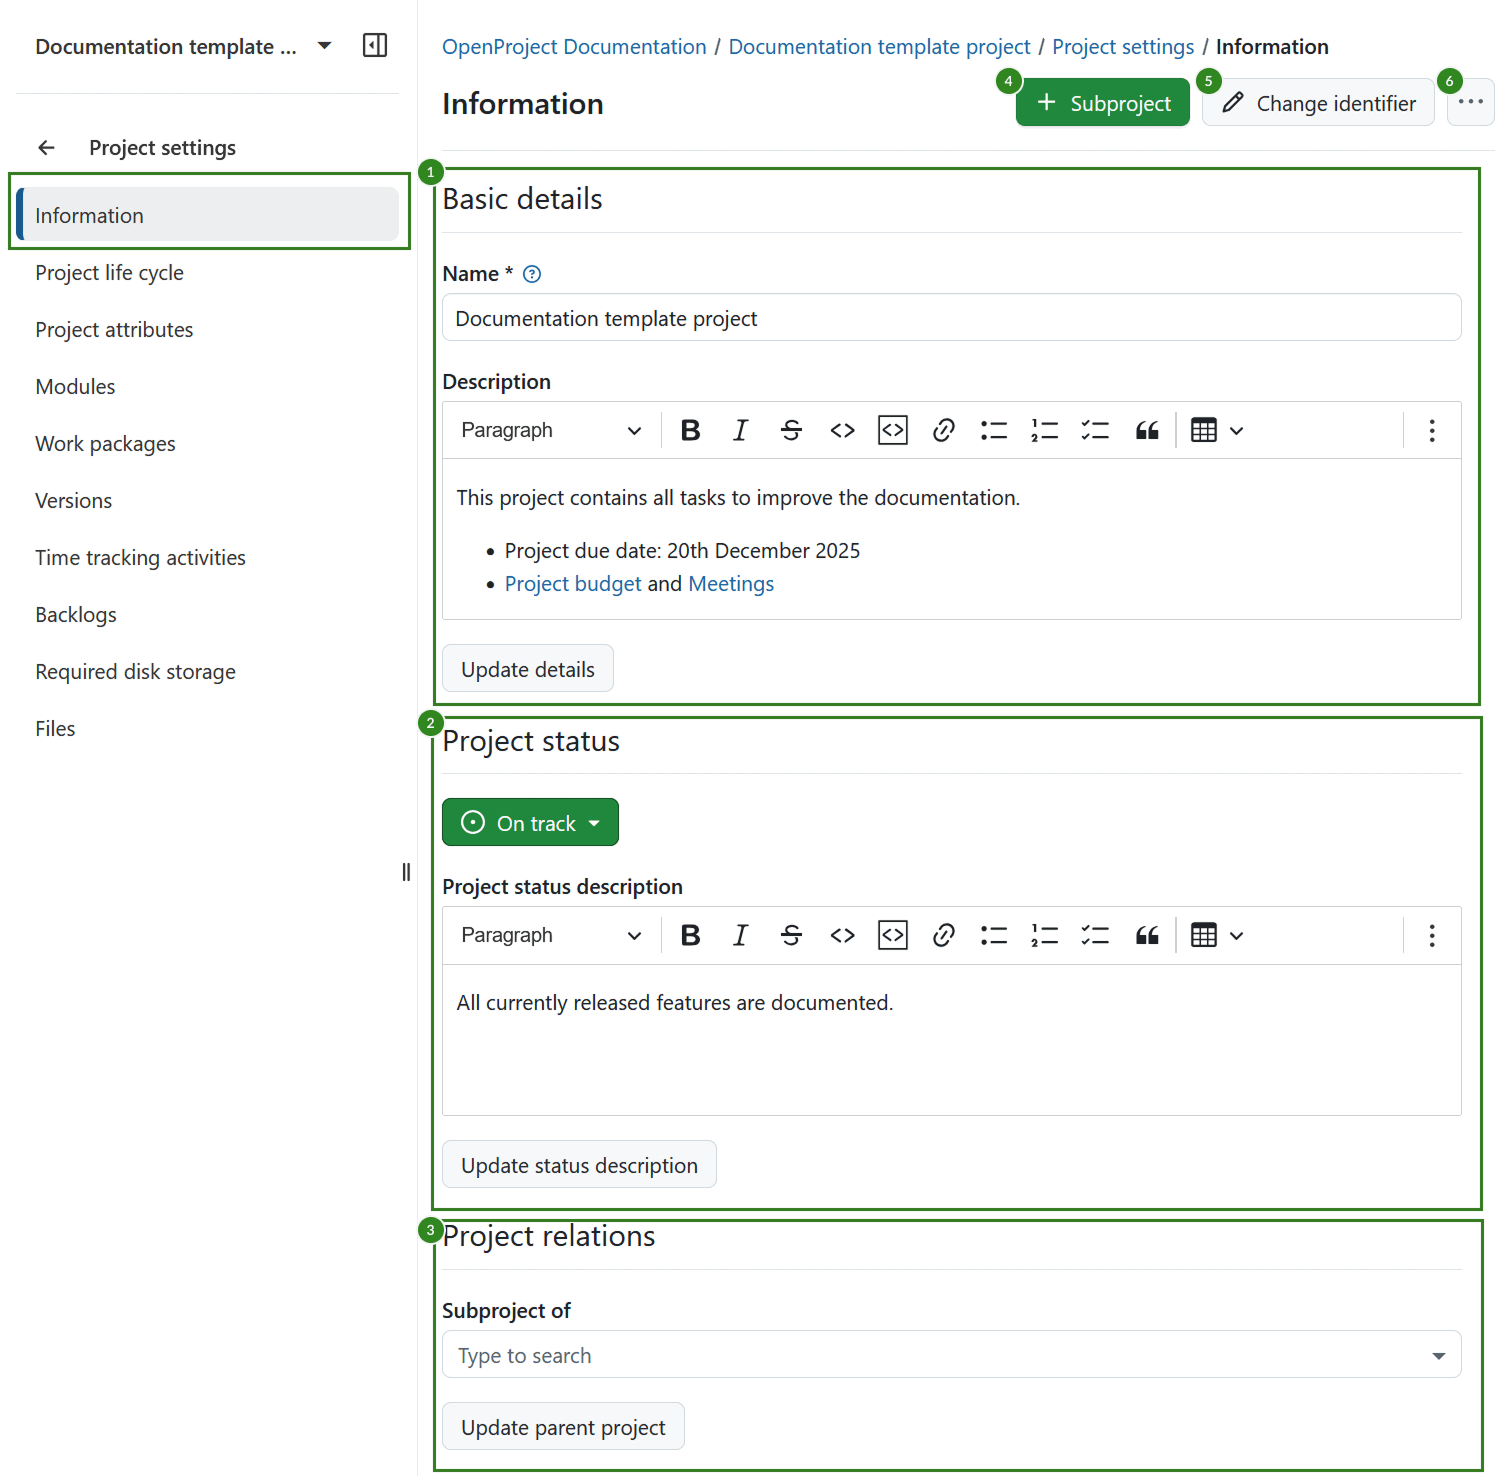
Para editar la información de su proyecto en OpenProject, seleccione un proyecto en el menú desplegable Seleccionar un proyecto. A continuación, acceda a Configuración del proyecto → Información en el menú del proyecto situado a la izquierda.
Los ajustes del proyecto se agrupan en tres secciones:
-
Detalles básicos. Aquí puede editar:
- Nombre del proyecto. El nombre aparecerá en la lista de proyectos.
- Añadir una descripción del proyecto.
-
Estado del proyecto. Aquí puede:
- Establecer un estado del proyecto. El estado del proyecto se puede mostrar en la página de inicio del proyecto. Si desea establecer opciones de estado adicionales o diferentes, puede crear y utilizar un campo personalizado del proyecto.
- Añadir una descripción del estado del proyecto. La descripción del estado se mostrará en la página inicio del proyecto.
-
Relaciones del proyecto, donde puede seleccionar el proyecto principal.
Guarde sus cambios haciendo clic en el botón Actualizar situado en la parte inferior de cada sección correspondiente.
Además, en la esquina superior derecha puede:
-
Haga clic en el icono Más (tres puntos), que abre un menú desplegable con las siguientes opciones:
Nota
Después de la versión 16.0, los atributos del proyecto se pueden editar directamente en la página de resumen del proyecto.
Crear un subproyecto
Para crear un subproyecto para un proyecto existente, vaya a Configuraciones del proyecto -> Información y haga clic en el botón verde + Subproyecto.
A continuación, siga las instrucciones para crear un nuevo proyecto.

Cambiar el identificador del proyecto
El identificador del proyecto es la parte del nombre del proyecto que aparece en la URL, por ejemplo /demo-project. Para cambiar el identificador del proyecto, vaya a Configuraciones del proyecto y haga clic en el botón Cambiar identificador en la esquina superior derecha.
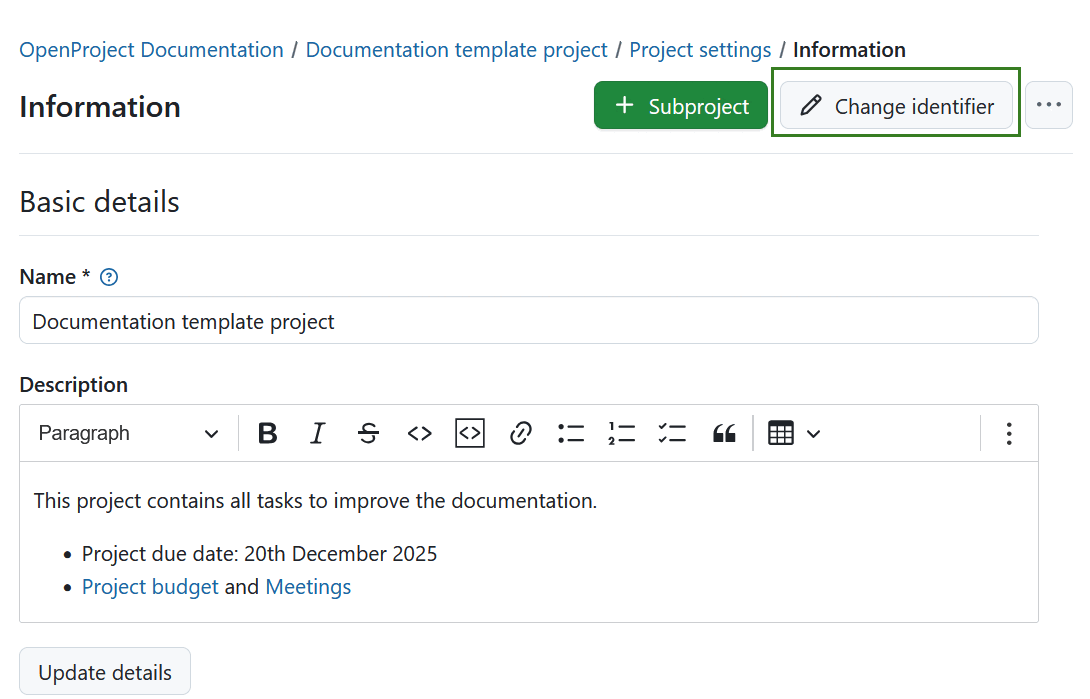
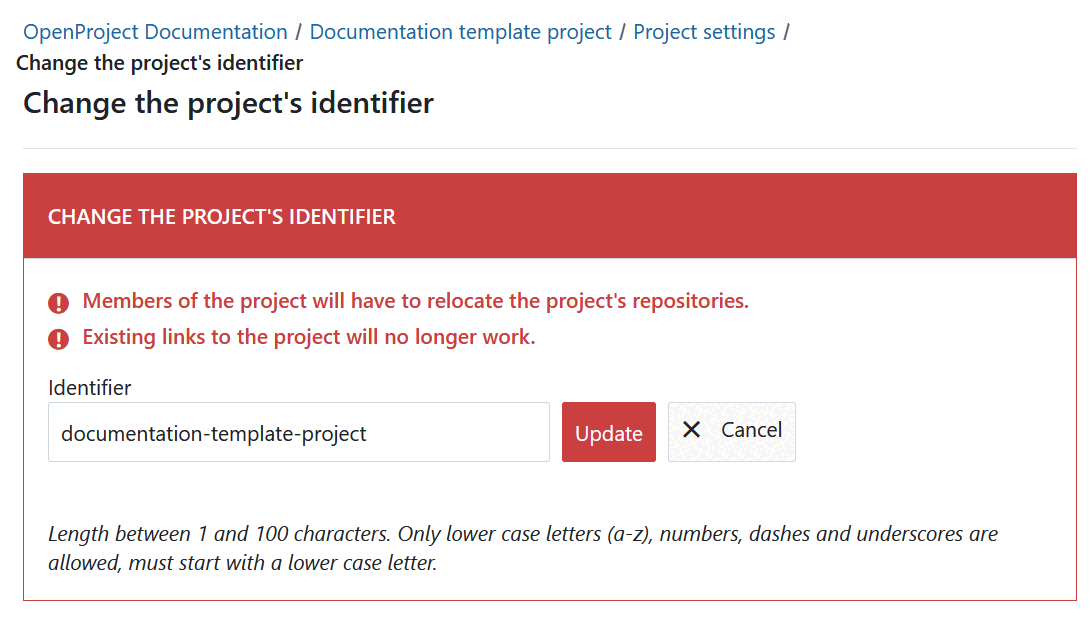
A continuación verá el formulario para cambiar y guardar el nuevo identificador del proyecto.
Alerta
Tenga en cuenta que una vez que se cambie el identificador de un proyecto, los miembros del mismo tendrán que reubicar los repositorios del proyecto.
Los enlaces a proyectos existentes ya no funcionarán.
Copiar un proyecto
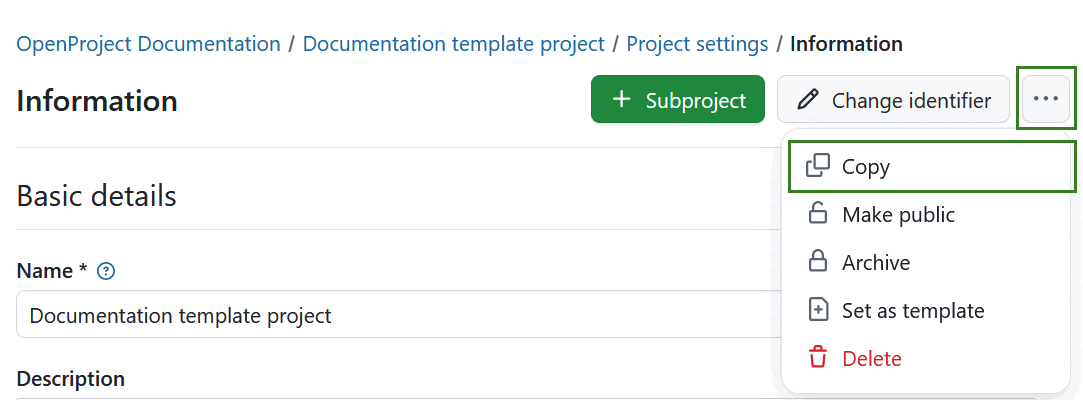
Puede copiar un proyecto existente accediendo a Configuraciones del proyecto -> Información del proyecto. Haga clic en el icono Más (tres puntos) en la esquina superior derecha y seleccione Copiar en el menú desplegable.
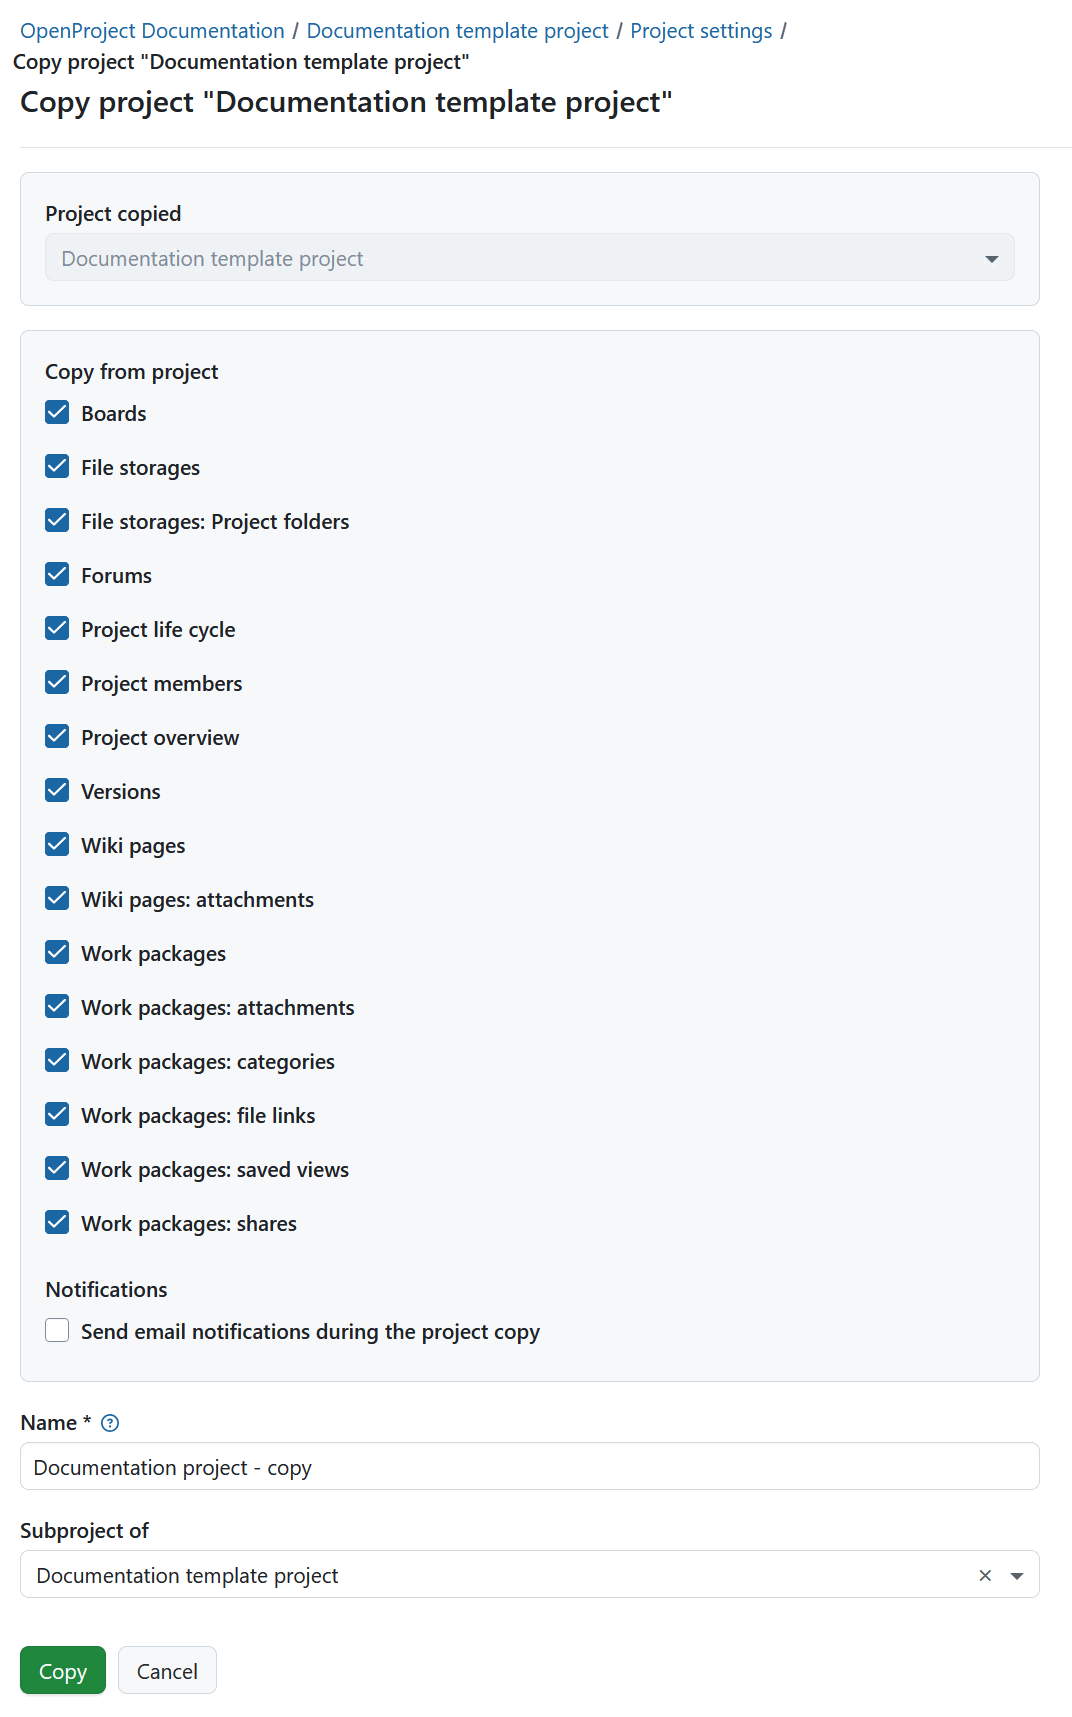
En la sección Copiar desde el proyecto puede seleccionar qué datos y configuraciones adicionales del proyecto, como versiones, categorías de paquetes de trabajo, archivos adjuntos, ciclo de vida del proyecto y miembros del proyecto, deben copiarse también. También puede copiar los tableros existentes (aparte del tablero del Subproyecto) y los paneles de control Resumen del proyecto junto con su proyecto.
Seleccione qué módulos y configuraciones desea copiar y si desea o no notificar a los usuarios por correo electrónico durante la copia.
Importante
Los presupuestos no pueden copiarse, por lo que deben eliminarse previamente de la tabla de paquetes de trabajo. Como alternativa, puede eliminarlos en el módulo Presupuestos y, por tanto, eliminarlos también de los paquetes de trabajo.
Nota
Las opciones de Almacenes de archivos solo se aplican si el proyecto de plantilla tenía activado un almacén de archivos con carpetas gestionadas automáticamente.
Si selecciona la opción Almacenamientos de archivos: Carpetas de proyecto, tanto el almacenamiento como las carpetas de almacenamiento se copian en el nuevo proyecto si se seleccionaron carpetas de proyecto gestionadas automáticamente para el almacenamiento de archivos original. Para los almacenamientos con la configuración de carpetas de proyecto gestionadas manualmente, el almacenamiento copiado hará referencia a la misma carpeta que el proyecto original.
Si deselecciona la opción Almacenamientos de archivos: Carpetas de proyecto, se copiará el almacenamiento, pero no se creará ninguna carpeta específica.
Si deselecciona la opción Almacenamientos de archivos, no se copiará ningún almacenamiento al nuevo proyecto.
Ponga un nombre al nuevo proyecto y seleccione un proyecto principal si fuera necesario.
Haga clic en el botón Copiar para continuar.
Hacer público un proyecto
Si desea establecer un proyecto como público, vaya a Configuraciones del proyecto -> Información del proyecto. Haga clic en el icono Más (tres puntos) en la esquina superior derecha y seleccione Hacer público.
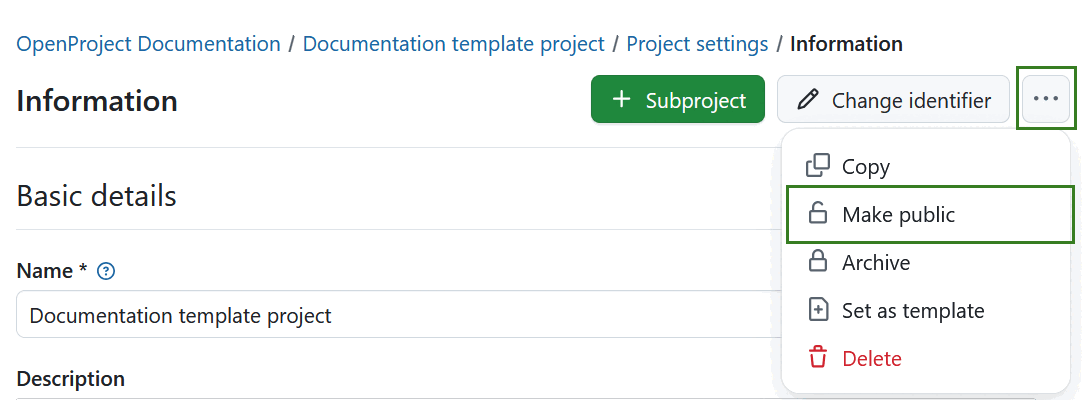
Configurar un proyecto como público lo hará accesible a todas las personas dentro de su instancia de OpenProject.
Importante
Si su instancia es accesible sin autenticación esta opción hará que el proyecto sea visible para el público en general fuera de su instancia.
Archivar un proyecto
Para archivar un proyecto, vaya a Configuraciones del proyecto -> Información del proyecto. Haga clic en el icono Más (tres puntos) en la esquina superior derecha y seleccione Archivar proyecto.
[NOTA] Esta opción está siempre disponible para los administradores de instancias y proyectos. También puede activarse para roles específicos habilitando Archive project permission para ese rol a través de la página Roles y permisos en las configuraciones del administrador.
Archivar un proyecto en las configuraciones del proyecto en OpenProject](openproject_user_guide_project_settings_information_archive_project.png)
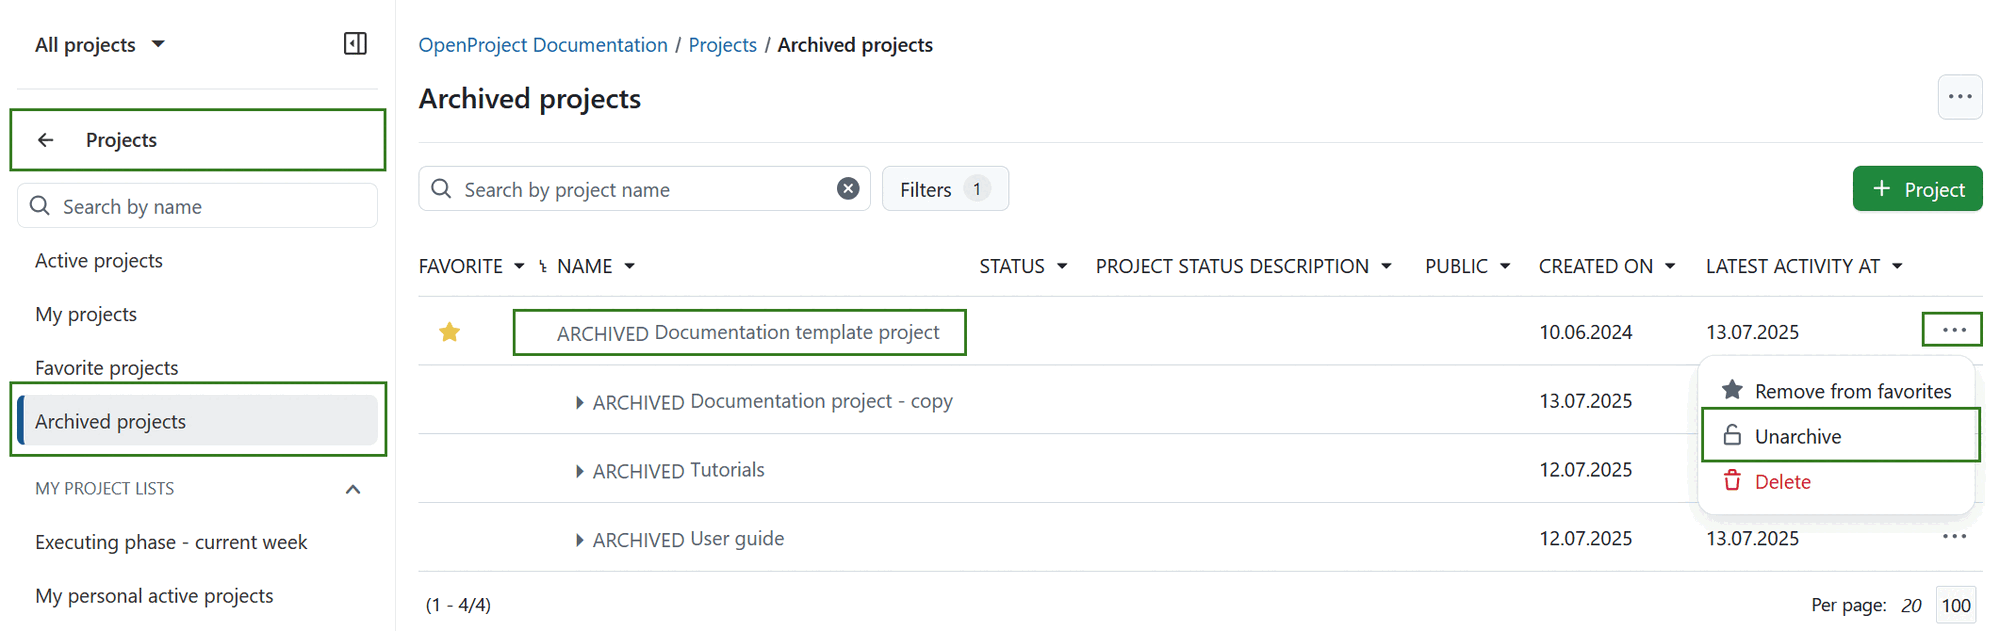
Una vez archivado, un proyecto ya no puede seleccionarse en la lista de proyectos accesible a través de la navegación del encabezado. Sigue siendo visible en el panel de control Listas de proyectos si establece el filtro «Activo» como «desactivado» (mueva el control deslizante hacia la izquierda). También puede desarchivar el proyecto allí, utilizando los tres puntos situados a la derecha de una fila y haciendo clic en Desarchivar.
También puede archivar un proyecto directamente en la página de resumen del proyecto.
Cambiar la jerarquía del proyecto
Para cambiar la jerarquía del proyecto, vaya a Configuraciones del proyecto -> Información y cambie el Subproyecto de en la sección Relaciones del proyecto.

Eliminar un proyecto
Si desea eliminar un proyecto, vaya a Configuraciones del proyecto. Pulse el botón Borrar proyecto en la parte superior derecha de la página.
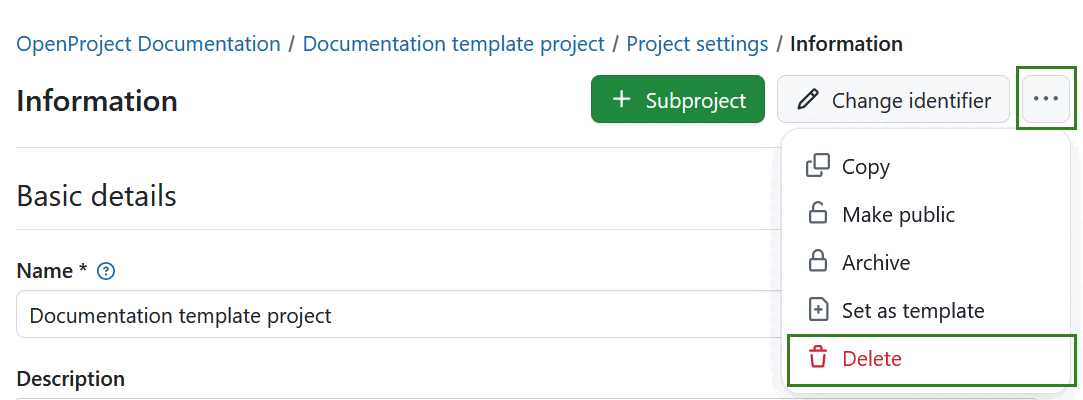
También puede eliminar un proyecto a través de la lista de resúmenes de proyectos.
Nota
La eliminación de proyectos solo está disponible para los administradores del sistema.