Manage organization
An Organization represents your company’s organizational structure in OpenProject. It consists of departments and sub-departments, which can be arranged hierarchically to reflect reporting lines and team structures. Users can be assigned to departments to support resource planning and reporting.
To manage your organization, navigate to Administration → Users and permissions → Organization.
The Organization page lets you create and maintain your company’s organizational hierarchy.
Tip
You can also import an existing organizational structure through LDAP department synchronization.
Organization overview
The page is divided into two parts:
- My organization (hierarchy view) on the left.
- My organization (table view) on the right.
The hierarchy view displays your departments as a tree structure. Each department can contain multiple sub-departments, allowing you to build your organizational hierarchy.
Selecting a department in the hierarchy updates the table view to display its direct sub-departments and members. This lets you navigate your organizational structure in the hierarchy while viewing and managing the contents of the selected department in the table.
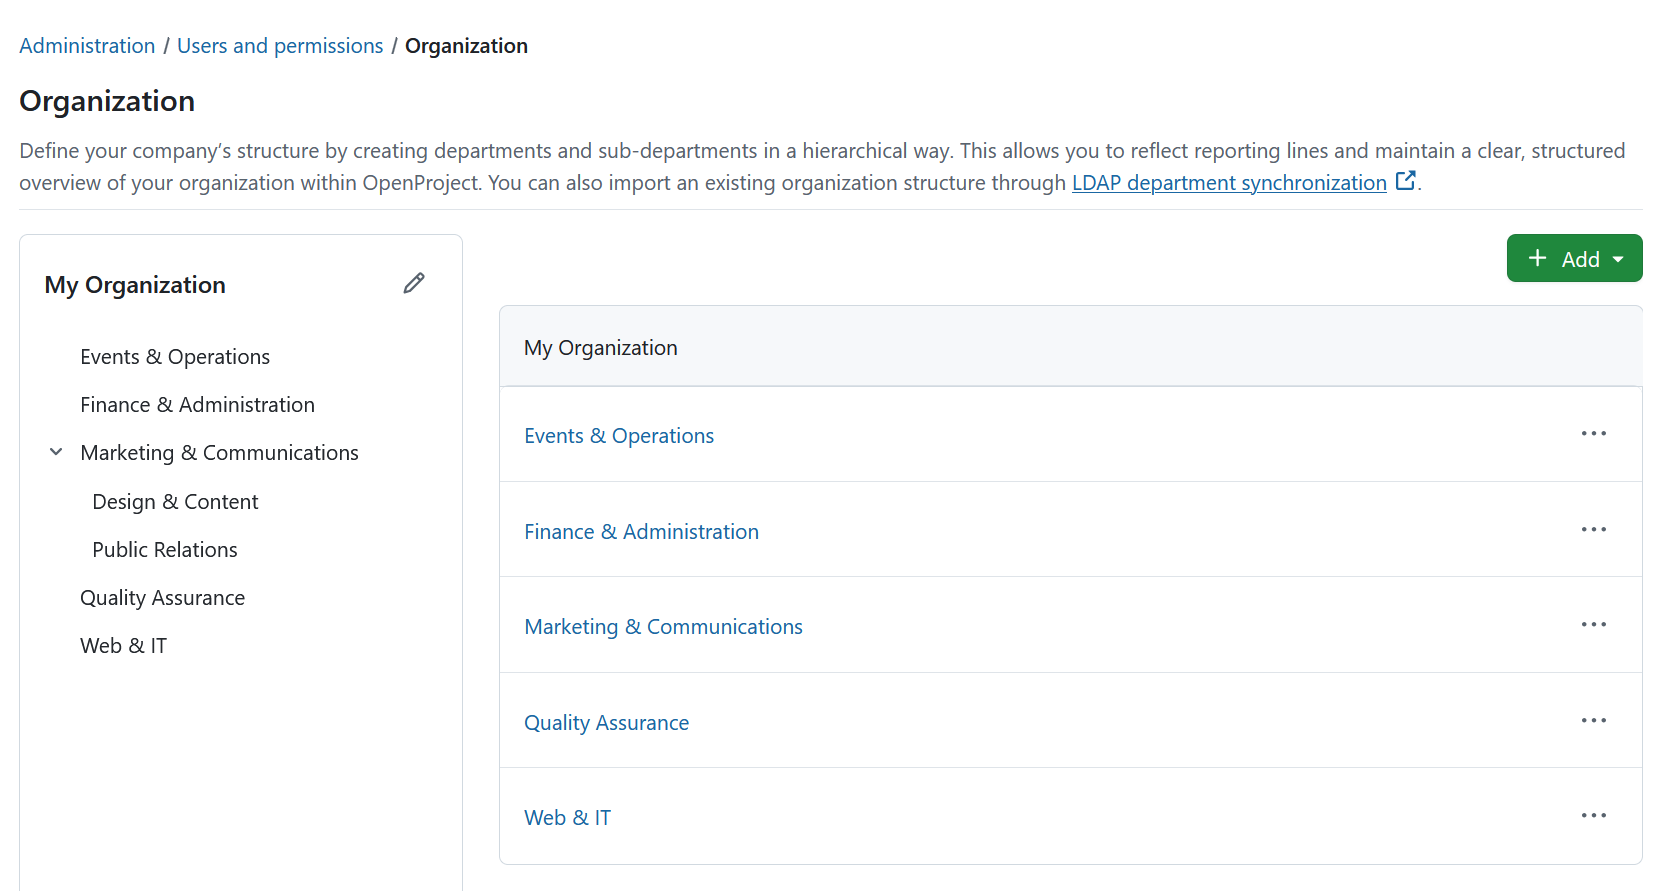
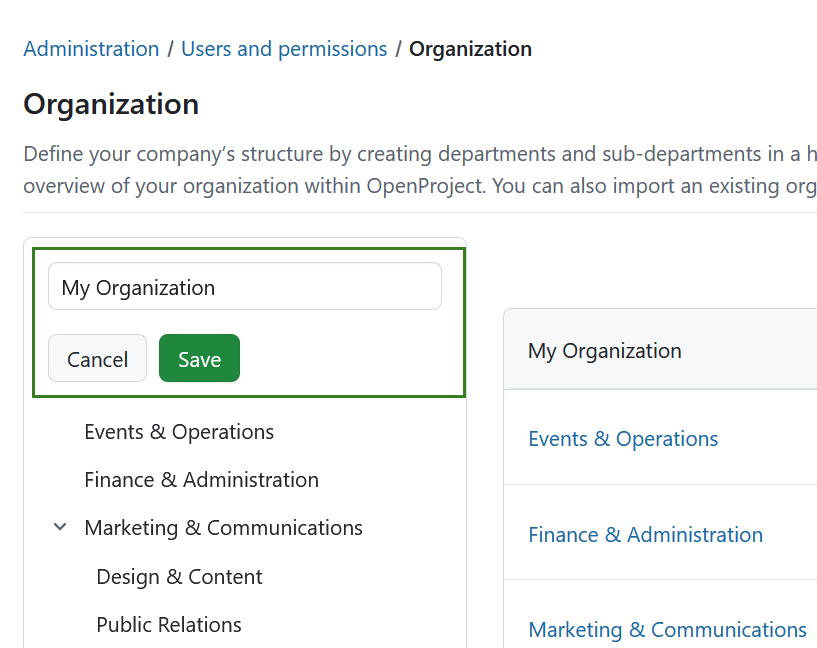
To rename your organization, click the Edit icon next to My organization on the left.
Create a new department
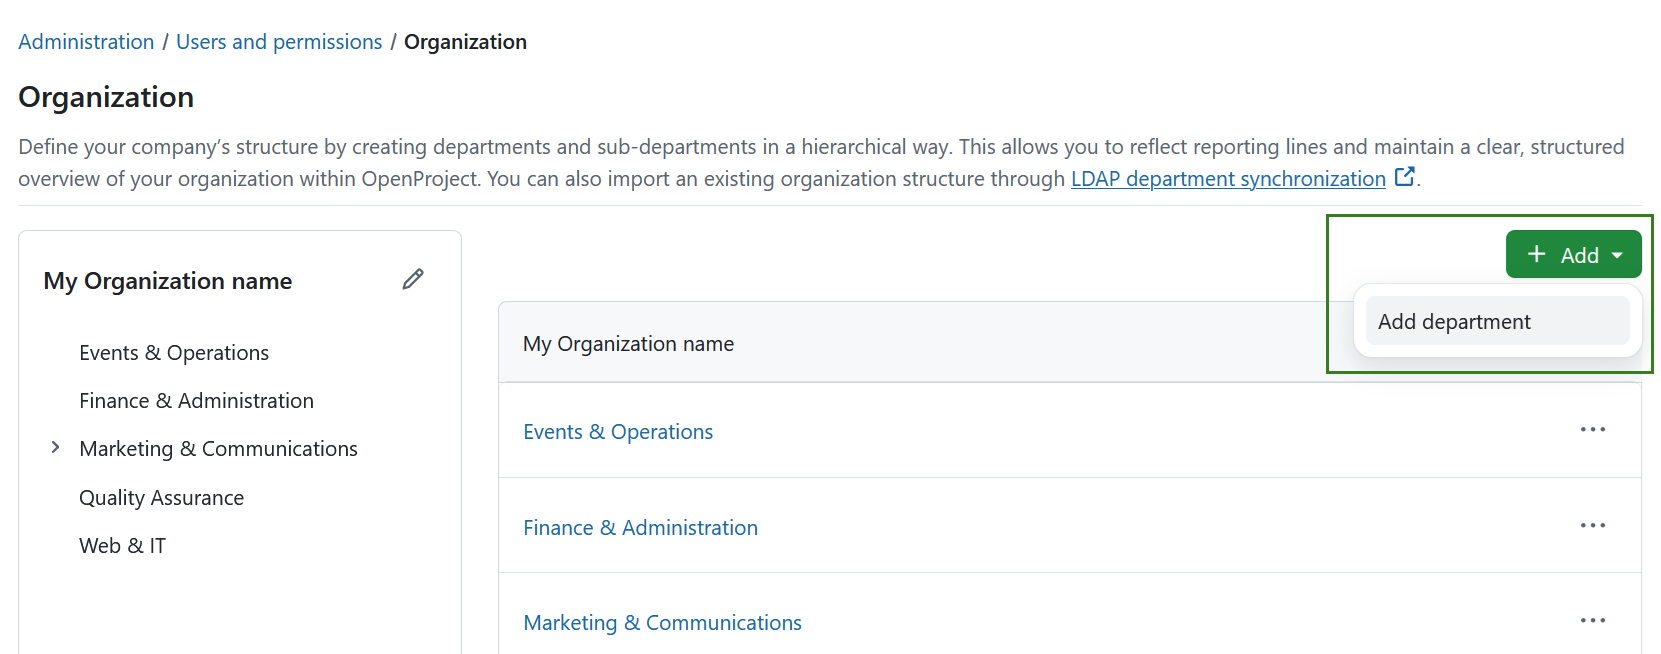
To create a department, click the + Add button and select Add department.
A new editable row appears in the table.
Enter the department name and click Add to create the department or Cancel to discard your changes.
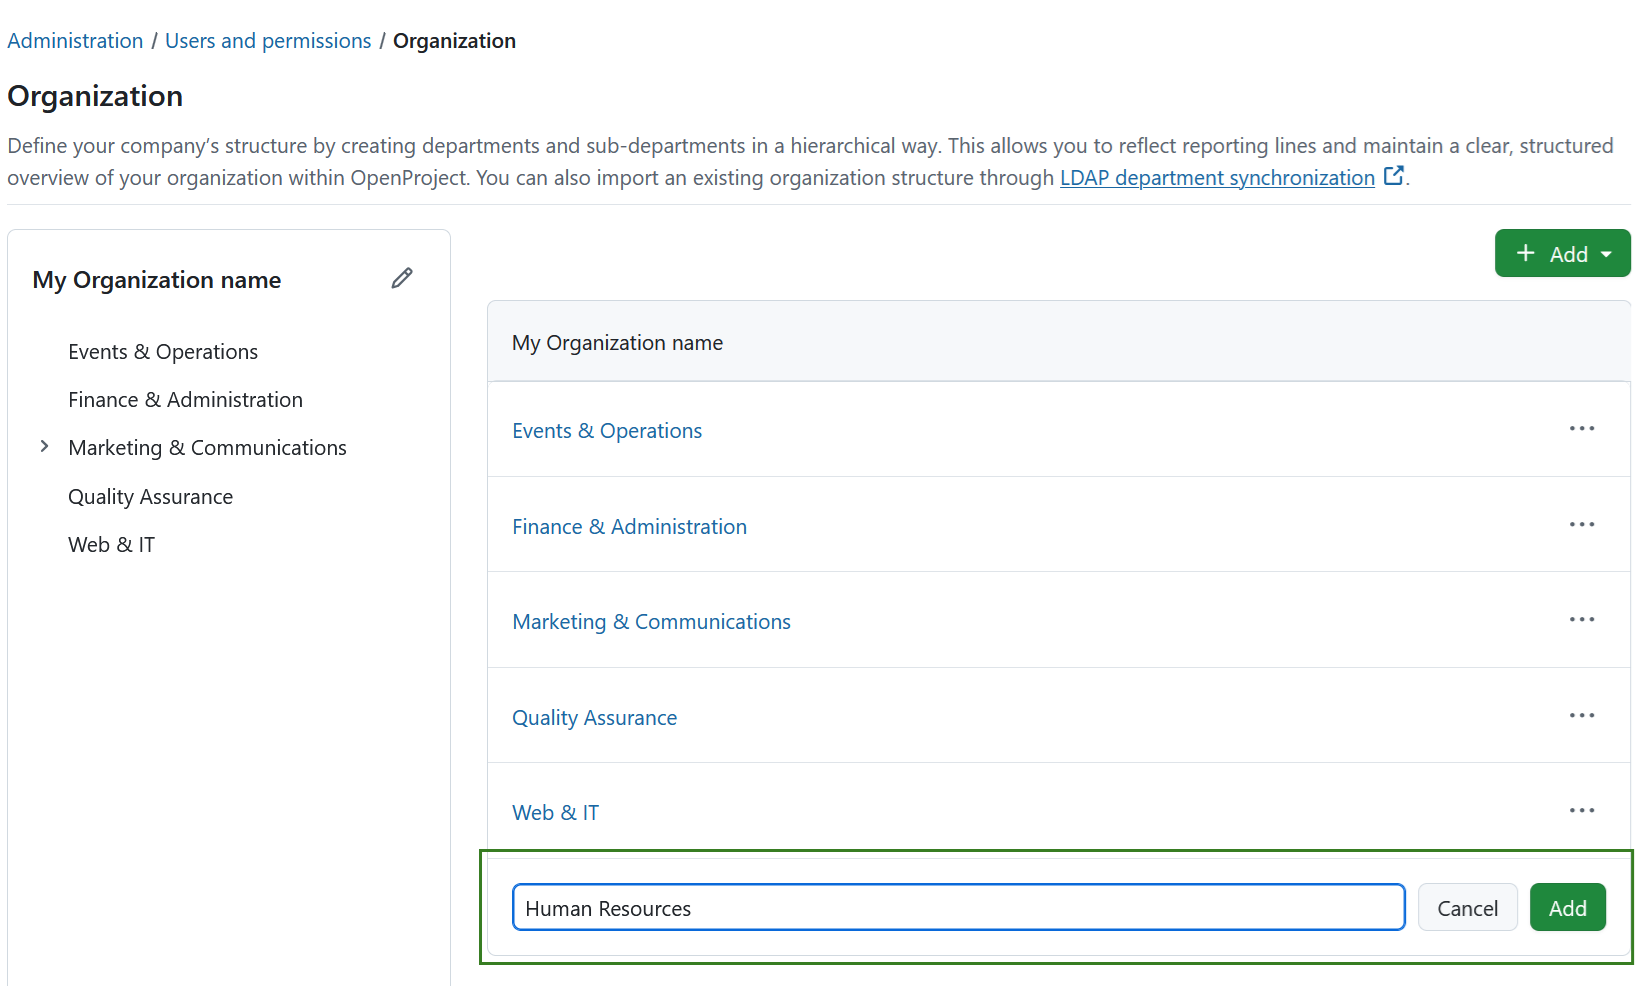
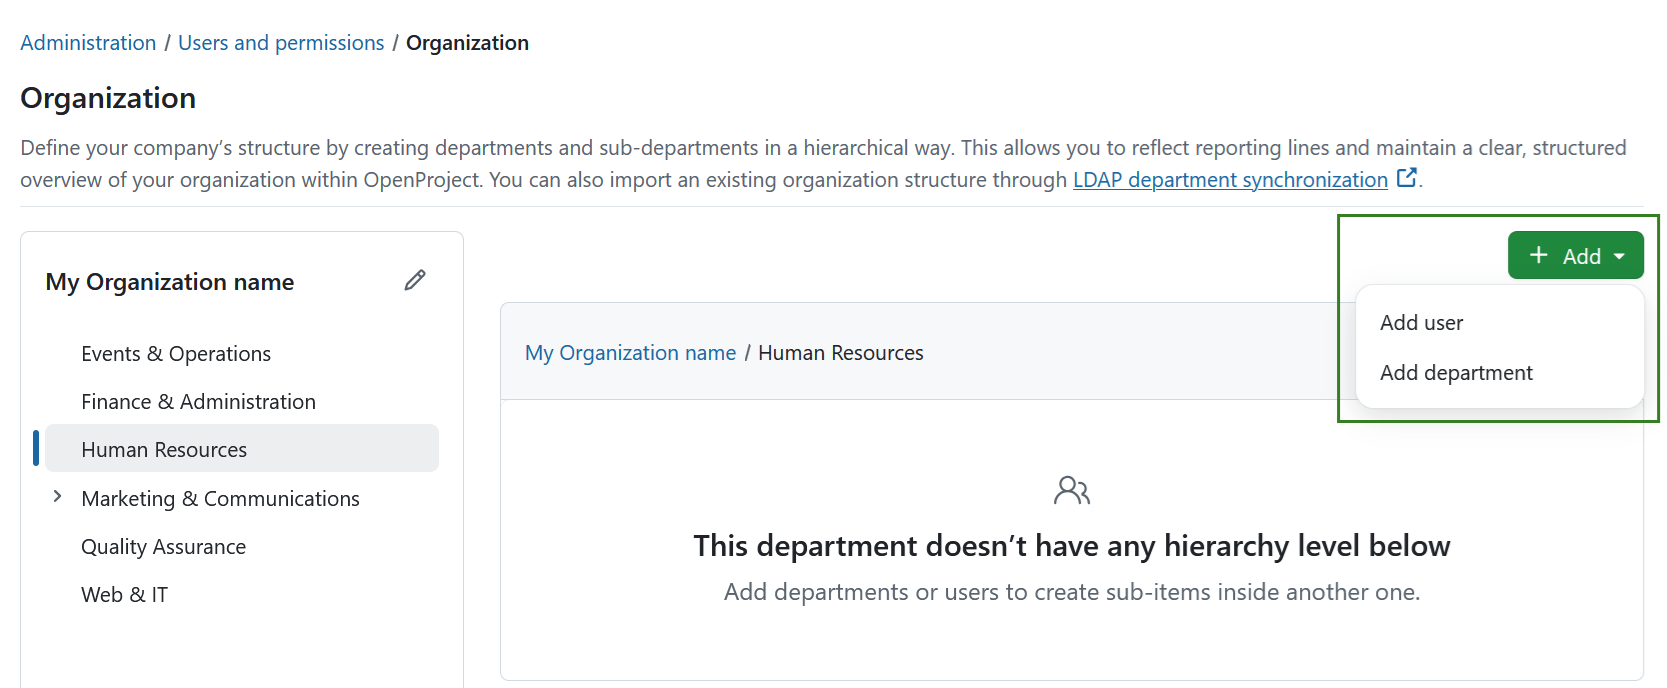
The new department is added to both the hierarchy and table views and opens automatically.
Initially, the department is empty. To start building the department, click the + Add button and select one of the following options:
- Add department to create a sub-department.
- Add user to assign users to the department.
Manage departments
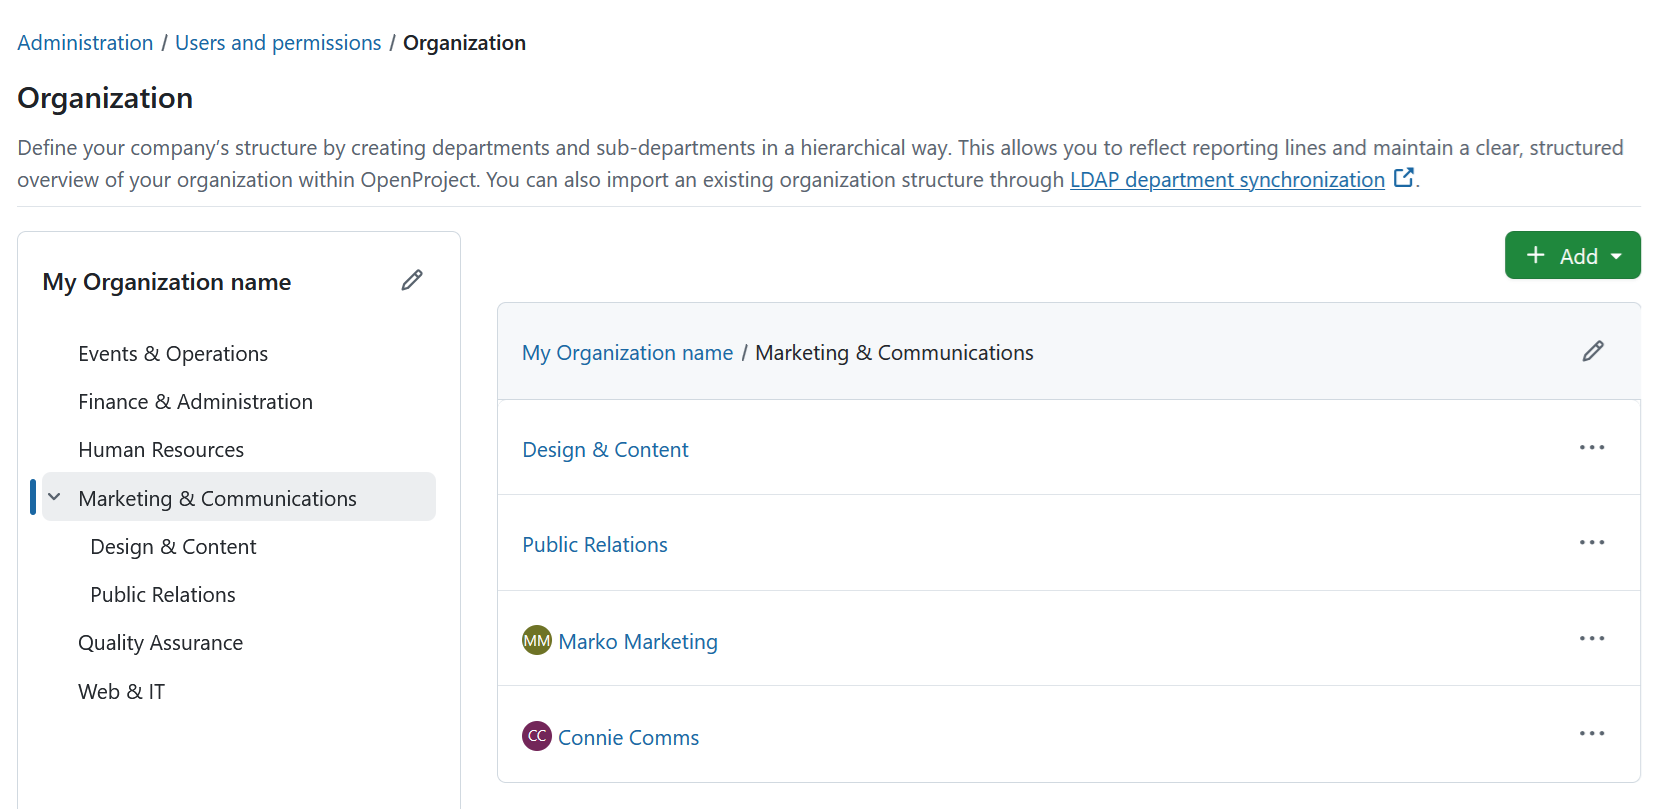
Click a department in either the hierarchy or the table to open its details.
The department page displays:
- Sub-departments (if any exist)
- Assigned users
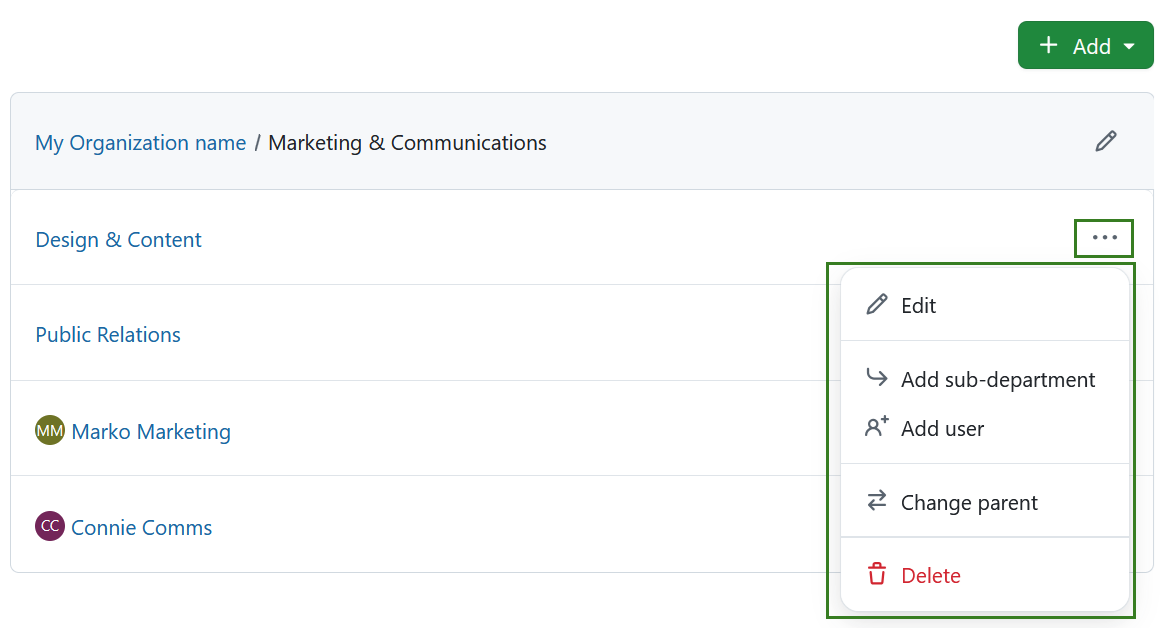
Click the More (⋯) menu to access the following actions:
- Edit
- Add sub-department
- Add user
- Change parent
- Delete
You can rename a department in two ways:
- Click the Edit icon next to the department name to open the Edit department page.
- Select Edit from the More (⋯) menu.
For more information about editing departments, see the Department detailed page.
Add a sub-department
To create a sub-department, open the More (⋯) menu for a department and select Add sub-department.
Enter the department name and click Add.
The new department is created beneath the selected parent department.
Assign users to a department
To assign users to a department, open the More (⋯) menu and select Add user.
Select a user from the dropdown list and confirm your selection.
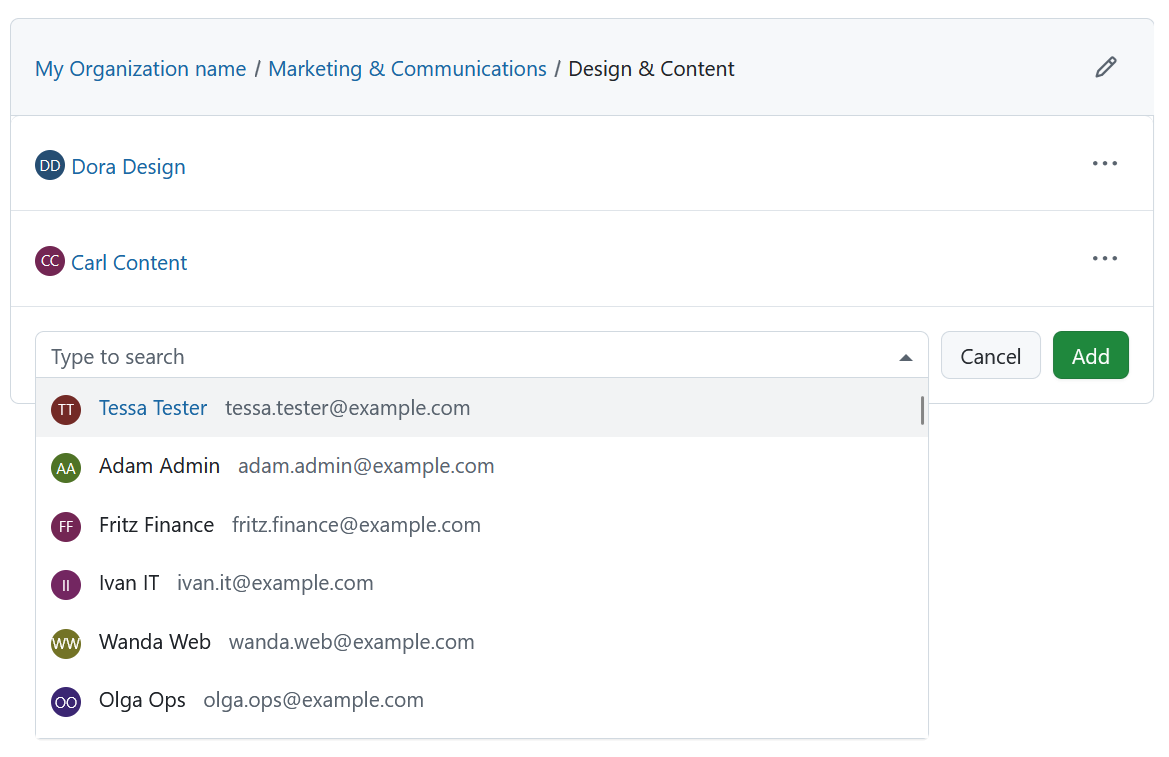
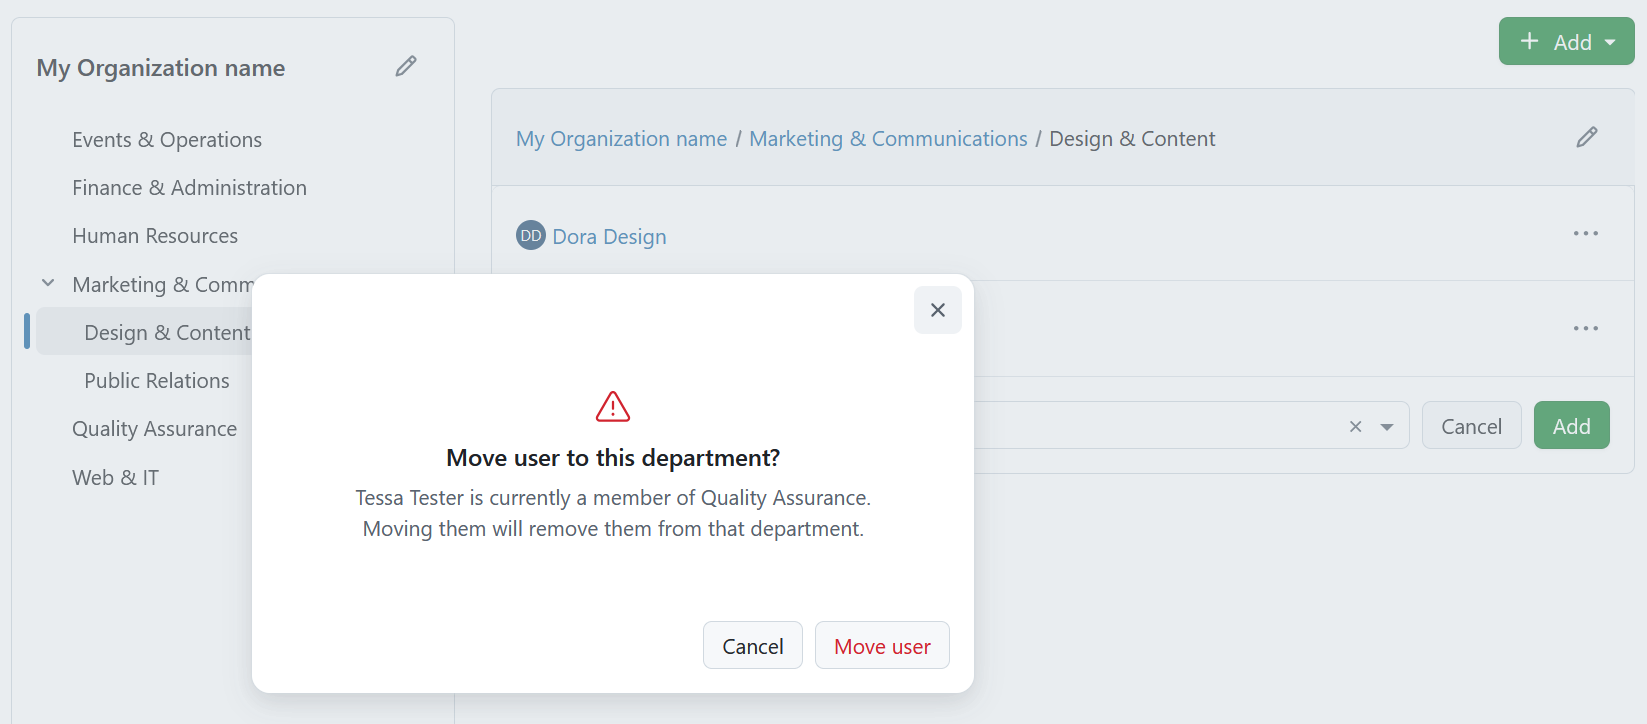
A user can only belong to one department. If a user you are trying to add is already part of another department, you will be asked to confirm the move.
Change the parent department
You can change the parent department in two ways:
- From the Organization overview
Open the More (⋯) menu for a department and select Change parent.
The Change parent dialog opens.
Select the new parent department and confirm the change.
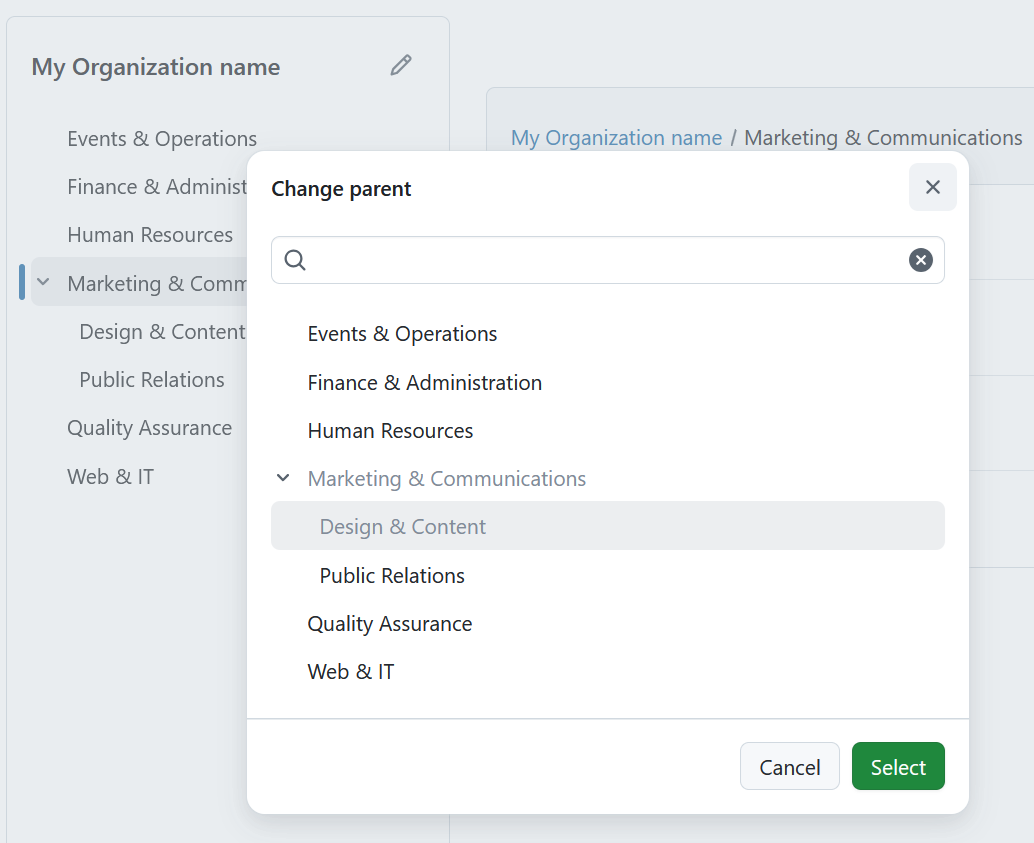
The department is immediately moved to its new position in the hierarchy.
- From the Department detailed page
Open the Department detailed page and select a different department in the Parent department field.
Save your changes to update the hierarchy.
Remove users from a department
Open a department to display its assigned users.
For the user you want to remove, open the More (⋯) menu and select Remove user.
The user is removed from the department but remains an active user in OpenProject.
Delete a department
You can delete a department in two ways:
- Open the More (⋯) menu and select Delete.
- Open the Edit department page and click Delete.
Depending on your organization structure, you may first need to move or remove any sub-departments or assigned users before the department can be deleted.
Department detailed page
The Department detailed view allows you to edit department settings, assign projects and global roles, and view the department profile.
To open the page, click the Edit icon next to a department name or select Edit from the More (⋯) menu.
The page contains three tabs:
- General
- Projects
- Global roles
General
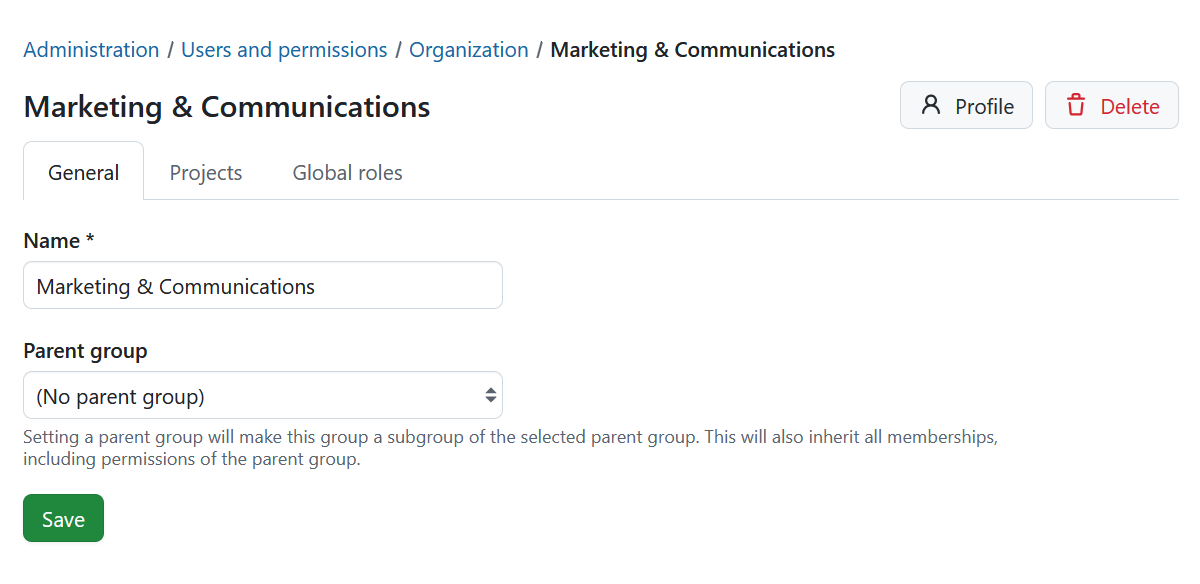
The General tab lets you edit the department’s basic information.
You can update:
- Name
- Parent department
To make the department a sub-department of another department, select a parent department.
Note
Setting a parent department will make this department a sub-department of the selected parent department.
Click Save to apply your changes.
Projects
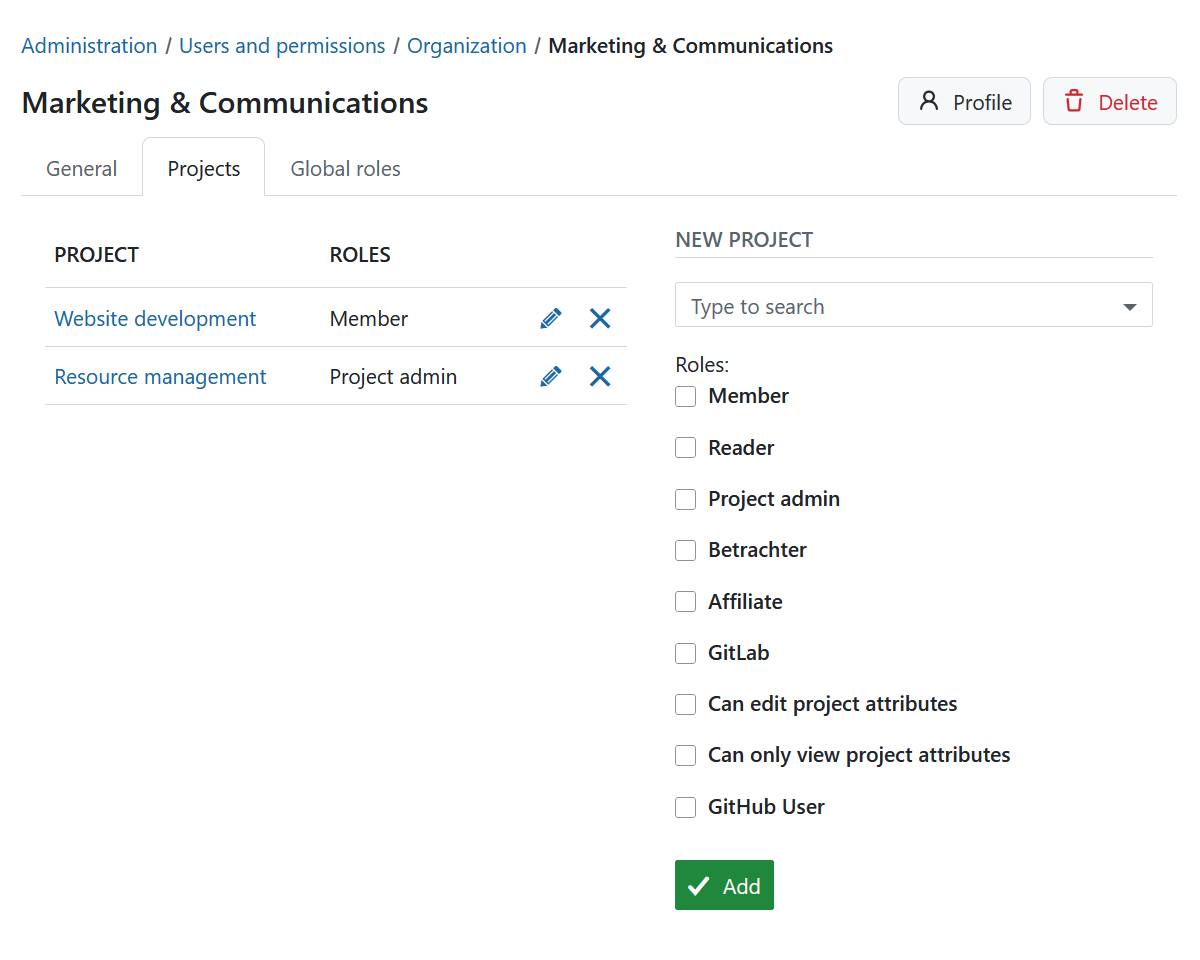
The Projects tab lets you assign the department to projects.
Click + Project to add the department to a project.
For each project, assign one or more project roles. Departments inherit the same project roles that are available for users and groups.
Managing project memberships for departments works the same way as for groups. For more information, see the Groups documentation.
Global roles
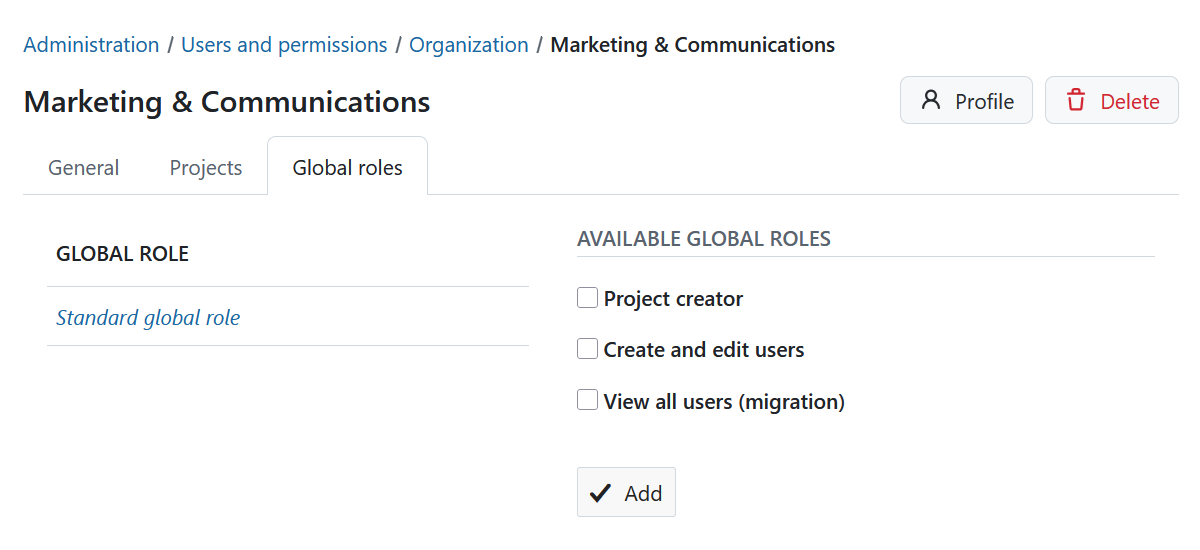
The Global roles tab lets you assign global roles to the department.
Click + Global role and select one or more available global roles.
Managing global roles for departments works the same way as for groups.
Department profile
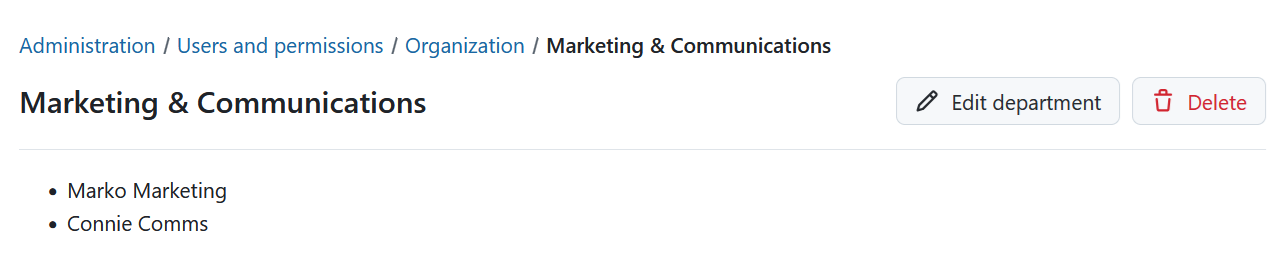
Click the Profile button in the upper-right corner of the Edit department page to open the department profile.
The profile page shows the users assigned to that department.
From the profile page, you can:
- Click Edit department to modify the department.
- Click Delete to remove the department.