Documents module settings
This page describes the available settings for the Documents module in the OpenProject administration.
Document types
Note
Prior to OpenProject 17.0 document types were called categories and were configured under Administration → Files → Categories.
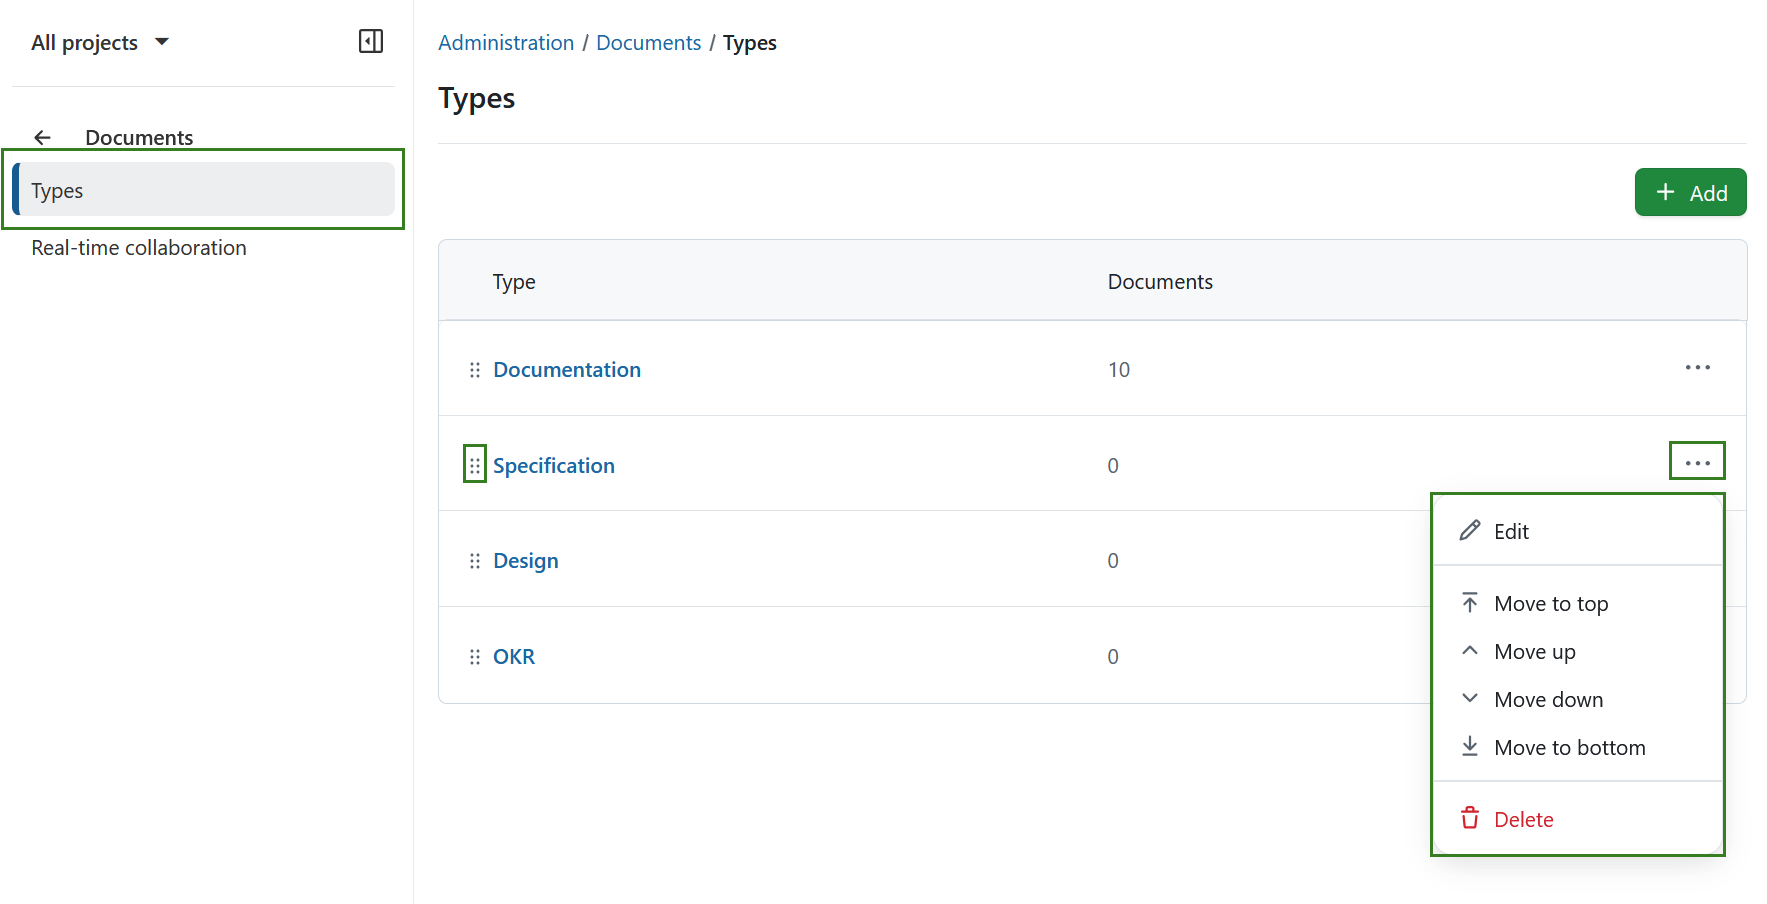
To create or edit document categories in OpenProject, navigate to Administration → Documents. Here, you will automatically see all existing document types:
- The column Type lists all existing document type names
- The column Documents shows the number of documents of this specific type
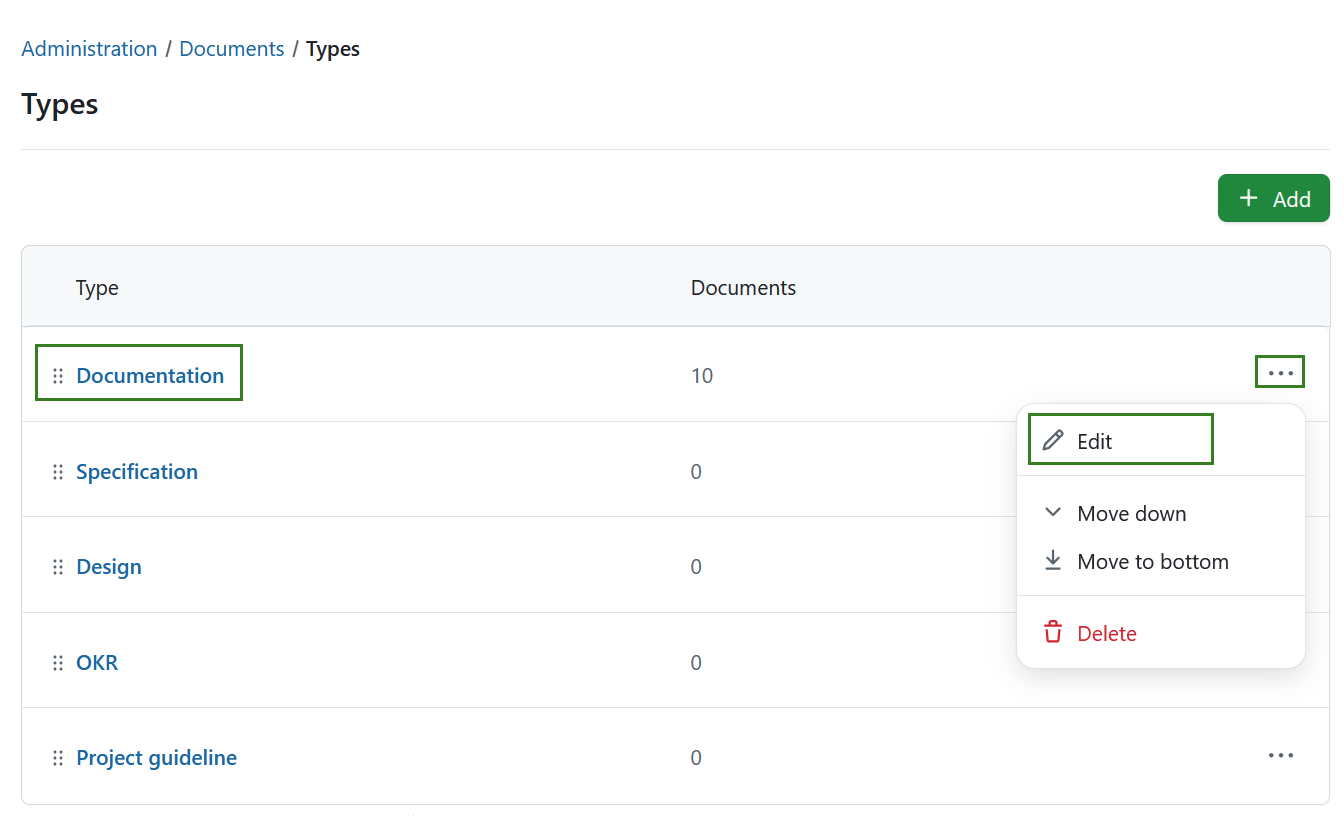
You can adjust the items within the list by using the options behind the More (three dots) menu on the right side. You can also rearrange the order by using the drag-and-drop handle on the left.
Create new document type
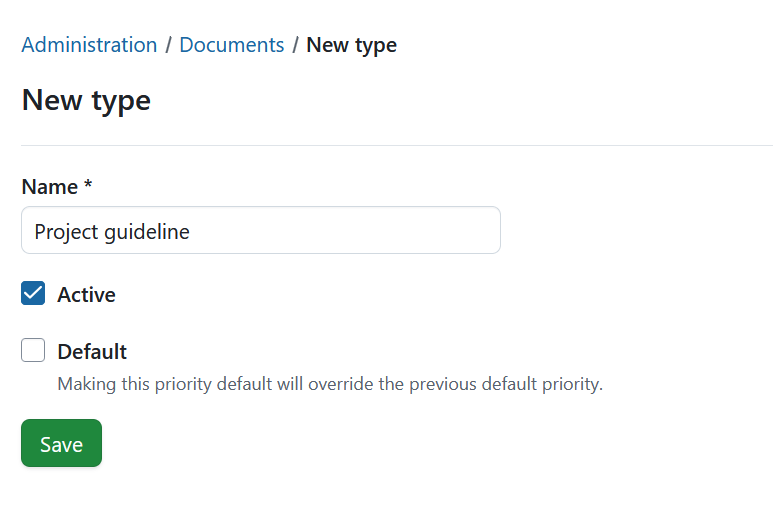
To create a new document type, select the + Add button in the top right corner.
You can then name the new type, and activate it. You can optionally set this type to be the Default value.
Note
Making this type default will override the previous default priority.
Press the Save button to save your changes.
Edit a document type
To edit an existing type, either click on the name directly or select the Edit option from the More (three dots) menu on the right end of the row.
Delete a document type
To remove a document type, open the More (three dots) menu on the right end of the row and click on the delete icon.
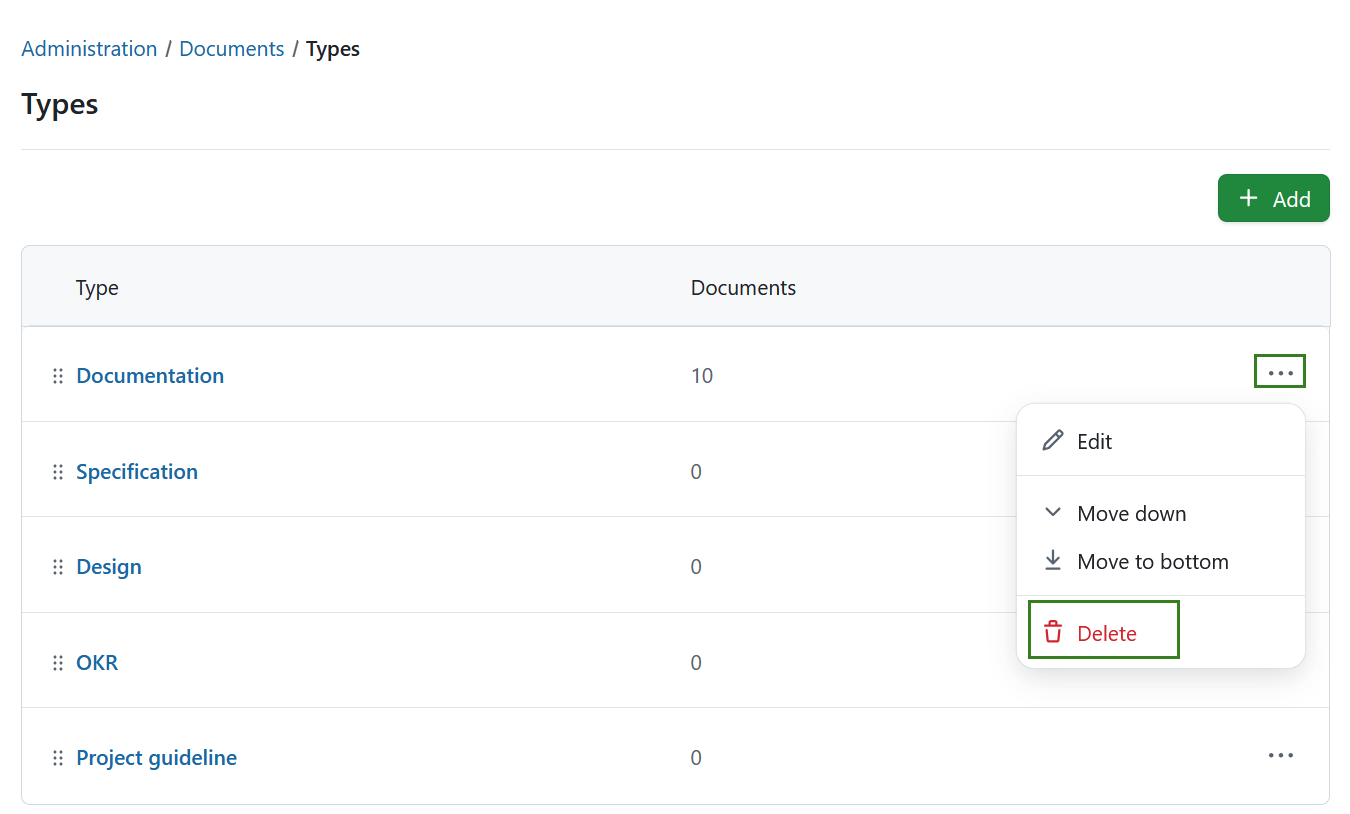
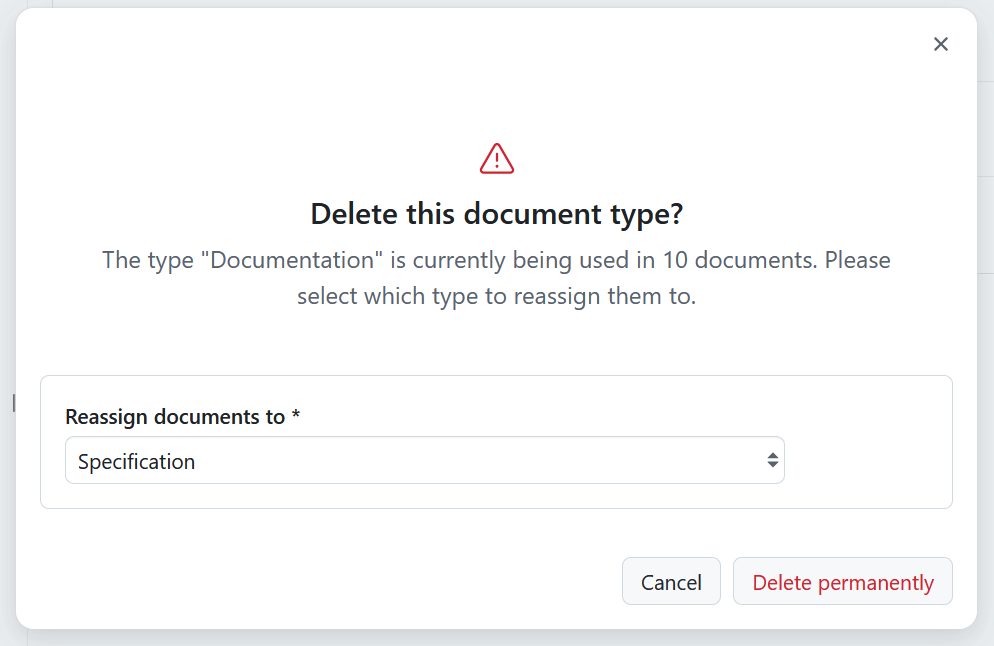
You will see a dialogue informing you of the consequences.
-
If a document type is unused, this has no significant consequences.

-
If a document type is used, you will need to select a different type for reassigning
-
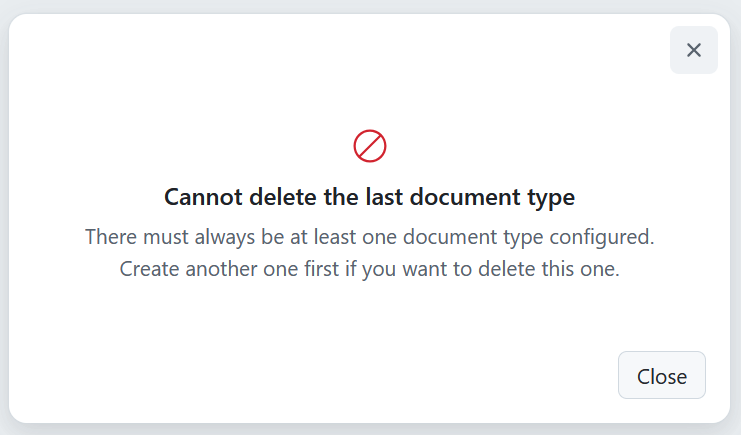
If a document type is the last existing one, you will not be able to delete it. There must always be at least one document type configured. In this case you can create another document type first.
Real-time collaboration in documents
Real-time collaboration for OpenProject’s Documents module was introduced with the 17.0 release. When enabled, it allows multiple users to edit the same document at the same time. Changes are synchronized instantly, and users can see each other’s cursors and edits as they occur. This improves collaboration, especially for teams working on shared documentation or meeting notes.
From a technical perspective, real-time collaboration relies on a running Hocuspocus server, which handles synchronization between users. OpenProject connects to this service to provide a seamless collaborative editing experience within documents.

Important
Real-time collaboration is available for the following installation types. However, it may require proper configuration before it is fully enabled:
- Containerized installations
- Cloud-hosted installations
Packaged installations (DEB/RPM) require additional manual setup. This includes installing and configuring a Hocuspocus server to enable real-time collaboration.
Enable real-time collaboration for packaged installations
1. Install hocuspocus
The easiest way to install hocuspocus is by using the Docker container. You can do so by using the following steps.
Create a hocuspocus directory:
mkdir hocuspocus
cd hocuspocus
Then you can create a docker-compose.yml file with the following content inside the hocuspocus directory:
services:
  hocuspocus:
    image: <hocuspocus_image>
    restart: unless-stopped
    environment:
      SECRET: "secret123"
    ports:
      - "127.0.0.1:1234:1234"
Replace the <hocuspocus_image> with the image from here.
Run hocuspocus:
docker compose up -d
2. Configure Apache
Note
This part of the docs assumes that you are using the generated Apache config by the OpenProject wizard
Create /etc/openproject/addons/apache2/custom/vhost/hocuspocus.conf with the following content:
ProxyPass        /hocuspocus  ws://127.0.0.1:1234/hocuspocus
ProxyPassReverse /hocuspocus  ws://127.0.0.1:1234/hocuspocus
For Debian/Ubuntu-based systems, run the following commands:
Enable the proxy_wstunnel module:
sudo a2enmod proxy_wstunnel
Restart Apache:
sudo service apache2 restart
For RHEL/CentOS-based systems, run the following command:
sudo service httpd restart
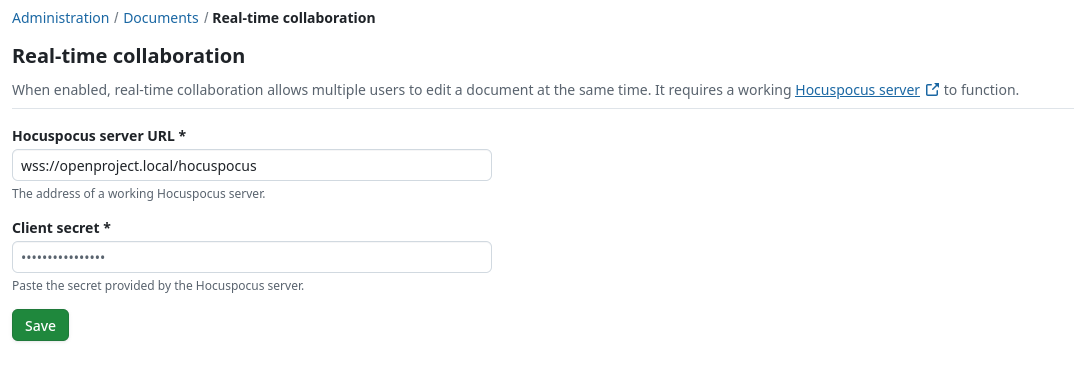
3. Enable real-time collaboration
Manually configure the server URL & secret in the Documents administration settings in OpenProject. Here you need to provide the URL in the following format: wss://<your_op_hostname>/hocuspocus. If you are using HTTP in your instance, the protocol has to be ws:// instead of wss://.
Note
The secret must be identical in both op-blocknote-hocuspocus and OpenProject.
For more background on this feature, see this blog article on the introduction of real-time collaboration in documents.