Project attributes
Project attributes overview
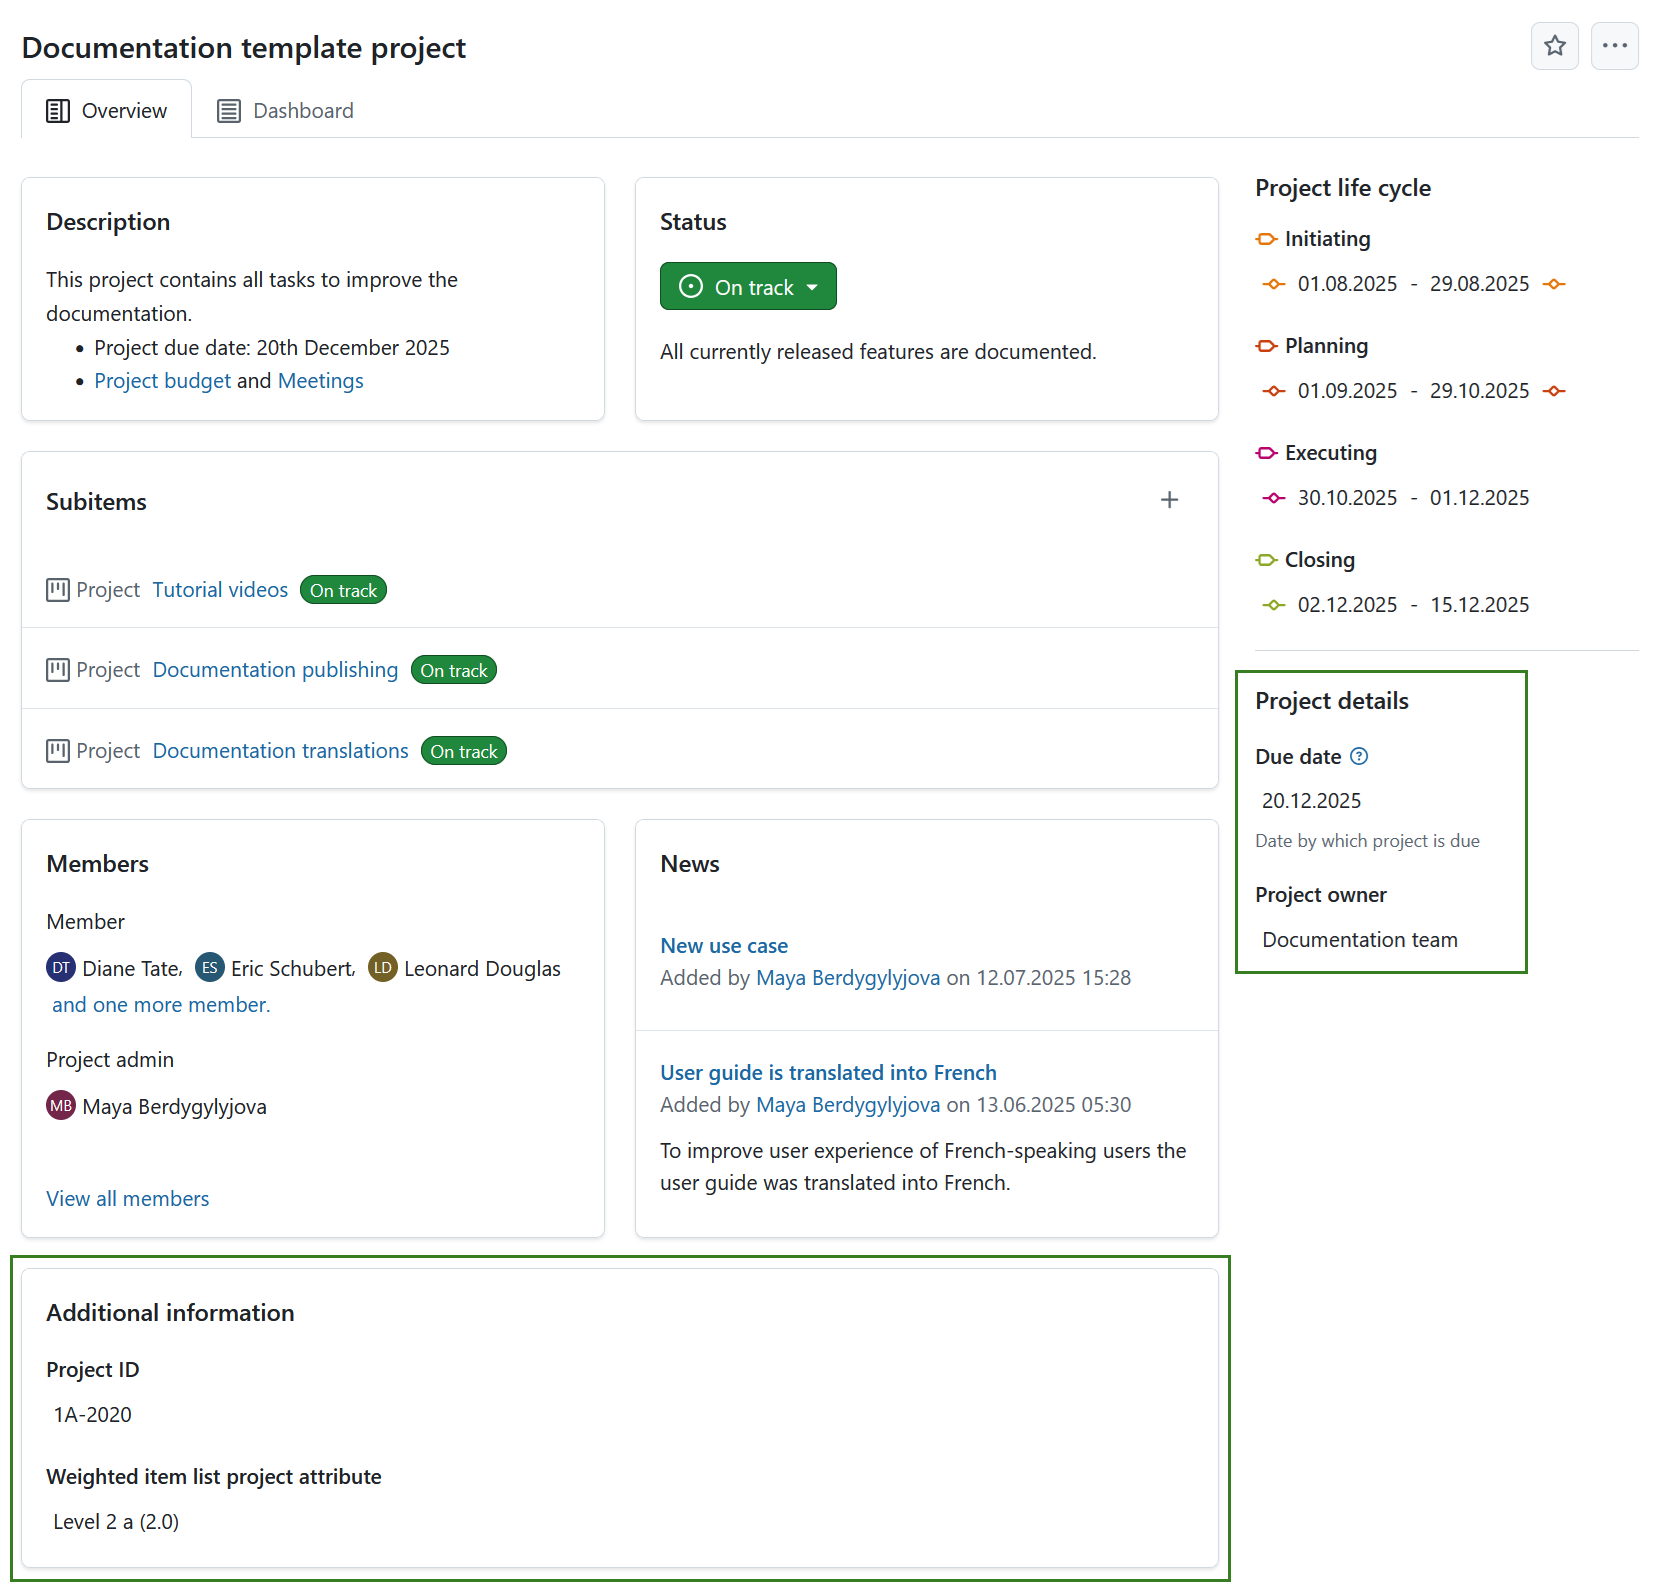
Project attributes are a set of project-level custom fields that let you display certain types of information relevant to your project. Project attributes are displayed on the Overview (first) tab of the project home page.
Project attributes must first be created on an instance level administration and then activated for a specific project under project settings.
The location of project attribute sections can be either in a pane on the right side under project life cycle phases, or in the main area under the project related widgets. The location of project attribute sections is determined under project attribute settings in system administration.
Project attributes are always grouped in sections.
Tip
Your view of the project attributes may vary depending on your roles and permissions in OpenProject. The project attributes are visible for users with the View project attributes permission enabled. The editing icons are visible for users with the Edit project attributes permission.
To edit the value of any visible project attribute, simply click on that value. For most attributes, you can edit the value directly in place.
Depending on the field type, changes are saved differently. For example, text fields can be confirmed with Enter or canceled with Escape, while checkboxes are saved automatically when changed.
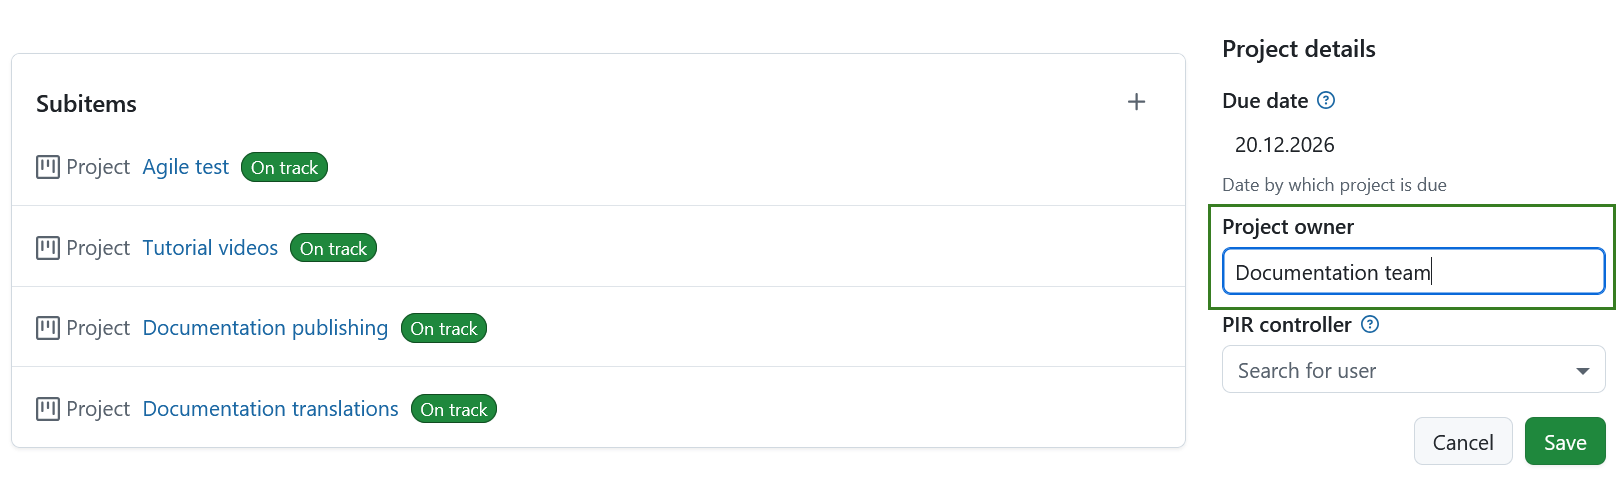
For certain attributes, a modal will be displayed instead. This applies to hierarchy attributes, long text fields shown in the sidebar, or attributes with comments enabled. In this case, you can edit the value in the modal. If the option to add a comment is enabled for this attribute, you will also see a comment field where you can add more information on the value change.
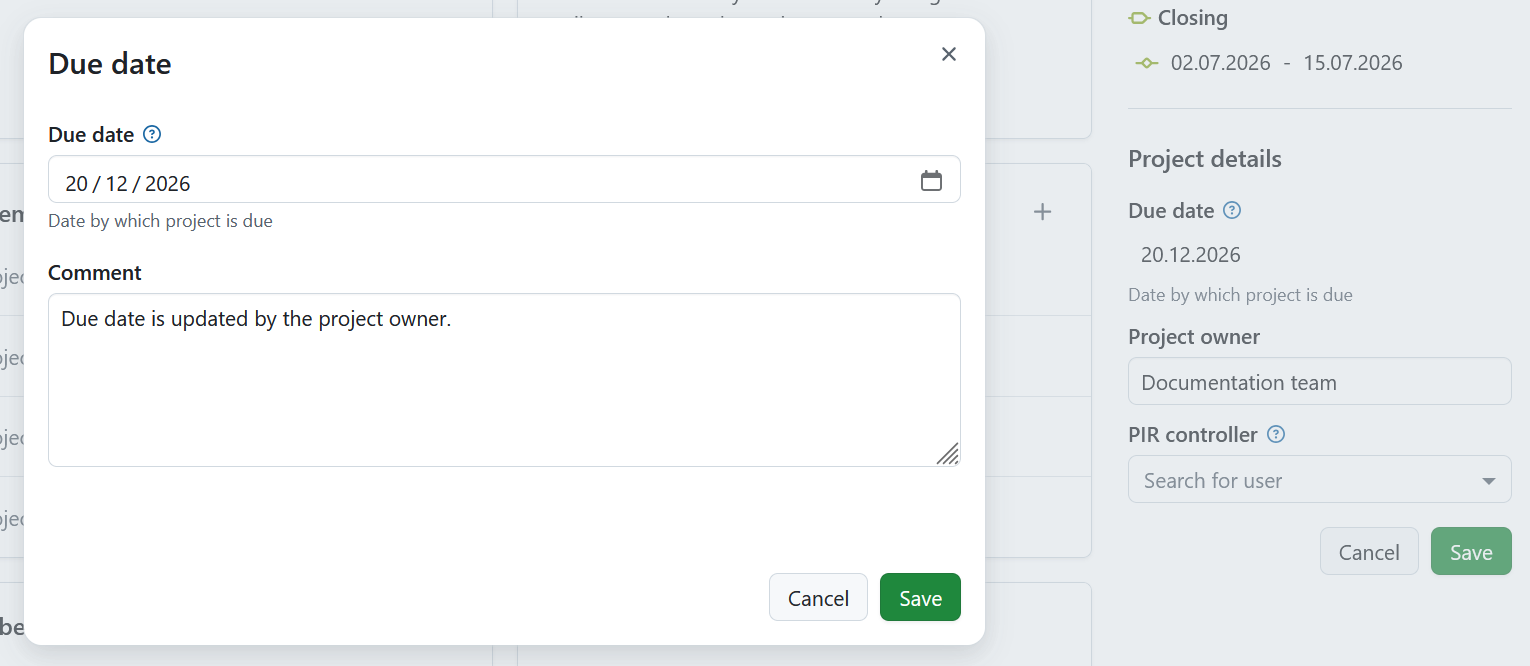
Edit the values for each project attribute and click the Save button where applicable to confirm and save your changes.
Note
If you are an instance administrator and would like to create, modify or add project attributes, please read our system administration guide on project attributes.
Project attribute settings
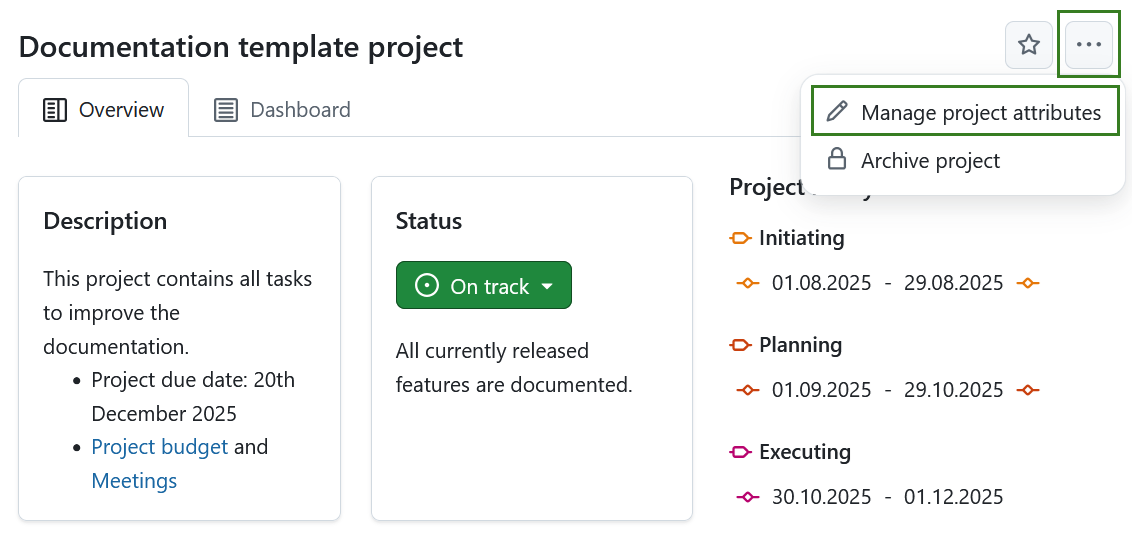
To adjust the project attribute settings for a specific project click the More (three dots) icon and select Manage project attributes. This will lead you directly to the project attribute settings.
Note
This option is always available to instance and project administrators. It can also be activated for specific roles by enabling the select_project_attributes permission for that role via the Roles and permissions page in the administrator settings.